// File: best-practices/datacoves/README
# Best practices on datacoves
Some recommendations on using datacoves.
---
// File: best-practices/datacoves/folder-structure
# Organizing your project
We recommend organizing your Datacoves project repository as described below so that different components are simple to find and maintain. View our sample analytics project for an example of all the required and recommended folders.
## Required Folders
The following folders are required for Datacoves Setup. Be sure to add them to your repository.
### automate/
The `automate/` folder contains scripts that are used by automated jobs.
### automate/dbt/
The `automate/dbt/` folder has dbt specific scripts and the `profiles.yml` file used by automated jobs e.g. for Github Actions or Airflow.
### orchestrate/
The `orchestrate/` folder contains Airflow related files.
### orchestrate/dags
The `orchestrate/dags` folder will contain the python dags that airflow will read
## Recommended Folders
The following folders are optional. Some are recommended and others are only necessary for specific use cases.
>[!NOTE] Below `DATACOVES__DBT_HOME` refers to the location of your dbt project (where you dbt_project.yml file is located). See [Datacoves Environment Variables](/docs/reference/vscode/datacoves-env-vars) for more information.
### DATACOVES__DBT_HOME/.dbt-coves
This folder is only needed if you are using the [dbt-coves library](https://github.com/datacoves/dbt-coves?tab=readme-ov-file#dbt-coves). This show be at the same level as your dbt project. ie) The root or in the `transform` folder.
### DATACOVES__DBT_HOME/.dbt-coves/config.yml
This folder is only needed if you are using the [dbt-coves library](https://github.com/datacoves/dbt-coves?tab=readme-ov-file#dbt-coves). dbt-coves will read the settings in this file to complete commands. Visit the [dbt-coves docs](https://github.com/datacoves/dbt-coves?tab=readme-ov-file#settings) for the full dbt-coves settings.
### DATACOVES__DBT_HOME/.dbt-coves/templates/
This folder is only needed if you are using the [dbt-coves library](https://github.com/datacoves/dbt-coves?tab=readme-ov-file#dbt-coves) and you want to override the dbt-coves sql and yml generators
### .github/workflows
If you're working on a Github repository and using Github Actions for CI/CD, the `.github` folder holds the Github Action Workflows
### load/
The `load/` folder can contain extract and load configurations as well as other scripts or frameworks you may be using to extract and load data.
### secure/
The `secure/` folder contains warehouse security role definitions. The folder is only needed if you are using Snowflake and Permifrost.
### transform/
While you can keep your dbt project in your project's root folder, we recommend moving it into a `transform/` sub-folder.
### orchestrate/dag_yml_definitions
The `orchestrate/dag_yml_definitions` is an optional folder that will contain yml dag definition files that dbt-coves will compile. This folder is only needed if you are using the dbt-coves extension to compile yml dags to python.
### orchestrate/python_scripts
The `python_scripts` folder will contain custom python scripts that you can call from an Airflow DAG. This is needed only if using custom Python scripts in your Airflow DAGs.
### visualization/
The `visualization` folder is used to place configs related to superset or other visualization tools.
### visualization/streamlit
The `visualization/streamlit` folder is used for Streamlit apps. This folder is only needed if using Streamlit.
### .vscode/settings.json
The `.vscode/settings.json` folder is used for customized settings in order to override the default workspace settings. This file can contain secrets so be sure to add it to the `.gitignore` to avoid version control. See our [How to Override default VS sCode settings](/docs/how-tos/vs-code/override) for more info
---
// File: best-practices/dbt/dbt-guidelines
# dbt Guidelines
## dbt Recommendations
- When a model has too much code, rather than using a subquery or CTE (with statement) to separate logic in a model, create a new model. This can be imported as an ephemeral model, but makes logic easier to manage.
- All `ref` and `source` references in a model should be included with selected fields at the top of the file as a CTE (with statement); allowing quick visibility of where the data comes from in a given model.
- Rather than adding new models to a team folder, think about where the model best fits in the overall project. Hierarchy and organizational projects can change, but your company will always care about 'Events' and 'Customers'.
- Rather than creating a new model, first search for any existing models that may achieve the same outcome. While in the early stages most logic will be new, over time this will save a lot of development effort.
- Rather than applying the same transformation manually in a number of places, consider creating a macro. It's a straightforward process for an experienced SQL developer and will make it much easier the next time you need it.
- Rather than applying just the required tests & documentation to your code, consider what you can put in place to avoid ever seeing this model again. If the logic is well tested and documented (both in the description and with --inline comments for complex sections) it will stand the test of time.
- Rather than describing the reason for a change in the column description, the reason for change should be listed in the git commit message; the description should only describe what is, not what used to be.
- Rather than developing complex queries against all data in the Development environment, consider adding a where condition to run just the most recent data - it will speed up query time, and with a `{% if target.name == 'dev' %}` the where statement can be easily removed during testing and in production.
- Rather than using *singular* tests, *generic* tests (defined in yml files) should be used wherever possible.
- Where a *singular* test (defined in /testing) is required, the folder structure under /tests should match the structure in /models for the primary model being tested.
- All models should be initially created as views or ephemeral; moving to tables / incremental tables as required for performance.
### Model attribute layout
- Any id columns should be listed first in a model (model key first, followed by any foreign keys)
- Any created/modified dates should be listed last in a model, followed by metadata fields (Fivetran, AirByte, etc)
- All other fields in the model should be listed alphabetically, as contents may change over time.

---
// File: best-practices/dbt/README
# Overview
As any data environment grows, it can become difficult for new team members to unravel complex pieces of logic within the project.
To assist with future change & onboarding, each model should contain only what it must to get to the next stage of complexity. The [dbt project guidelines](/docs/best-practices/dbt/dbt-guidelines) assist with decision-making to keep the environment clean.
## Macros
Any dbt macros created to apply repeated logic should be descriptively named with the action they accomplish:
- add_load_timestamp_column
- create_hash_key_from_columns
- get_latest_record_for_key
Macros in the *dbt-utils* package allow developers to develop in universal SQL syntax that can run on any modern database, giving the business flexibility to move between platforms as required in the future.
Macros in *dbt-expectations* increases the testing suite significantly, including many statistical, multi-column, and aggregation tests.
## Tools & Packages
One of the significant advantages of joining the global dbt community is the wide array of [open source libraries](https://datacoves.com/dbt-libs) and [dbt packages](https://hub.getdbt.com) we have available to us.
These tools allow companies to move faster, produce more reusable and readable code, and make it far easier for those who come after us to keep moving forward.
There are 3 primary types of tool:
1. Coding environment extensions and python libraries help find information quickly while developing data models, and make it easy to write good code quickly
2. Macros and packages extend the capability of SQL, by allowing reuse of advanced pieces of logic in a centralized, repeatable way.
3. Standards and expectations build trust in data and flag areas where the quality of code could be improved.
Datacoves provides a web-based interface for AirByte, dbt, dbt Docs, Airflow, and Superset - streamlining the process of development by wrapping the below tools in a simple environment
[dbt-coves](https://github.com/datacoves/dbt-coves) automates certain tasks such as creating source property(yml) files and initial staging models by querying the database eliminating tedious tasks.
[sqlfluff](https://www.sqlfluff.com/) provides baseline expectations of clean code and flags many common logic issues as SQL is developed
[dbt-checkpoint](https://github.com/dbt-checkpoint/dbt-checkpoint) helps perform governance checks like verifying the models have descriptions and table names are not hard coded
---
// File: best-practices/dbt/object-naming
# Object naming standards
## General Database Relation Naming
As we build database objects for use across multiple areas, naming quickly emerges as the first (and arguably most important) method of documentation. It's an area of frustration for many developers, as it requires a context switch from "how do I make this code work" to thinking about future readers and how to make our models discoverable.
While case sensitive names can be used in some data warehouses like Snowflake, they require double quotes to use and using mixed case introduces potential for duplication (`fieldName` and `FieldName` are different objects). We recommend `snake_case` for a consistent structure throughout our Snowflake databases. Similarly, all models managed by dbt must have unique names to allow references to be driven by the name of the table or view.
As a general rule, names should use full words and increase in granularity left-right: `patient_address_city`. This assists with the sort order of our objects, grouping models and columns into obvious sections.
## Databases
The warehouse should be separated into two primary parts:
1. The **raw** database where data gets ingested and which is not exposed to most users.
2. The **analytics** database is where the transformed data exists. This is where dbt operates.
## Raw Data
### RAW - Source database
The **RAW_PRD** database is the landing area for integration tools such as Fivetran and Airbyte. A **RAW_DEV** database exists in parallel where new sources are added and tested before they are ready to be used in production.
Sensitive data is restricted at the column level throughout the system: if sensitive data exists, the schema in the **raw** database is given a suffix of `_pii` to give users a hint that there is sensitive data in this schema. A corresponding security role must be assigned to a dbt developer to be able to see this data.
Data flattening is managed with dbt in the `/models/inlets/` folder of the dbt repository. Flattened models must be created by developers permitted to see the sensitive data. These developers will flatten data to create more useable columns and they will apply masking and row level security rules.
Developers can add new sources to **RAW_DEV** using Fivetran or AirByte. Any new data added to the raw database will not be immediately accessible by any user until proper permissions/roles created and granted. Only new and changed tables are created in **RAW_DEV**. All tables previously released to production will be available via dbt deferral from **RAW_PRD**.
## Transformed - Analytics Database
### ANALYTICS database
This dbt-managed database contains all transformed models (inlets, bays, and coves) prepared for use by the business. Development and Test environments exist in parallel. **analytics_dev** is where new models are developed and **analytics_pr_``** is where the data is checked before changes are released to production.
Security from **RAW_PRD** is automatically assigned to any views in the **ANALYTICS** database; the release process ensures the same rules are applied to any created tables as part of deployment.
### ANALYTICS_DEV database
This database contains individual developer schemas where models are created and modified before they are ready to be deployed to production.
All models are created here by developers using dbt within Datacoves. Each developer will have a schema named with their username as defined in the dbt profiles.yml. All models will build into the developer's schema even overriding the custom schema used in production. dbt will only create a models that are added or changed if the deferral feature is used. All developer schemas may be dropped at the start of every week to ensure sensitive data is not retained longer than necessary to comply with GDPR and other regulations.
When creating models in Datacoves, any required data may be "deferred" from production: if the upstream models have not been changed, dbt can simply reference them from production rather than rebuilding them and increasing build time and duplication. This ensures that developers are always working on the freshest production data and reduces the likelihood of production failures.
### ANALYTICS_PR_`` databases
Every time a pull request is opened from a feature branch to a release branch or from a feature / release branch to the main branch, a new database is automatically created to run and test the changes in that branch. By leveraging dbt's deferral and Slim CI (`state:modified`) features, we only build changed models and their downstream dependencies. Deferral allows us to pull unchanged upstream models from production.
These databases are used for UAT as needed and act as "pre-release" for any manual review required to trust the new codebase before it is merged to the main branch.

## Data Flow
The general flow of data is from Raw schemas to Inlets then Bays, and finally Coves. These will be described in more detail below.
:::note
See [this page](/docs/best-practices/dbt/inlets-bays-coves) to learn more about Inlets, Bays, and Coves
:::

## Raw Database Schemas
The **RAW_PRD** database is primarily populated directly from vendor / source system data, and exists as a mirror in place of direct connection to those sources. Schemas are named as follows: `_`. This can be configured in Fivetran / AirByte (Airbyte calls schemas Namespaces). Source tables keep the name given by the source system. In large implementations where a source is unique to a specific country, the schema should be named as follows: `__` for clarity.
### Raw Database Tables
To account for schema drift, all data should be loaded into VARIANT (semi-structured) columns directly in the database. You should create additional tables for nested objects as follows: `_[_]` with columns matching the keys of the original source.
Schema name is included in order to avoid duplication where multiple source systems include identically-named tables ('User', 'Customer', etc). By keeping this source-driven convention, these can be created quickly by a technical team without needing to understand the subject matter.
### Source Connections
A source connection configuration should be given the name of the source itself allowing clear visibility of where the data comes from without the need to open a connection configuration screen.
## Transformed - Analytics Schemas

### Inlets
Inlet Schema names should match those in the RAW database for traceability.
The first step in making raw data usable is to flatten and do some basic cleanup of the data. In dbt we use the inlets folder and we mirror the schema name created in the raw database.
Here we do some basic transformation including:
- flattening
- aliasing columns for clarity
- casting
- cleansing (like converting all time stamps to UTC)
### Bays - Schemas
The Bay schemas in the ANALYTICS database are named for data domains / entities of the business. These are intended for reuse in many areas. They are developed by cross-functional teams responsible for their ongoing development, so time should be taken to understand the subject and potential use cases.
As the primary developers are still technical, there will be a natural leaning toward system-centric names - this should be challenged in code review, as this is our main chance to translate data from what a vendor cares about ("User") to what we actually care about ("Employee", "Customer", "Events").
Names should be:
1. verbose
2. generally increase in complexity left-right
3. un-repeating within a database → schema → model → column structure where practical
The primary goal is searchability; while the structure in `_analytics.bay_customer.dim_customer.first_name_` breaks principles 2 and 3, renaming the dimension (`dim_customer`) or column (`name_first`) would make it harder to find and understand.
### Bays - Tables And Fields
All models in a Bay schema should describe their modelling style as the first segment of the name: `dim_`, `fct_`, `ref_` etc.
If any aggregation is required in a bay, this should be a suffix (`fct_direct_sales_month`) to group alongside other `direct_sales` facts. This immediately prepares the Cove developer (who are also technically skilled) with understanding of the join types they will need to query the object.
Any ephemeral or staging models which aren't intended for use outside the Bay should be prefixed `int_` to show their intermediate/internal nature.
Any static CSV data seeded from the dbt repository can be loaded directly to the appropriate name (e.g. `dim_date`).
### Coves
The Cove schemas in **ANALYTICS** are named for specific use cases and analytic areas. These are built with less focus on reuse and a much greater focus on the experience for the user that will be consuming the data.
All naming in a cove should be focused on use by less technically skilled users and tools, especially if the data is intended for self service. In many visualization tools it's easy to confuse `patients.name` with `products.name`, so we must include the table name as `patients.patient_name` in models.


Where a modelling methodology has been used, prefixes should be used to describe models: `dim_`, `fct_`, etc.
Any single-table analyses should be prefixed `mart_` and any models not intended for ongoing use should be prefixed `temp_`.
End users may create their own models in their respective cove. These models should be prefixed with the username of the person who created them if not intended for general use: `_`.
Any aggregation should be described in a suffix on the model/column: `customer_countries.customer_count`.
---
// File: best-practices/dbt/inlets-bays-coves
# What are Inlets, Bays & Coves
Before companies start creating data warehouses or data lakes, they typically run their business with spreadsheets. Different areas of the business do analysis by combining different data sets to produce the metrics they need.
An Accounts Payable analyst may have a file containing vendors, another containing invoices, and another containing purchase orders. With a few files this person can do their job.
However, as the volume of data increases, Excel becomes unusable and these users are sent to gather the data they need from the data warehouse or data lake. Usability suffers and the organization becomes less agile.
## The Datacoves approach
We want to give users an area where they can find the things they need to do their job, tailored to their use cases. These are `Data Coves`. In practical terms, they are schemas in a data warehouse that are tailored for a specific area of the business, in the example above, we would have an accounts_payable cove.
## Data Flow
A Data Cove is a user centric data area, but data doesn't start out this way. Companies receive data that needs to be cleansed and harmonized. Before data is made available to end users, we should also assure that some level of data quality checks are performed. This is what happens in the **inlets** and **bays**. These areas could also be referred to as "staging" and "core".

## Raw
This area mirrors the source system. It is where data is loaded into the warehouse. Raw data feeds **Inlets**.
## Inlets
This area mirrors the raw database and it is where basic transformations such as renaming of columns, casting data to the proper data type, and harmonizing timezones is done. Inlets feed **bays**.
## Bays
Bays are where we build *reusable* Data Products that adhere to Data Mesh principles. These should be thought of as business objects that do not change over time. While systems like a CRM may change, objects like Customers, Vendors, Employees, Orders, Online Interactions, etc remain constant over time.
Bays feed the analytic **Coves**.
## Coves
A cove is an analytics centric area focused on usability. It also adheres to Data Mesh principles.
While a Bay may have a model for a customer dimension that may have hundreds of columns, when we expose that model in a cove we take into consideration which of those columns are needed by the given analytics area.
Continuing from the example above, an accounts payable analyst that sees what is available in their accounts_payable cove should immediately be able to use the data just as they traditionally used their excel datasets. Their view of a vendor would not have several addresses for the vendor, but instead would have the address that accounts payable needs for their analytics.
The diagram below illustrates how data flows between each layer and what takes place in each.

## Building Bays and Coves
As stated above, Bays and Coves should adhere to Data Mesh principles and should have clear ownership. Data products are created and the complexity that goes into building them is encapsulated for future modification.
The diagram below shows the qualities of data products.

---
// File: best-practices/git/README
# Git Overview
While many see the advantage of dbt as a platform with unit testing, SQL for everything, and automatic documentation, these have all been available (to various extents) in data platforms for some time. The core innovation that dbt brought to DataOps is Context - the Transformation engine understands the relationship between models.
In the old world, we designed pipelines - once a specific task has finished, the next can start - all chained together manually with plenty of 'padding' between scheduled start times. With dbt, the transformation tool itself knows what is required before any individual task can begin; dynamically executing a unique run order on every execution as each task has its dependencies resolved and can begin to run.
This network of dependencies is the core competency of our platform, and allows several efficiencies: refreshing just what's needed on a data load, checking that downstream models ran as expected after a change, and reloading just what changed during a release.
To assemble this network of dependencies, the first step dbt performs is to parse all code and to determine relationships between models. This happens whether the models are stored in the current repository or imported via shared packages. The specific models that are executed in the database will change based on the command (and access rights of the user); but the tool is always aware of the whole ecosystem.
At end of sprint in a multiple-repository environment, code review and deployment must be synchronized: a raw database must be changed simultaneously with the downstream outputs. This becomes especially complex in the case of a hotfix to a well-used raw model, where every downstream Cove or area specific repository would need to be simultaneously released. The same models would run in either case; but a single repository allows a single review and merge process.
## Project Structure - Monorepo vs Multiple repositories
A single repository manages subject areas as a thoughtful folder structure, each containing the logic and metadata required to create and document its models. Code review occurs within a project team before merging to a release for logic and security review. A single set of permissions can be released and enforced across the ecosystem alongside changes to logic.
In a single-repository environment, security can be included alongside the logic itself, and is included as part of the codebase. This is more difficult in a multiple-repository environment, as there is no primary master (or if consolidating to one, it must be updated when any other environment changes)
Below we outline the pros and cons to having a single repo vs having multiple dbt repositories.
We recommend everyone start with a single repository based on the added complexity that having multiple repositories introduces. Only after careful consideration should you embark on managing multiple dbt repositories.


If anyone challenges the viability of using a single repo for your project, show them the image below of the Linux project.

## Security in a monorepo
While developers can view code across the wider organization, any attempts to execute that code to gain access to information are restricted by individual database permissions. Proposed changes to these objects or permissions are only executed with escalated permissions once the code has passed review; further protecting the environment from unauthorized access.
## Git Branching Strategy
The concepts of branching, merging, and pull requests can be initially hard to grasp. As developers, many of us learned to code by hacking together solo projects - the rigour of organizational source control can feel like hard work.
The speed of releases has gotten faster, but without proper care the environment can become very messy and untested code can break user trust in the data platform.
To strike a balance between trust and efficiency, we follow a Release plan as illustrated in the diagrammed below.

The Main branch stores the current version of the truth in our Production database and will always describe exactly what has been run to update the production database.
Data & Analytic Engineers complete analysis and explore potential new models by creating a *feature* branch off the *main* branch.
Feature branches are further developed and unit tests are added to ensure the output can be trusted by the business. Once the Product Owner is satisfied with the delivery, a pull request is created to a *release* branch.
In this pull request, the automated deployment process creates a fresh UAT database, and business users review the output against expectations before approving release of the candidate to the Release branch.
Once code is reviewed and UAT is approved, the merge request is completed to the *release* Branch. A final set of integration tests is run before the Release Manager performs a deployment/merged to Main.
---
// File: best-practices/snowflake/security-model
# Snowflake Security Model
## Overview
The right Security model is critical to ensuring sensitive data is protected.
While Snowflake allows convenient swapping between granted roles during a single user session, datasets must be accessible to the same role in order to analyze them together. To create a seamless user experience, the user should be able to access all data required to operate using a single role. That same role may be granted to others in a users' direct team, but will differ between teams across the organization: each allowing access to their required data and environments.
In Snowflake there are three options for how security is managed as seen in the image below.
*Option 1* combines the access and the users into a single role. This is what most tool documentation will tell you do to as it is "simple". You create one role and give it the permissions it needs then grant users that role.
The problem with this approach is that it is hard to scale and users either get too much or not enough access. You will find yourself repeating permissions across roles and when those permissions need to be updated you need to update them in many places. Simply put, this approach is not [DRY](https://en.wikipedia.org/wiki/Don%27t_repeat_yourself).
In *Option 2* we create more granular roles and create a hierarchical structure where Sysadmin in this case has access to everything.
While better than Option 1, this gives administrators access to data which they may not need to have. If a user needs to have access to data, they should have a role specifically for that, like an Analyst role.
*Option 3*
This is our recommended approach because this allows us to create granular permissions such as a role that unmasks masked data, or a role that gives access to a specific schema. We then combine those "Object" roles into "Functional" roles which are then granted to users. This allows us to have roles like _Analyst_ and _Analyst\_PII_ with the only difference being that the latter gets an additional role that unmasks data. More importantly, the role to unmask data is defined once and used many times.

As shown below we create granular object roles each allowing access to a single database, schema, warehouse (compute cluster), Data classification, and region/country. We then grant the full set of required object roles to a given functional role which are in turn granted to users to allow them to query the database.

This approach allows clear visibility of what a given user has access to: Production or Development environments, Raw or Processed schema, PII / Non-PII, etc. Any newly required permissions can be added for a team via its user role easily, by simply granting an additional object role.
These permissions are all defined in source files which are then leveraged by a tool called Permifrost. This adds traceability to the role management process and can be run as part of the DataOps process. This process will also retain a record of who made the change, when they changed it, and their justification for granting / revoking access.
## PII Access

In order to analyze our most secure data, we must first protect it - allowing access to those who have been appropriately trained to meet our compliance and quality standards.
While Snowflake allows many complex access policies, we take care to apply what is needed to meet our compliance obligations while retaining the ability to understand the data and create value for our users.
PII data is protected within marked columns by using Dynamic Masking policies: predetermined methods for protecting all or part of the data unless a certain access role is granted, which can be applied to any column in the database. This protection may be complete masking ('\*\*\*\*') or partial masking ('\*\*\*\*\*@gmail.com', 'Martin \*\*\*\*\*\*'), and can use any SQL methods to determine the content of masked data to a given role.

In this implementation, we can mask PII data and have the ability to expand this to other sensitive data over time as required. PII and other sensitive data are then only accessible by users with a role that can unmask this data.
As developers work in their own dev schemas, any data saved to a table in their schema will contain only the level of information they are permitted access to; and will only be accessible by users of the same role. Before release of their newly developed feature, any created tables are expected to be given security configuration, protecting any derived data to the same standard as its source.
---
// File: best-practices/snowflake/time-travel
# Snowflake Time travel & GDPR
In order to comply with GDPRs right to be forgotten, Time Travel for PII data is set at 7 days for Production data, and 21 days for snapshots. Time Travel for non-PII is set to 30 days as default.

Production retention period is set up as part of our initial database creation and is implemented with the below settings:
- **ANALYTICS** database:
``` sql
alter database analytics set data_retention_time_in_days = 30
```
- **ANALYTICS_DEV** database:
``` sql
alter database analytics_dev set data_retention_time_in_days = 7
```
- Macro created to run on-run-end: This loops through all models in database at the end of every production run, and checks for the pii metadata flag.
- If found:
- for snapshots:
`set alter table < table name > set data_retention_time_in_days = 21`
- for pii tables
`set alter table < table name > set data_retention_time_in_days = 7`
The default table materialization causes issues for Time Travel by dropping the table on every refresh. You will need to create a Time Travel specific table materialization that only recreates the table when the columns have changed. This Time Travel table materialization should be used in place of table materialization throughout the environment.
>[!TIP]Example materialization can be found [here](https://github.com/edx/snowflake_timetravel_table/blob/main/macros/snowflake_timetravel_table.sql)
## Time Travel Data Lifecycle
When a request for a person "to be forgotten" from the database comes in, the following set of events occur.
1. 5 days are given for request to make it to the appropriate team so they can remove the record from the **RAW* database
2. The production **ANALYTICS** database is refreshed on the next daily dbt run clearing out offending records. This database has a 7 day retention period on PII tables, so that history will be removed at that time.
3. Non-PII data will not be impacted and remain in the system with the standard 30 day retention period.
4. Since developers may have PII data in their schemas, developers schemas are dropped every 7 days and their retention period is set to 7.

---
// File: best-practices/snowflake/comparing-tables
# Comparing Tables Across Environments
## Overview
When migrating data pipelines (e.g., from Streamsets to dlt), it is critical to verify that the new pipeline produces identical data to the original. This guide documents best practices and common pitfalls for comparing tables across Snowflake databases, based on real-world experience comparing production (PRD) and sandbox (SBX) environments.
### How Data is Stored
In our setup, each pipeline extracts data from a source system and writes it as JSONL files to S3. These files are then loaded into Snowflake using the `COPY INTO` command. Each row in the target table contains an `object_data` column of type `VARIANT` that holds the full JSON payload for that record. The comparison techniques in this guide operate on this `object_data` column — hashing it, parsing it, and comparing its keys and values across environments.
### Why a Single JSON Column
Storing the entire record as a single `VARIANT` column rather than mapping each field to its own Snowflake column has several advantages for the raw/landing layer:
- **Schema flexibility**: Source schemas change frequently — new columns appear, old ones are renamed or removed. A single JSON column absorbs these changes without requiring `ALTER TABLE` statements or pipeline redeployment. The raw layer never breaks due to upstream schema drift.
- **Simplified loading**: `COPY INTO` with a single VARIANT column is a straightforward, universal pattern that works for any source system. There is no need to maintain column mappings or type casts at the loading stage.
- **Full-record hashing**: Comparing entire rows across environments becomes a single `MD5(object_data)` call. With separate columns, you would need to concatenate or hash each column individually, handle NULLs, and deal with column ordering — all of which introduce edge cases.
- **Auditability**: The raw JSON is preserved exactly as it was extracted. Downstream transformations (in dbt or similar tools) parse the JSON into typed columns, but the original payload remains available for debugging and reprocessing.
- **Decoupled extract and transform**: The extraction layer only needs to get data into Snowflake reliably. All type casting, column naming, and business logic happens in the transformation layer, keeping each stage simple and independently testable.
### Table Structure Assumptions
The queries in this guide assume each raw table has the following columns:
| Column | Type | Description |
|--------|------|-------------|
| `object_data` | `VARIANT` | The full JSON payload for a single record, loaded from a JSONL file via `COPY INTO`. |
| `pipeline_start_utc` | `TIMESTAMP` | The UTC timestamp of when the pipeline run started. Every row loaded in the same pipeline execution shares the same value. This acts as a batch identifier — it allows you to isolate the latest load and compare it against the corresponding load on the other side. |
These columns are added automatically by the loading framework. The `pipeline_start_utc` column is essential for comparison because tables accumulate data from multiple pipeline runs, and you typically want to compare only the most recent run on each side.
### Prerequisites
To run cross-database comparison queries (e.g., `MINUS` between PRD and SBX), both databases must be accessible from the same Snowflake connection. This requires setting up a database link or share from the production account to the sandbox account. For example, if your production data lives in `PRD_RAW` and sandbox data in `SBX_RAW`, both databases must be queryable from a single session so you can use fully qualified names like `PRD_RAW.MY_SCHEMA.MY_TABLE` and `SBX_RAW.MY_SCHEMA.MY_TABLE` in the same query.
If PRD and SBX are on separate Snowflake accounts, you can create a database in the PRD account that points to the SBX data (e.g., via Snowflake data sharing or a replicated database), allowing cross-database queries without switching connections.
## Comparison Strategy
A layered approach works best, progressing from cheap/fast checks to expensive/thorough ones. Each layer acts as a fast-fail gate — skip deeper checks if earlier ones fail.
### Layer 1: Row Count
The simplest sanity check. Compare the number of rows for the latest pipeline run on each side. Run these two queries and compare the results:
```sql
-- Count rows for the latest pipeline run in PRD
SELECT 'PRD' AS source, COUNT(*) AS row_count
FROM PRD_RAW.MY_SCHEMA.MY_TABLE
WHERE pipeline_start_utc = (
SELECT MAX(pipeline_start_utc) FROM PRD_RAW.MY_SCHEMA.MY_TABLE
);
-- Count rows for the latest pipeline run in SBX
SELECT 'SBX' AS source, COUNT(*) AS row_count
FROM SBX_RAW.MY_SCHEMA.MY_TABLE
WHERE pipeline_start_utc = (
SELECT MAX(pipeline_start_utc) FROM SBX_RAW.MY_SCHEMA.MY_TABLE
);
```
If both tables have zero rows, skip all remaining checks. If row counts differ, investigate before proceeding — deeper checks will be misleading if the data volume is fundamentally different.
:::note
Row count equality does not guarantee data equality. Two tables can have the same number of rows with completely different content.
:::
### Layer 2: JSON Structure (Key Count, Case Sensitivity, Types)
Fetch a representative row from each side and compare the JSON structure of the data column (e.g., `object_data`):
- **Key count**: Do both rows have the same number of top-level keys?
- **Case sensitivity**: Are there keys that differ only in casing (e.g., `firstName` vs `FirstName`)?
- **Missing keys**: Keys that exist on one side but not the other.
- **Value types**: For shared keys, do the value types match?
:::warning
When comparing JSON structures, ensure you are comparing the **same record** on both sides. Fetching the "latest row" independently from each table may return completely different records, leading to false structural differences. Use a scored matching approach (described below in "Finding the Matching Row") to find the corresponding row.
:::
### Layer 3: Sample Hash Verification
Take a sample of rows from one table, compute their content hash, and check if those hashes exist in the other table. This catches most mismatches without scanning the full table.
```sql
-- Step 1: Get 1000 distinct hashes from PRD
WITH prd_sample AS (
SELECT DISTINCT MD5(object_data) AS row_hash
FROM PRD_RAW.MY_SCHEMA.MY_TABLE
WHERE pipeline_start_utc = (
SELECT MAX(pipeline_start_utc) FROM PRD_RAW.MY_SCHEMA.MY_TABLE
)
LIMIT 1000
)
-- Step 2: Check how many of those hashes exist in SBX
SELECT
(SELECT COUNT(*) FROM prd_sample) AS prd_sample_count,
COUNT(s.row_hash) AS found_in_sbx
FROM prd_sample p
LEFT JOIN (
SELECT DISTINCT MD5(object_data) AS row_hash
FROM SBX_RAW.MY_SCHEMA.MY_TABLE
WHERE pipeline_start_utc = (
SELECT MAX(pipeline_start_utc) FROM SBX_RAW.MY_SCHEMA.MY_TABLE
)
) s ON p.row_hash = s.row_hash;
```
If `found_in_sbx` equals `prd_sample_count`, all sampled rows match. Otherwise, investigate the missing hashes.
:::note
Use `DISTINCT` on the hash to avoid counting duplicate rows as mismatches. Tables may contain legitimate duplicate rows that inflate the sample count.
:::
### Layer 4: Full Hash Comparison (MINUS)
Only run this after the sample check passes (to fast-fail on obvious mismatches). Use Snowflake's `MINUS` operator to find rows that exist on one side but not the other:
```sql
-- Rows in PRD that are not in SBX
SELECT MD5(object_data) AS row_hash
FROM PRD_RAW.MY_SCHEMA.MY_TABLE
WHERE pipeline_start_utc = (
SELECT MAX(pipeline_start_utc) FROM PRD_RAW.MY_SCHEMA.MY_TABLE
)
MINUS
SELECT MD5(object_data) AS row_hash
FROM SBX_RAW.MY_SCHEMA.MY_TABLE
WHERE pipeline_start_utc = (
SELECT MAX(pipeline_start_utc) FROM SBX_RAW.MY_SCHEMA.MY_TABLE
);
```
Run the reverse direction as well (SBX MINUS PRD) to catch rows only in SBX. For cross-database comparisons, always use fully qualified table names (`database.schema.table`).
## Common Pitfalls
### JSON Serialization Differences
Different loaders serialize JSON differently. Two records with identical data can produce different `MD5(object_data)` hashes due to:
- **Key ordering**: `{"a":1,"b":2}` vs `{"b":2,"a":1}`
- **Number formatting**: `0.0` vs `0`, or `33.99831` vs `33.998310000000004`
- **Nested object stringification**: `{"key": {"sub": 1}}` vs `{"key": "{\"sub\": 1}"}`
- **Null representation**: A key with `null` value vs the key being absent entirely
When hash mismatches occur but parsed values are identical, the difference is purely in serialization. Use Snowflake's `HASH` function on the parsed JSON for a normalized, order-independent comparison:
```sql
-- Normalized comparison (slower, ignores JSON formatting differences)
SELECT TO_VARCHAR(HASH(PARSE_JSON(object_data))) AS normalized_hash
FROM PRD_RAW.MY_SCHEMA.MY_TABLE
WHERE pipeline_start_utc = (
SELECT MAX(pipeline_start_utc) FROM PRD_RAW.MY_SCHEMA.MY_TABLE
);
```
This is slower than `MD5` because it parses every row's JSON, but it eliminates false positives from serialization differences.
### Finding the Matching Row
When a hash mismatch is found, you need to locate the corresponding row on the other side to understand what changed. A score-based approach works well — build a `CASE` expression for every column and return the row with the highest number of matching columns:
```sql
-- Given a PRD row with values col1='ABC', col2='123', col3='XYZ'
-- find the best matching row in SBX
SELECT
object_data,
(
CASE WHEN object_data:"col1"::STRING = 'ABC' THEN 1 ELSE 0 END +
CASE WHEN object_data:"col2"::STRING = '123' THEN 1 ELSE 0 END +
CASE WHEN object_data:"col3"::STRING = 'XYZ' THEN 1 ELSE 0 END
) AS match_score
FROM SBX_RAW.MY_SCHEMA.MY_TABLE
WHERE pipeline_start_utc = (
SELECT MAX(pipeline_start_utc) FROM SBX_RAW.MY_SCHEMA.MY_TABLE
)
ORDER BY match_score DESC
LIMIT 1;
```
:::tip
Compare all columns as `STRING` to avoid type cast errors. For example, a date stored as `'2026-03-12'` on one side and as an epoch integer on the other will fail a `::NUMBER` cast.
:::
### Floating Point Precision
When extracting `DECIMAL`/`NUMERIC` columns through connectors that use `float64` internally (like ConnectorX), precision drift can occur:
| Source Value | float64 Representation |
|-------------|----------------------|
| `33.99831` | `33.998310000000004` |
**Fix**: In the extraction query (run against the **source database**, not Snowflake), cast the column to `FLOAT` with `ROUND` to the original scale. The scale can be detected from the source's metadata. For example, in MSSQL:
```sql
-- Run on the source MSSQL database: detect the scale for DECIMAL/NUMERIC columns
SELECT COLUMN_NAME, NUMERIC_SCALE
FROM INFORMATION_SCHEMA.COLUMNS
WHERE TABLE_SCHEMA = 'dbo' AND TABLE_NAME = 'my_table'
AND DATA_TYPE IN ('decimal', 'numeric');
-- Then apply ROUND in the extraction query (also on the source database)
SELECT ROUND(CAST(my_column AS FLOAT), 5) AS my_column -- 5 = NUMERIC_SCALE
FROM dbo.my_table;
```
### Timestamp and Timezone Handling
Timestamp conversion is the most common source of data mismatches between different extraction tools.
**Understanding the problem**: Many source databases store timestamps without timezone information (naive timestamps). When converting these to epoch milliseconds (UTC), the extraction tool must assume a timezone. Different tools may apply this conversion differently, especially around Daylight Saving Time (DST) transitions.
**DST Spring-Forward**: During the spring-forward transition (e.g., last Sunday of March in Europe), clocks jump from 02:00 to 03:00. A timestamp at 01:00 CET is unambiguous, but checking its timezone offset against the offset one hour later (which is now CEST) reveals a change. Some implementations incorrectly add a 1-hour correction here.
The fix: only apply the correction during **fall-back** (last Sunday of October), when the timezone offset decreases (e.g., from CEST +02:00 back to CET +01:00). During fall-back, the hour between 02:00 and 03:00 repeats, creating genuine ambiguity. During spring-forward, there is no ambiguity — the offset increases but no correction is needed.
In MSSQL (run against the **source database** as part of the extraction query), you can detect this by comparing the timezone offset of the value against the offset of the value plus one hour:
```sql
-- MSSQL source query: correct — only trigger when timezone offset decreases (fall-back)
CASE WHEN DATEPART(TZOFFSET, CAST(my_col AS DATETIME2) AT TIME ZONE 'W. Europe Standard Time')
> DATEPART(TZOFFSET, CAST(DATEADD(HOUR, 1, my_col) AS DATETIME2) AT TIME ZONE 'W. Europe Standard Time')
THEN 3600000
ELSE 0
END
-- MSSQL source query: wrong — triggers on any timezone offset change (including spring-forward)
CASE WHEN DATEPART(TZOFFSET, CAST(my_col AS DATETIME2) AT TIME ZONE 'W. Europe Standard Time')
!= DATEPART(TZOFFSET, CAST(DATEADD(HOUR, 1, my_col) AS DATETIME2) AT TIME ZONE 'W. Europe Standard Time')
THEN 3600000
ELSE 0
END
```
Here, `DATEPART(TZOFFSET, ...)` returns the UTC offset in minutes for a timezone-aware value. During fall-back the offset goes from 120 (CEST) to 60 (CET), so `120 > 60` is true and the correction applies. During spring-forward the offset goes from 60 to 120, so `60 > 120` is false and no correction is applied.
**Oracle-specific pitfalls**: Oracle's `FROM_TZ` function, which assigns a timezone to a naive timestamp, has additional edge cases:
- **Pre-1900 dates** (sentinel values like year 1111): Oracle uses historical Local Mean Time (LMT) for named timezones. For `Europe/Brussels`, LMT is `+0:17:30`, not `+01:00`. But JDBC/Java uses CET (`+01:00`) for all historical dates. This 43-minute difference causes mismatches. Fix: use a fixed offset `'+01:00'` instead of the named timezone for dates before 1900.
- **Far-future dates** (sentinel values like year 9621): Oracle's timezone data has a limited range. Beyond ~2100, `FROM_TZ` falls back to standard time regardless of the month. But Java extrapolates DST rules forever. Fix: apply the offset manually — use `'+02:00'` (CEST) for April–September and `'+01:00'` (CET) for October–March.
- **Normal dates (1900–2100)**: Use the named timezone (e.g., `'Europe/Brussels'`) and let Oracle handle DST transitions, which matches Java behavior.
```sql
-- Oracle source query: timezone selection with sentinel value handling
FROM_TZ(
CAST(my_col AS TIMESTAMP),
CASE
WHEN my_col < DATE '1900-01-01' THEN '+01:00'
WHEN my_col > DATE '2100-01-01' THEN
CASE WHEN EXTRACT(MONTH FROM my_col) BETWEEN 4 AND 9
THEN '+02:00' ELSE '+01:00' END
ELSE 'Europe/Brussels'
END
) AT TIME ZONE 'UTC'
```
**DATE vs DATETIME**: Columns stored as `DATE` (no time component) should be converted to epoch milliseconds at midnight in the target timezone. JDBC-based tools like Streamsets do this automatically; custom pipelines must handle it explicitly. In Oracle specifically, `DATE` columns store both date and time, but some connectors (like ConnectorX) may read them as date-only, losing the time component. Detect these from `ALL_TAB_COLUMNS` metadata and force a `TIMESTAMP` cast.
### Null Column Handling
Different extraction systems handle null columns differently:
- **Streamsets** creates columns for the union of all fields across all records, filling `null` for records that don't have a given field.
- **dlt** by default strips keys with null values during JSON serialization.
- **Elasticsearch** returns only the fields that exist in each document.
When columns are always null (they only exist in the schema, never populated in the data), they may be stripped by the new pipeline. This leads to "only in PRD" differences where every missing column has a value of `None`.
Solutions include declaring expected columns via schema hints, patching the serializer to preserve null values, or collecting all keys across all records and backfilling `null` for missing ones.
### Nested Object Flattening
Different systems flatten nested JSON in incompatible ways:
| System | Input | Output |
|--------|-------|--------|
| Streamsets | `{a: {b: 1}}` | `a.b: 1` (dot-separated) |
| Streamsets | `{a: [{b: 1}, {b: 2}]}` | `a.0.b: 1, a.1.b: 2` (indexed arrays) |
| dlt (max_table_nesting=0) | `{a: {b: 1}}` | `a: "{\"b\": 1}"` (stringified) |
| dlt (default) | `{a: {b: 1}}` | Separate child table |
When migrating from Streamsets and the downstream models depend on the dot-notation column names, custom flattening logic may be needed to match the expected format with indexed arrays.
## Recommended Comparison Workflow
1. **Row count** first — skip everything if both sides have zero rows
2. **JSON structure** — compare key counts, names, and types on matched rows
3. **Sample verification** (1000 rows) — fast-fail on hash mismatches
4. **Full MINUS comparison** — only if sampling passes
5. **Row-level diff** — for mismatched rows, use scored matching and column-by-column comparison
6. **Raw JSON diff** — when parsed values match but hashes differ, compare the raw JSON strings to identify serialization differences
---
// File: best-practices/vscode/README
# VS Code Best Practices and Tips
---
// File: best-practices/vscode/tips
# VS Code Tips and tricks
## Shortcuts
- `cmd + alt + Shift + L` ➡️ Select all occurrences of a selected phrase
---
// File: getting-started/create-account
# Configure your account with Datacoves
:::caution
The appropriate git repo access is required to be able to add deployment keys.
Be sure that you can add SSH keys to the repo or setup will not be able to finish.
:::
## Prerequisites
Before the setup call with the Datacoves team, ensure you have the following ready.
:::note
Email gomezn@datacoves.com with the answers to the following two questions so we can be ready for the call.
:::
1. What version of dbt are you using?
2. Do you use Google / Google Workspace or Microsoft to authenticate? Datacoves leverages your existing authentication service.
### Data Warehouse
To set up your Datacoves account, you will need to know your data warehouse provider and have relevant access details handy. This includes the service account that Airflow will use.
| Data Warehouse Provider | Information Needed |
| --- | --- |
| Snowflake | Account, Warehouse, Database, Role, User, Password, Schema |
| Redshift | Host, Database, User, Schema, Password |
| Databricks | Host, Schema, HTTP Path, Token |
| BigQuery | Dataset, Keyfile JSON |
:::warning
For the Snowflake `Account` field you will need to find your account locator and replace `.` with `-`.
Check out [Snowflake Fields](/docs/how-tos/datacoves/how_to_connection_template#for-snowflake-the-available-fields-are) on how to find your Snowflake account locator.
:::
**Network Access:** Verify that your Data Warehouse is accessible from outside your network. You'll need to whitelist the Datacoves IP - `74.179.200.137`
### Git
To configure the git integration, you will need:
**Git Access**
Ensure your user has access to add a deployment key to the repo, as well as access to clone and push changes.
**Git Repo**
If this will be a new dbt project, create a new repo and ensure at least one file is in the `main` branch such as a `README.md`. Have your git clone URL handy.
**dbt Docs**
Create a `dbt-docs` branch in your repo.
## During Call with Datacoves
To ensure a smooth call, please have the answers to the following questions ready to go.
- What do you want to call your account? (This is usually the company name)
- What do you want to call your project? (This can be something like Marketing DW, Finance 360, etc)
- Do you currently have a CI/CD process and associated script like GitHub Actions workflow? If not, do you plan on creating a CI/CD process?
- Do you need any specific Python library on Airflow or VS Code? (outside the standard dbt-related items)
---
// File: getting-started/admin/configure-airflow
# Configuring Airflow
You don't need Airflow to begin using Datacoves, but at some point you will want to schedule your dbt jobs. The following steps will help you get started using Airflow. Keep in mind this is the basic setup, you can find additional Aiflow information in the how-tos and reference sections.
1. To complete the initial configuration of Airflow, you will need to make changes to your project. This includes creating the dbt profile for Airflow to use as well as the Airflow DAG files that will schedule your dbt runs.
[Initial Airflow Setup](/docs/how-tos/airflow/initial-setup)
2. Airflow will authenticate to your data warehouse using a service connection. The credentials defined here will be used by dbt when your jobs run.
[Setup Service Connection](/docs/how-tos/datacoves/how_to_service_connections)
3. Datacoves uses a specific [folder structure](/docs/best-practices/datacoves/folder-structure) for Airflow. You will need to add some folders and files to your repository for Airflow to function as expected.
[Update Repository](/docs/getting-started/admin/configure-repository)
4. When Airflow jobs run you may want to receive notifications. We have a few ways to send notifications in Datacoves. Choose the option that makes sense for your use case.
- **Email:** [Setup Email Integration](/docs/how-tos/airflow/send-emails)
- **MS Teams:** [Setup MS Teams Integration](/docs/how-tos/airflow/send-ms-teams-notifications)
- **Slack:** [Setup Slack Integration](/docs/how-tos/airflow/send-slack-notifications)
## Getting Started Next Steps
Once Airflow is configured, you can begin scheduling your dbt jobs by [creating Airflow DAGs](/docs/getting-started/admin/creating-airflow-dags)!
---
// File: getting-started/admin/creating-airflow-dags
# Creating Airflow Dags
## Pre-Requisites
By now you should have:
- [Configured Airflow](/docs/getting-started/admin/configure-airflow) in Datacoves
- [Updated your repo](/docs/getting-started/admin/configure-repository) to include `automate/dbt/profiles.yml` and `orchestrate/dags` folders
- [Set up notifications](/docs/how-tos/airflow/send-emails) for Airflow
## Where to create your DAGs
This means that Airflow is fully configured and we can turn our attention to creating DAGs! Airflow uses DAGs to run dbt as well as other orchestration tasks. Below are the important things to know when creating DAGs and running dbt with Airflow.
During the Airflow configuration step you added the `orchestrate` folder and the `dags` folder to your repository. Here you will store your airflow DAGs. ie) You will be writing your python files in `orchestrate/dags`
## DAG 101 in Datacoves
1. If you are eager to see Airflow and dbt in action within Datacoves, here is the simplest way to run dbt with Airflow.
[Run dbt](/docs/how-tos/airflow/dags/run-dbt)
2. You have 2 options when it comes to writing DAGs in Datacoves. You can write them out using Python and place them in the `orchestrate/dags` directory, or you can generate your DAGs with `dbt-coves` from a YML definition.
[Generate DAGs from yml definitions](/docs/how-tos/airflow/dags/generate-dags-from-yml) this is simpler for users not accustomed to using Python
3. You may also wish to use external libraries in your DAGs such as Pandas. In order to do that effectively, you can create custom Python scripts in a separate directory such as `orchestrate/python_scripts` and use the `DatacovesBashOperator` to handle all the behind the scenes work as well as run your custom script.**You will need to contact us beforehand to pre-configure any python libraries you need.**
[External Python DAG](/docs/how-tos/airflow/dags/external-python-dag)
---
// File: getting-started/admin/configure-repository
# Update Repository for Airflow
Now that you have configured your Airflow settings you must ensure that your repository has the correct folder structure to pick up the DAGs we create. You will need to add folders to your project repository in order to match the folder defaults we just configured for Airflow. These folders are `orchestrate/dags` and, optionally, `orchestrate/dags_yml_definitions`.
**Step 1:** Add a folder named `orchestrate` and a folder inside `orchestrate` named `dags`. `orchestrate/dags` is where you will be placing your DAGs as defined earlier in our Airflow settings with the `Python DAGs path` field.
**Step 2:** **ONLY If using Git Sync**. If you have not already done so, create a branch named `airflow_development` from `main`. This branch was defined as the sync branch earlier in our Airflow Settings with the `Git branch name` field. Best practice will be to keep this branch up-to-date with `main`.
**Step 3:** **This step is optional** if you would like to make use of the [dbt-coves](https://github.com/datacoves/dbt-coves?tab=readme-ov-file#airflow-dags-generation-arguments) `dbt-coves generate airflow-dags` command. Create the `dags_yml_definitions` folder inside of your newly created `orchestrate` folder. This will leave you with two folders inside `orchestrate`- `orchestrate/dags` and `orchestrate/dags_yml_definitions`.
**Step 4:** **This step is optional** if you would like to make use of the dbt-coves' extension `dbt-coves generate airflow-dags` command. You must create a config file for dbt-coves. Please follow the [generate DAGs from yml](/docs/how-tos/airflow/dags/generate-dags-from-yml) docs.
## Create a profiles.yml
If the `delivery mode` of your service connection is [`Environment Variables`](/docs/how-tos/datacoves/how_to_service_connections) then Airflow will need a `profiles.yml`. The available environment variables will vary based on your data warehouse. We have made it simple to set this up by completing the following steps. This profiles.yml will also be used in the CI/CD process.
To create your and your `profiles.yml`:
**Step 1:** Create the `automate` folder at the root of your project
**Step 2:** Create the `dbt` folder inside the `automate` folder
**Step 3:** Create the `profiles.yml` inside of your `automate` folder. ie) `automate/dbt/profiles.yml`
**Step 4:** Copy the following configuration into your `profiles.yml`
### Snowflake
``` yaml
default:
target: default_target
outputs:
default_target:
type: snowflake
threads: 8
client_session_keep_alive: true
account: "{{ env_var('DATACOVES__MAIN__ACCOUNT') }}"
database: "{{ env_var('DATACOVES__MAIN__DATABASE') }}"
schema: "{{ env_var('DATACOVES__MAIN__SCHEMA') }}"
user: "{{ env_var('DATACOVES__MAIN__USER') }}"
password: "{{ env_var('DATACOVES__MAIN__PASSWORD') }}"
role: "{{ env_var('DATACOVES__MAIN__ROLE') }}"
warehouse: "{{ env_var('DATACOVES__MAIN__WAREHOUSE') }}"
```
### Redshift
```yaml
company-name:
target: dev
outputs:
dev:
type: redshift
host: "{{ env_var('DATACOVES__MAIN__HOST') }}"
user: "{{ env_var('DATACOVES__MAIN__USER') }}"
password: "{{ env_var('DATACOVES__MAIN__PASSWORD') }}"
dbname: "{{ env_var('DATACOVES__MAIN__DATABASE') }}"
schema: analytics
port: 5439
```
### BigQuery
```yaml
my-bigquery-db:
target: dev
outputs:
dev:
type: bigquery
method: service-account
project: GCP_PROJECT_ID
dataset: "{{ env_var('DATACOVES__MAIN__DATASET') }}"
threads: 4 # Must be a value of 1 or greater
keyfile: "{{ env_var('DATACOVES__MAIN__KEYFILE_JSON') }}"
```
### Databricks
```yaml
your_profile_name:
target: dev
outputs:
dev:
type: databricks
catalog: [optional catalog name if you are using Unity Catalog]
schema: "{{ env_var('DATACOVES__MAIN__SCHEMA') }}" # Required
host: "{{ env_var('DATACOVES__MAIN__HOST') }}" # Required
http_path: "{{ env_var('DATACOVES__MAIN__HTTP_PATH') }}" # Required
token: "{{ env_var('DATACOVES__MAIN__TOKEN') }}" # Required Personal Access Token (PAT) if using token-based authentication
threads: 4
```
## Getting Started Next Steps
You will want to set up notifications. Selet the option that works best for your organization.
- **Email:** [Setup Email Integration](/docs/how-tos/airflow/send-emails)
- **MS Teams:** [Setup MS Teams Integration](/docs/how-tos/airflow/send-ms-teams-notifications)
- **Slack:** [Setup Slack Integration](/docs/how-tos/airflow/send-slack-notifications)
---
// File: getting-started/admin/configure-repository-using-dbt-coves
# Initial Datacoves Repository Setup
## Introduction
Setting up a new data project requires careful consideration of tools, configurations, and best practices. Datacoves simplifies this process by providing a standardized, yet customizable setup through the `dbt-coves` library. This article explains how to initialize and maintain your Datacoves repository.
## Getting Started with dbt-coves Setup
The `dbt-coves setup` command generates a fully configured project environment tailored to your specific needs. This command creates a repository structure with all necessary components pre-configured according to data engineering best practices.
### Initial Setup Process
dbt-coves comes pre-installed in Datacoves, you only have to run:
```bash
# Create a new Datacoves repository
dbt-coves setup
```
During the setup process, you'll be guided through a series of configuration questions that determine:
- Which data warehouse to use (Snowflake, BigQuery, Redshift, Databricks)
- Which components to include in your stack (dbt, Airflow, dlt)
- Project naming conventions
- Repository structure preferences
- CI/CD pipeline configurations
- Testing and documentation settings
:::note
It is recommended that you commit the answers file in your repo for future updates (see below)
:::
:::
## What Gets Created
The `dbt-coves setup` command generates a comprehensive project structure that includes:
1. **dbt configuration**
- Pre-configured dbt project with appropriate adapters
- Custom macros tailored to your selected data warehouse
- Template generators for consistent model creation
2. **Orchestration tools**
- Airflow DAG templates (if selected)
- Pipeline configurations
3. **Data loading**
- dlt configurations for data ingestion (if selected)
4. **Quality control**
- SQLFluff and YAMLlint configurations
- dbt test frameworks
- CI/CD workflows for GitHub Actions or GitLab CI
5. **Documentation**
- README templates
- Project structure documentation
## Customizing Your Setup
The setup process is highly flexible, allowing you to:
- Select only the components you need
- Configure folder structures based on your preferences
- Set up CI/CD pipelines appropriate for your workflow
- Include specialized macros for your specific data warehouse
## Updating Your Repository
As your project evolves or as Datacoves releases template improvements, you can update your existing repository:
```bash
# Update an existing Datacoves repository
dbt-coves setup --update
```
The update process:
- Preserves your custom code and configurations
- Updates template-managed files with the latest versions
- Adds any new components you select (it will remove the components you selected at Setup time but didn't select at Update time)
- Maintains backward compatibility where possible
:::note
When running an update, you will be prompted for the services you want to setup / update, if you saved the answers file from when you first ran set, your original choices pre-selected. If you unselect one of these, that content will be deleted
:::
:::
## Benefits for Data Teams
This approach to repository setup and maintenance offers several advantages:
1. **Reduced setup time** from days to minutes
2. **Consistency** across projects and teams
3. **Built-in best practices** for data modeling and CI/CD
4. **Easy maintenance** through template updates
5. **Standardized testing** and quality control
## Conclusion
The `dbt-coves setup` command streamlines the creation and maintenance of Datacoves repositories by providing a solid foundation that incorporates industry best practices. Whether you're starting a new data project or standardizing existing ones, this approach offers a scalable and maintainable solution for modern data stack implementation.
By leveraging this setup process, data teams can focus on delivering value through data transformations and insights rather than spending time on infrastructure configuration.
---
// File: getting-started/admin/user-management
# User Management
1. To get your users up and running, you need to invite them to the platform and grant them access to projects or specific environments.
[Invite Users](/docs/how-tos/datacoves/how_to_invitations)
2. You can change the permissions for users via the Users admin screen.
[Edit Users](/docs/how-tos/datacoves/how_to_manage_users#edit-a-user)
3. When users no longer need access to Datacoves, you can delete their accounts.
[Deleting a Users](/docs/how-tos/datacoves/how_to_manage_users#delete-a-user)
---
// File: getting-started/developer/snowflake-extension
# Getting Started with the Snowflake Extension
## This getting started video guide covers
- Account sign in
- Extension Interface overview
- Object Exploration
- Autocomplete
- Running Queries
For more information, please see the **[Snowflake VS Code Extension Docs](https://docs.snowflake.com/en/user-guide/vscode-ext)**
---
// File: getting-started/developer/transform-tab
# Getting Started with the VS Code in the browser via the Transform Tab
## This video guide covers:
- [User Settings Configurations](/docs/how-tos/vs-code/initial)
- Terminal setup
- A high level overview of VS Code editor
- How to reset your environment
---
// File: getting-started/developer/using-git
# Getting Started with Git - Branches and Changes
This guide covers essential Git commands for managing branches and making changes in your Git repository.
## Managing Branches
- **View Current Branch:** Check the current branch in your Git repository.
- **View All Branches Locally and Remote:** See both local and remote branches in your repository.
- **View local branches - `git branch`:** List all local branches using the `git branch` command.
- **Create a new branch - `git checkout -b `:** Create a new branch and switch to it with a single command.
- **Switch branches** In git you can change branches using either of these two commands:
- `git switch `:** A simpler command to switch between branches.
- `git checkout `:** An older, but still functional way to switch branches.
- **Stash changes - `git stash`:** Temporarily save your changes without committing them.
## Managing Changes
- **Open Modified Files:** View files with changes that haven't been committed.
- **View Side-by-Side Changes:** Compare changes between two versions side by side.
- **View Inline Changes:** View changes inline within the code.
- **Discard Changes:** Undo modifications and revert to the last committed state.
- **Stage Changes:** Prepare changes for a commit by staging them.
- **Commit:** Save staged changes with a commit message.
- **Undo Commit:** Undo the last commit while keeping changes in your working directory.
## Aliased Commands
- **git br = git branch:** Use `git br` to see available branches.
- **git co = git checkout:** Quickly switch to another branch with `git co`.
- **git l = git log:** View the commit log with `git l`.
- **git st = git status:** Check the Git status of your repository using `git st`.
- **git po:** Pull changes from the main branch into your local branch (specific usage may vary).
- **git prune-branches:** Delete local branches that have been deleted on the remote server.
For more in-depth information and advanced usage, please consult the **[Source Control Extension Docs](https://code.visualstudio.com/docs/sourcecontrol/overview)**.
## Resources
- [How Git Works](https://www.youtube.com/watch?v=e9lnsKot_SQ)
- [Git Documentation](https://git-scm.com/doc)
- [GitHub Learning Lab](https://github.com/apps/github-learning-lab)
- [Git Cheat Sheet](https://github.com/github/training-kit/blob/master/downloads/github-git-cheat-sheet.pdf)
- [Git rebase - Why, When & How to fix conflicts](https://youtube.com/watch?v=DkWDHzmMvyg&si=WE4VeEY1HKa_ejEA)
- [Git merge/pull tutorial](https://youtube.com/watch?v=DloR0BOGNU0&si=3EfopCU41XvkYkJJ)
- [Git pull rebase](https://youtube.com/watch?v=xN1-2p06Urc&si=8ZGMhJSy-A6N62l6)
---
// File: getting-started/developer/working-with-dbt-datacoves/index
# Getting Started with dbt in Datacoves
This guide covers various aspects of using Datacoves for creating, editing, running, and testing models and sources.
## Creating and Editing Models and Sources
- **Manually creating dbt Sources and Model:** Learn how to create models and sources within Datacoves.
- **Usage of [dbt-coves generate sources](https://github.com/datacoves/dbt-coves#readme):** Explore how to use the `dbt-coves` tool to generate sources efficiently.
- **Handling variant columns and auto-generated SQL and YAML files:** Understand how to deal with variant columns and work with auto-generated SQL and YAML files.
## Running a Model
- **Running man icon:** Learn how to run a model using the man icon.
- **Right-click menu option:** Discover the options available in the right-click menu for running models.
- **Run current button:** Understand how to use the "Run current" button to execute models.
## Opening a Model and Auto Complete
- **Quick model access using Cmd/Ctrl + P:** Learn how to quickly access models using the keyboard shortcut.
- **Auto-complete feature for efficient coding:** Discover the auto-complete feature to streamline your development process.
- **Cmd/Ctrl + Enter shortcut for CTE previews:** Utilize the Cmd/Ctrl + Enter shortcut to preview Common Table Expressions (CTEs).
- **SQL linting for error checking and best practices adherence:** Learn about SQL linting for error checking and adherence to best practices.
## Compiled SQL vs Run SQL
- **Viewing the compiled model for debugging:** Explore how to use the `compiled dbt` preview to debug dbt issues or to get SQL you can run in your Data Warehouse.
- **Accessing compiled SQL:** Learn how to access compiled SQL code.
## Testing Models
- **Testing icon:** Understand how to initiate testing for your models.
- **More - Shows various options:** Explore additional testing options.
- **Datacoves Power User - Run Individual tests or all tests:** For power users, run individual tests or all tests for comprehensive testing.
## Closing Tabs
- **Closing models with Ctrl + Option/Alt + W:** Learn how to close tabs quickly.
---
// File: getting-started/developer/working-with-dbt-datacoves/lineage-view
# Lineage View
The **Lineage View** panel is a feature of the Datacoves VSCode extension that provides a visual representation of the lineage of your project. This tool helps you quickly understand how data flows between models, sources, and downstream dependencies within your dbt project.
## What is the Lineage View?
The Lineage View displays a graph of your dbt model's relationships, showing both upstream and downstream dependencies. This visualization makes it easy to:
- See which sources and models feed into your current model
- Identify all models and reports that depend on your current model
- Understand the impact of changes to a model across your project
## Usage
The basic usage of Lineage View consists of the following steps:
1. **Open a dbt model or yml file** in your VSCode workspace.
2. Locate the **Lineage View** panel, typically found in the lower panel (alongside Terminal, Output, Datacoves)
3. The panel will automatically display the lineage graph for the currently sql or yml file.
### Additional features
In addition to seeing your model(s) lineage, you can also:
- **Single-click** on a node to open the SQL file.
- **Double-click** on a node to open the YML file.
- **Right click** a node and perform a dbt action(run, test, compile, open files, etc)
You can also look up other dbt models and change the parent and child nodes displayed using one of the following:
- `{n}+my_model`
- `my_model+{n}`
- `{n}+my_model+{n}`

## Configuration
Lineage Panel has 3 configurable settings. As with any VSCode setting, these can be [overridden](/docs/how-tos/vs-code/override) in the `settings.json` file located in `workspace/.vscode/settings.json`:
- Default Expansion (`dbt.lineage.defaultExpansion`: number): How many nodes should expand by default for the currently-opened model.
---
// File: how-tos/airflow/README
# Airflow - What to know
- `Ruff` is installed to show unused imports and unused variables as well as python linting.
- [Datacoves Decorators](/docs/reference/airflow/datacoves-decorators) simplify working with dbt, syncing databases, and running commands in Airflow.
- [My Airflow](/docs/how-tos/my_airflow) can help speed up your DAG writing experience.
---
// File: how-tos/airflow/initial-setup
import Tabs from '@theme/Tabs';
import TabItem from '@theme/TabItem';
# How to configure Airflow in Datacoves
## Turn on Airflow
Go to the `Environments` admin screen.

Edit the desired environment and click on the `Stack Services` tab. Ensure that you turned on `ORCHESTRATE`.

## Airflow Configurations
:::info
You will need to add folders to your project repository in order to match the folder defaults for Airflow; These folders are `orchestrate/dags` and `orchestrate/dags_yml_definitions`. Please see the recommended [folder structure](/docs/best-practices/datacoves/folder-structure) for all folder structure recommendations.
:::
Once you enabled Airflow, click on the `Services configuration > Airflow Settings` tab and configure each of the following fields accordingly:
### Fields Reference:
- **Python DAGs path** Relative path to the folder where Python DAGs are located. The default is `orchestrate/dags`.
- **YAML DAG Path** Relative path to the folder where YAML DAGs for dbt-coves `generate airflow-dags` command are located. The default is `orchestrate/dags_yml_definitions`.
- **dbt profiles path** Relative path to a folder where a dbt profiles.yml file is located, used to run `dbt` commands. This file should use Environment variables and should be placed in the recommended folder `automate/dbt/profiles.yml`. Please refer to our example [profiles.yml](https://github.com/datacoves/balboa/blob/main/automate/dbt/profiles.yml) in our [Sample Analytics project](https://github.com/datacoves/balboa).

### DAGs Sync Configuration
There are **2 options** to choose from for your DAGs sync: **Git Sync** and **S3 Sync**.
Each requires specific information to be provided during configuration. Our recommended default is Git Sync.
- **Provider** Select `Git`
- **Git branch name** The branch airflow will monitor for changes. If you have more than 1 environment (Development and Production), we suggest `airflow_development` for the development environment and `main` for the production environment. Note: You would need to create an `airflow_development` branch in your repo. If only have 1 environment, then the `Git branch name` should be `main`.
:::tip
We recommend combining your dbt transformations in the same project as your Airflow orchestration. However, you may wish to separate orchestration from transformation into different git projects. In Datacoves you can achieve this by having two projects. Each project will be associated with one git repo. Find out how to configure a [project](/docs/how-tos/datacoves/how_to_projects).
:::
You must create the s3 bucket and IAM user before this step.
- **Provider** Select `S3`
- **Bucket Path** The bucket and path that airflow will monitor and sync to the Airflow file system.
- **Auth Mechanism** Choose the auth method. Below you will see the fields required.
- **IAM User**
- **Access Key and Secret Key**
- **IAM Role**
- **Role ARN**
Once configured, you will need to configure your CI/CD process to clone your project into the S3 bucket.
### Logs Configuration - Private Deployment ONLY. Not applicable in SaaS.
:::info
Log Storage limit: 15 days. Airflow logs are not stored indefinitely and will be deleted after 15 days.
:::
There are **2 options** for logs - **EFS** and **S3**. Below you will see the fields required for each:
- **EFS**
- **Volume Handle**
- **S3**
- **Bucket Path**
- **Access Key**
- **Secret Key**
## Getting Started Next Steps
[Setup Service Connection](/docs/how-tos/datacoves/how_to_service_connections)
---
// File: how-tos/airflow/use-airflow-api
# How to use the Airflow API
:::warning
Users must have Project Level Admin Group to use the Airflow API. The API will allow you to view secrets values in plain text. Always exercise the principle of least privilege.
:::
This how to will walk you through configuring the Airflow API and using it in a DAG.
## Step 1: Navigate to your target environment
- A user with the appropriate access can navigate to the `Environments` in the navigation menu.

- Then Select the Pad lock icon for the Airflow environment you wish to access.

## Step 2: Copy the API URL
Copy the `Airflow API URL`

## Step 3:Generate the API KEY
Generate your API key and copy it somewhere secure. Once you click away it will not be shown again.

## Step 4: Add your credentials to a .env file
Create a `.env` file inside your `orchestrate/` directory and be sure to add the file to your `.gitignore`. Add your credentials there.
```env
AIRFLOW_API_URL = "https://..."
DATACOVES_API_KEY = "...."
```
## Step 5: Use it in a python script
Below is a sample script that makes use of the Airflow API.
**This script does the following:**
- Initializes the Airflow API client using authentication details from environment variables.
- Fetches a list of all DAGs from the Airflow API.
- Prints a sorted list of DAG IDs for better readability.
- Triggers a new DAG run for a specified DAG using the API.
- Updates an Airflow dataset using the API.
- Handles API errors and retries requests if necessary.
```python
# airflow_api_call.py
import requests
import os
import json
from dotenv import load_dotenv
load_dotenv()
API_URL = os.getenv("AIRFLOW_API_URL")
API_KEY = os.getenv("DATACOVES_API_KEY")
def update_dataset(name):
url=f"{API_URL}/datasets/events"
response = requests.post(
url=url,
headers = {
"Authorization": f"Token {API_KEY}",
},
json={"dataset_uri": "upstream_data",}
)
return response.json()
def trigger_dag(dag_id):
url=f"{API_URL}/dags/{dag_id}/dagRuns"
response = requests.post(
url=url,
headers = {
"Authorization": f"Token {API_KEY}",
},
json={"note": "Trigger from API",}
)
return response.json()
def list_dags():
url=f"{API_URL}/dags"
response = requests.get(
url=url,
headers = {
"Authorization": f"Token {API_KEY}",
"Content-Type": "application/json",
},
)
# Extract just the DAG names from the response
dags_data = response.json()
dag_names = [dag['dag_id'] for dag in dags_data['dags']]
# Sort the names alphabetically for better readability
dag_names.sort()
return dag_names
def print_response(response):
if response:
msg = json.dumps(response, indent=2)
print(f"Event posted successfully:\n{'='*30}\n\n {msg}")
if __name__ == "__main__":
# Update an Airflow Dataset
# dataset_name = "upstream_data"
# response = update_dataset(dataset_name)
# print_response(response)
# Trigger a DAG
# dag_id = "bad_variable_usage"
# response = trigger_dag(dag_id)
# print_response(response)
# List DAGs
response = list_dags()
print_response(response)
```
---
// File: how-tos/airflow/sync-database
# Sync Airflow database
It is now possible to synchronize the Datacoves Airflow database to your Data Warehouse
:::note
This is currently only available for Snowflake and Redshift warehouses.
:::
## Data Sync Decorator
To synchronize the Airflow database, we can use an Airflow DAG with the Datacoves Airflow Decorator below.
```python
@task.datacoves_airflow_db_sync
```
To avoid synchronizing unnecessary data, the following Airflow tables are always loaded. Where possible, these are loaded incrementally for higher performance:
- `ab_permission`
- `ab_role`
- `ab_user`
- `dag` (incrementally loaded by last_pickled)
- `dag_run` (incrementally loaded by execution_date)
- `dag_tag`
- `import_error` (incrementally loaded by timestamp)
- `job` (incrementally loaded by start_date)
- `task_fail` (incrementally loaded by start_date)
- `task_instance` (incrementally loaded by updated_at)
The decorator can receive:
- `db_type`: the destination warehouse type, "snowflake" or "redshift"
- `connection_id`: the name of the Airflow Service Connection in Datacoves that will be used by the operator
- `tables`: list of additional tables to load
- `destination_schema`: the destination schema where the Airflow tables will end-up. By default, the schema will be named as follows: `airflow-\{datacoves environment slug\}` for example `airflow-qwe123`

## Example DAG
```python
from pendulum import datetime
from airflow.decorators import dag, task
@dag(
default_args={
"start_date": datetime(2026, 1, 1),
"owner": "Bruno",
"email": "bruno@example.com",
"email_on_failure": False,
"retries": 3
},
description="Sample DAG for dbt build",
schedule="0 0 1 */12 *",
tags=["extract_and_load"],
catchup=False,
)
def airflow_data_sync():
@task.datacoves_airflow_db_sync(
db_type="snowflake",
destination_schema="airflow_dev",
connection_id="main",
# tables=["additional_table_1", "additional_table_2"],
)
def sync_airflow_db():
pass
sync_airflow_db()
airflow_data_sync()
```
:::note
The example DAG above uses the service connection `main`
:::

---
// File: how-tos/airflow/api-triggered-dag
# How to Trigger a DAG using Datasets
## Overview
This guide explains how to trigger Airflow DAGs with Datasets. DAGs can be triggered by another DAG using datasets or by an external process that sends a dataset event using the Airflow API.
## Producer DAG
Airflow enables DAGs to be triggered dynamically based on dataset updates. A producer DAG updates a dataset, automatically triggering any consumer DAGs subscribed to it.
To implement this, start by creating a DAG and defining the dataset it will update.
```python
# data_aware_producer_dag.py
import datetime
from airflow.decorators import dag, task
from airflow.datasets import Dataset
# A dataset can be anything, it will be a poiner in the Airflow db.
# If you need to access url like s3://my_bucket/my_file.txt then you can set
# it with the proper path for reuse.
DAG_UPDATED_DATASET = Dataset("upstream_data")
@dag(
default_args={
"start_date": datetime.datetime(2024, 1, 1, 0, 0),
"owner": "Noel Gomez",
"email": "gomezn@example.com",
"retries": 3
},
description="Sample Producer DAG",
schedule="0 0 1 */12 *",
tags=["extract_and_load"],
catchup=False,
)
def data_aware_producer_dag():
@task(outlets=[DAG_UPDATED_DATASET])
def extract_and_load_dlt():
print("I'm the producer")
extract_and_load_dlt()
dag = data_aware_producer_dag()
```
Thats it, now you are ready to create your [Consumer DAG](#setting-up-the-airflow-dag)
## Lambda Function
Alternatively, you can trigger a DAG externally using the [Airflow API](/docs/how-tos/airflow/use-airflow-api). In this example we will be using an AWS Lambda Function to trigger your DAG once data lands in an S3 Bucket.
### Creating your zip files
To run your python script in a lambda function you need to upload the `requests` library
along with your `lambda_function.py` file.
- Create a python file locally and write out your function. Below is an example function.
**Example Lambda function:**
```python
import requests
import os
import json
# In Lambda, environment variables are set in the Lambda configuration
# rather than using dotenv
API_URL = os.environ.get("AIRFLOW_API_URL")
API_KEY = os.environ.get("DATACOVES_API_KEY")
def update_dataset(dataset_name):
url = f"{API_URL}/datasets/events"
response = requests.post(
url=url,
headers={
"Authorization": f"Token {API_KEY}",
},
json={"dataset_uri": dataset_name,}
)
try:
return response.json()
except ValueError:
return response.text
def print_response(response):
if response:
msg = json.dumps(response, indent=2)
print(f"Event posted successfully:\n{'='*30}\n\n {msg}")
def lambda_handler(event, context):
print("Lambda execution started")
try:
print(f"Environment variables: API_URL={API_URL is not None}, API_KEY={API_KEY is not None}")
# Extract S3 information
bucket = event['Records'][0]['s3']['bucket']['name']
key = event['Records'][0]['s3']['object']['key']
print(f"S3 event details: bucket={bucket}, key={key}")
print(f"File uploaded: {bucket}/{key}")
# Airflow Dataset name must be static so if filename changes, that would have to
# be addressed above
dataset_name = f"s3://{bucket}/{key}"
response = update_dataset(dataset_name)
print_response(response)
return {
'statusCode': 200,
'body': 'Successfully processed S3 event'
}
except Exception as e:
print(f"ERROR: {str(e)}")
import traceback
print(traceback.format_exc())
return {
'statusCode': 500,
'body': f'Error: {str(e)}'
}
```
- Run the following commands locally to prepare a zip file with everything you need.
```bash
pip install --target ./package requests
cd package
zip -r ../deployment-package.zip .
cd ..
zip -g deployment-package.zip lambda_function.py
```
### Create a Lambda Function
- Create a new AWS lambda function.
- Set the runtime to Python 3.10.
- Create an IAM role and add the following policy:
- AmazonS3ReadOnlyAccess to bucket
- Upload `deployment-package.zip` from the earlier step into the Lambda function.
### Set Environment Variables
- Gather your [API credentials](/docs/how-tos/airflow/use-airflow-api#step-1-navigate-to-your-target-environment) Configure the following environment variables in the Lambda Function's Configuration:
- `AIRFLOW_API_URL` (the API URL for Airflow)
- `AIRFLOW_API_KEY` (the API key for authentication)
## Configuring the S3 Event Notification
1. **Go to S3 and Open the Target Bucket**
2. **Create a New Event Notification under the bucket's properties**
- **Event Name:** `TriggerAirflowDAG`
- **Prefix (Optional):** Specify a subfolder if needed.
- **Suffix (Optional)** If you would like to trigger specific files ie) .csv
- **Event Type:** Select `All object create events`
- **Destination:** Select **AWS Lambda** and choose the function created earlier.
Now you are ready to set up your Consumer DAG.
## Setting Up the Airflow DAG
Whether you decide to use a producer DAG or the Airflow API, the last step is to create an Airflow DAG that is triggered by a dataset event rather than a schedule. This particular example can be triggered with either a `LAMBDA_UPDATED_DATASET` or `DAG_UPDATED_DATASET`.

### Example DAG
```python
import datetime
from airflow.decorators import dag, task
from airflow.datasets import Dataset
LAMBDA_UPDATED_DATASET = Dataset("s3://my_bucket/my_folder/my_file.csv")
DAG_UPDATED_DATASET = Dataset("upstream_data")
@dag(
default_args={
"start_date": datetime.datetime(2024, 1, 1, 0, 0),
"owner": "Noel Gomez",
"email": "gomezn@example.com",
"retries": 1
},
description="Sample Producer DAG",
schedule=(LAMBDA_UPDATED_DATASET | DAG_UPDATED_DATASET),
tags=["transform"],
catchup=False,
)
def data_aware_consumer_dag():
@task
def run_consumer():
print("I'm the consumer")
run_consumer()
dag = data_aware_consumer_dag()
```
:::note
Ensure the Dataset you are sending an event to exists in Airflow. It will be created automatically when a DAG is created. If a dataset does not exist when the API event is sent, the API call will fail.
:::
---
// File: how-tos/airflow/use-key-pair-authentication
# Using Key-Pair Authentication in Airflow
:::note
This documentation will presume you have knowledge of Datacoves' [Service Connections](/docs/how-tos/datacoves/how_to_service_connections) and how to configure them.
:::
Using RSA Keys is only supported through Airflow Connections, not Environment Variables. Make sure your Datacoves Service Connection is using this `delivery mode`.

Also, make sure to select `Authentication mechanism: RSA Key-pair` and [assign the generated key to your Snowflake user](https://docs.snowflake.com/en/user-guide/key-pair-auth#assign-the-public-key-to-a-snowflake-user).

Once you have properly configured your Service Connection, your Airflow instance will restart. This process may take up to 10 minutes.
To confirm the above worked correctly, you can access your Airflow `Admin -> Connections` menu, and make sure your Service Connection is now an Airflow Connection.

## Usage
Thanks to our new [`dbt` Airflow Decorator](/docs/reference/airflow/datacoves-decorators), you can run dbt against your warehouse using the Airflow Connection you just created, by simply passing the Service Connection name to our decorator's `connection_id` parameter.
```python
@dag(
[...]
)
def dbt_dag():
@task.datacoves_dbt(
connection_id="main_key_pair" # your service connection name
)
def run_dbt():
return "dbt debug" # return any dbt command
run_dbt()
dbt_dag()
```
---
// File: how-tos/airflow/send-emails
# How to send email notifications on DAG's failure
Getting notifications when there is a failure is critical for data teams and Airflow allows multiple ways to keep users informed about the status of a DAG.
This page will show you how to:
- Use the Datacoves default SMTP
- Add the integration to your environment
- Create a custom smtp Integration for Airflow (optional)
- Create a DAG that makes use of the notification integration
- Bonus: DRY default_args
After completing these steps you will be able to receive email notifications upon DAG failure.
Let's get started!
## Configure SMTP integration in Environment
Datacoves provides a **pre-configured SMTP** connection which will send out a failure email from `hey@datacoves.com` to email recipients you configure in your DAGs.
In Datacoves 3.3 and up, the `SMTP` will be automatically added to your environment upon creation. If you created your environment before Datacoves 3.3 follow these instructions to configure the default SMTP.
- First, go to the `Environments` admin.

- Click the Edit icon for the environment containing the Airflow service you want to configure, then navigate to the `Integrations` tab.

- Click on the `+ Add new integration` button.

- Select `SMTP`. In the second dropdown select `Airflow` as service.
- Click `Save Changes`.
Viola!🎉 The Airflow service will be restarted shortly and will now include the SMTP configuration required to send emails.
:::note
**Getting Started Guide:** If you are making your way through our [getting started guide](/docs/category/administrator), please continue on to [developing DAGs](/docs/getting-started/admin/creating-airflow-dags).
:::
## Set up a custom SMTP (Optional)
If you do not wish to use the default SMTP server, you can configure your own.
First, create a new integration of type `SMTP` by navigating to the Integrations Admin.

Click on the `+ New integration` button. **Fill out the fields as seen below:**
- **Name:** Provide a descriptive name such as `Mail Service `
- **Type:** Select `SMTP`
- **Host:** Enter the smtp server for your domain.
- **Port:** TLS encryption on port 587. If you’d like to implement SSL encryption, use port 465.
- **From Address:** This is the address that you have configured for smtp
- **User:** Same address as the `From Address`
- **Password:** Password that you have configured for smtp

Click `Save Changes`
## Add integration to an Environment
Once you created the `SMTP` integration, it's time to add it to the Airflow service in an environment.
- First, go to the `Environments` admin.

- Select the Edit icon for the environment that has the Airflow service you want to configure, and then click on the `Integrations` tab.

- Click on the `+ Add new integration` button, and then, select the integration you created previously.
- In the second dropdown select `Airflow` as service.

- Click `Save Changes`.
## Implement in a DAG
If you have already created a DAG it's time to modify your DAG to make use of our newly set up SMTP integration on Airflow.
Simply provide a `default_args` dict like so:
:::tip
You can add as many email recipients needed by passing a list into the email field. eg) `email: ["gomezn@example.com", "mayra@example.com", "walter@example.com"]`
:::
### Python version
```python
from pendulum import datetime
from airflow.decorators import dag, task
@dag(
default_args={
"start_date": datetime(2024, 1, 1),
"owner": "Noel Gomez", # Replace with your name
"email": ["gomezn@example.com", "mayra@example.com", "walter@example.com"],
"email_on_failure": True,
"email_on_retry": False,
},
description="Sample DAG for dbt build",
schedule="0 0 1 */12 *",
tags=["version_1"],
catchup=False,
)
def dbt_run():
@task.datacoves_dbt(connection_id="main")
def build_dbt():
return "dbt run -s personal_loans"
build_dbt()
dag = dbt_run()
```
### YAML version
```yaml
description: "Sample DAG for dbt run"
schedule: "0 0 1 */12 *"
tags:
- version_1
default_args:
start_date: 2024-01-01
owner: Noel Gomez
# Replace with the email of the recipient for failures
email:
- gomezn@example.com
- mayra@example.com
- walter@example.com
email_on_failure: true
email_on_retry: false
catchup: false
nodes:
build_dbt:
type: task
operator: operators.datacoves.dbt.DatacovesDbtOperator
bash_command: "dbt run -s personal_loans" # Replace the name of the model
```
## DRY default_args
:::tip
We recommend placing your default_args in its own file and importing it for reusability. In the example below we created a file inside of orchestrate/utils/.
:::
```python
# orchestrate/utils/default_args.py
from datetime import datetime, timedelta
default_args = {
'owner': 'mayra@example.com',
'email_on_failure': False,
'email_on_retry': False,
'retries': 3,
'retry_delay': timedelta(minutes=5),
'start_date': datetime(2024, 1, 1),
}
from airflow.decorators import dag, task
from orchestrate.utils.default_args import default_args # Import default args
@dag(
default_args=default_args, # Use imported default args
description="Daily dbt run",
schedule="0 12 * * *",
tags=["version_1"],
catchup=False,
)
def default_args_dag():
@task.datacoves_dbt(connection_id="main")
def run_dbt():
return "dbt run -s country_codes"
run_dbt()
dag = default_args_dag()
```
---
// File: how-tos/airflow/send-ms-teams-notifications
# How to send Microsoft Teams notifications on DAG's status
As stated in [how to send email notifications](/docs/how-tos/airflow/send-emails), Airflow allows multiple ways to inform users about DAGs and tasks status.
Furthermore, it's important to understand Airflow handles these 4 status (`failure`, `retry`, `success` and `missed SLA`) via callbacks. You can learn more about them [here](https://airflow.apache.org/docs/apache-airflow/2.2.1/logging-monitoring/callbacks.html).
## Prepare the Microsoft side
Sending messages through Teams is done using Power Automate webhooks. These connections can be assigned to Teams channels, chats, or individuals. It is a simple two step automation: a webhook receives the DAG notification, and an action posts it to your Teams.
Everything on the Microsoft side is managed through their [Power Automate](https://make.powerautomate.com/) application. Choose `My flows` from the sidebar:

Choose `Instant cloud flow` from the `New flow` dropdown:

Now pick the type of trigger to use. `When a Teams webhook request is received`:

This will create a flowchart with just the webhook on it. Click on it to bring up a sidebar with its settings. Make sure it is set to allow anyone to trigger the flow. Also note the empty URL field here; we will have to come back for it after the flow is saved. You can name this flow at any time by clicking on the title text (shown here as `Untitled flow`).

Then, click the (+) on the flowchart to add an action. Type `card` into the search box to narrow the results, then choose `Post card in a chat or channel`:

The settings for this action determine where your notification will go. First, paste the following into the `Adaptive Card` field; this tells the workflow how to read the notifications:
- `@triggerBody()?['attachments'][0]?['content']`
Then set `Post In` to `Chat with Flow bot` to message only yourself, or for group messages, `Group chat` or `Channel`. For the latter two, there are more fields to set the exact destination.

Now click Save in the upper right corner of the screen, and when it finishes, you can return to the webhook's sidebar and copy the URL it's generated. Make sure to copy all of it.
:::info
Store this URL in a safe place as you will need it in a subsequent step and anyone with this link can send notifications to that Teams channel.
:::
## Prepare Airflow
### Create a new Integration
In Datacoves, create a new integration of type `MS Teams` by navigating to the Integrations admin page.

Click on the `+ New integration` button.
Provide a name and select `MS Teams`.

Provide the required details and `Save` changes.
:::note
The name you specify will be used to create the Airflow-Teams connection. It will be uppercased and joined by underscores -> `'ms teams'` will become :::
:::
`MS_TEAMS`. You will need this name below.
### Add integration to an Environment
Once the `MS Teams` integration is created, it needs to be associated with the Airflow service within a Datacoves environment.
Go to the `Environments` admin screen.

Select the Edit icon for the environment that has the Airflow service you want to configure and click on the `Integrations` tab.

Click on the `+ Add new integration` button and select the integration you created previously. In the second dropdown select `Airflow` as the service.

`Save` changes. The Airflow service will be restarted and will include the Teams configuration required to send notifications.
## Implement DAG
Once MS Teams and Airflow are configured, you can start using the integration within Airflow Callbacks to send notifications to your MS Teams channel.
MS Teams will receive a message with a 'View Log' link that users can click on and go directly to the Airflow log for the Task.

### Callback Configuration
In the examples below, we will send a notification on failing tasks or when the full DAG completes successfully using our custom callbacks: `inform_failure` and `inform_success`.
:::note
In addition to `inform_failure` and `inform_success`, we support these callbacks `inform_failure`, `inform_success`, `inform_retry`, `inform_sla_miss`.
:::
To send MS Teams notifications, in the Airflow DAG we need to import the appropriate notifier and use it with the following parameters:
- `connection_id`: the name of the Datacoves Integration created above
- if no connection_id is specified, MSTeams Notifier will use `ms_teams`
- `message`: the body of the message
- `theme_color`: theme color of the MS Teams card. This may be one of:
- `default`
- `emphasis`
- `good`
- `attention`
- `warning`
- `accent`
:::info
`on_failure_callback` will throw an error if using lists causing your task to fail.
:::
### Python version
```python
from pendulum import datetime
from airflow.decorators import dag, task
from notifiers.datacoves.ms_teams import MSTeamsNotifier
@dag(
default_args={
"start_date": datetime(2024, 1, 1),
"owner": "Noel Gomez",
"email": "gomezn@example.com",
"email_on_failure": True,
},
description="Sample DAG with MS Teams notification",
schedule="0 0 1 */12 *",
tags=["version_2", "ms_teams_notification", "blue_green"],
catchup=False,
on_success_callback=MSTeamsNotifier(
connection_id="MS_TEAMS", # ✅ If using 'ms teams' as an Integration, this is optional
message="DAG {{ dag.dag_id }} Succeeded"
),
on_failure_callback=MSTeamsNotifier(message="DAG {{ dag.dag_id }} Failed"),
)
def dbt_run():
@task.datacoves_dbt(connection_id="main")
def transform():
return "dbt run -s personal_loans"
transform()
dag = dbt_run()
```
:::note
Quotation marks are not needed when setting the custom message. However, making use of Jinja in a YAML file requires the message to be wrapped in quotations to be parsed properly. eg) `{{ dag.dag_id }} failed`
:::
### YAML version
```yaml
description: "Sample DAG with MS Teams notification"
schedule: "0 0 1 */12 *"
tags:
- version_2
- ms_teams_notification
default_args:
start_date: 2024-01-01
owner: Noel Gomez
# Replace with the email of the recipient for failures
email: gomezn@example.com
email_on_failure: true
catchup: false
# Optional callbacks used to send MS Teams notifications
notifications:
on_success_callback:
notifier: notifiers.datacoves.ms_teams.MSTeamsNotifier
args:
connection_id: MS_TEAMS
message: "DAG {{ dag.dag_id }} Succeeded"
on_failure_callback:
notifier: notifiers.datacoves.ms_teams.MSTeamsNotifier
args:
connection_id: MS_TEAMS
message: "DAG {{ dag.dag_id }} Failed"
color: "warning"
# DAG Tasks
nodes:
transform:
operator: operators.datacoves.dbt.DatacovesDbtOperator
type: task
bash_command: "dbt run -s personal_loans"
```
## Getting Started Next Steps
Start [developing DAGs](/docs/getting-started/admin/creating-airflow-dags)
---
// File: how-tos/airflow/send-slack-notifications
# How to send Slack notifications on DAG's status
As stated in [how to send email notifications](/docs/how-tos/airflow/send-emails), Airflow allows multiple ways to inform users about DAGs and tasks status.
Furthermore, it's important to understand Airflow handles these 4 status (`failure`, `retry`, `success` and `missed SLA`) via callbacks. You can learn more about them [here](https://airflow.apache.org/docs/apache-airflow/2.2.1/logging-monitoring/callbacks.html).
Below we explain how to use those callbacks to send Slack notifications.
## Prepare Slack
To send messages in Slack, you must first create a Slack App, which will act as a "bot" that sends messages. Visit [https://api.slack.com/apps](https://api.slack.com/apps) to start.

As it's the most basic type of application, you have to create it `from scratch`
After that, give it a `name` and assign it to your desired `workspace`


Once created, you must specify which features it will use. In order to send messages to your workspace channels, `Incoming Webhooks` is the only mandatory one.

In the `Incoming Webhooks` configuration screen, you must `toggle` the On/Off slider for the settings to appear. Once that's done, you can `Add New Webhook to Workspace`, where you will create `one webhook for each channel` you want to send messages to.


Once assigned a channel, your Incoming Webhook configuration screen will change to show your webhook `URL` and `Key`
The standard syntax of these are `url/key`, in our example: `https://hooks.slack.com/services` followed by `T05XXXXXX/XXXXXXXXX/XXXXXXXXX`

Now your Slack App is ready to send messages to `#airflow-notifications-dev` via webhooks.
## Prepare Airflow
### Create a new Integration
In Datacoves, create a new integration of type `Slack` by navigating to the Integrations admin page.

Click on the `+ New integration` button.
Provide a name and select `Slack`.

Provide the required details and `Save` changes.
:::tip
The name you specify will be used to create the Airflow-Slack connection. It will be uppercased and joined by underscores -> `'SLACK NOTIFICATIONS'` will become `SLACK_NOTIFICATIONS`. You will need this name below.
:::
### Add integration to an Environment
Once the `Slack` integration is created, it needs to be associated with the Airflow service within a Datacoves environment.
Go to the `Environments` admin screen.

Edit the environment that has the Airflow service you want to configure and click on the `Integrations` tab.

Click on the `+ Add new integration` button and select the integration you created previously. In the second dropdown select `Airflow` as the service.

`Save` changes. The Airflow service will be restarted and will include the Slack configuration required to send notifications.
## Implement DAG
Once Slack and Airflow are configured, you can start using the integration within Airflow Callbacks to send notifications to your Slack channel.
Slack will receive a message with a 'Logs' link that users can click on and go directly to the Airflow log for the Task.
### Callback Configuration
In the examples below, we will send a notification on failing tasks or when the full DAG completes successfully using our custom callbacks: `inform_failure` and `inform_success`.
:::note
In addition to `inform_failure` and `inform_success`, we support these callbacks `inform_failure`, `inform_success`, `inform_retry`, `inform_sla_miss`.
:::
To send Slack notifications, in the Airflow DAG we need to import the appropriate callbacks and call them with:
- `slack_webhook_conn_id`: the name of the Datacoves Integration created above
- `text`: to customize the message sent to Slack.
:::warning
`on_failure_callback` will throw an error if using lists causing your task to fail.
:::
### Python version
```python
from pendulum import datetime
from airflow.decorators import dag, task
from airflow.providers.slack.notifications.slack_webhook import send_slack_webhook_notification
# ✅ Define Slack notifications (These will send messages when the DAG succeeds or fails)
run_inform_success = send_slack_webhook_notification(
slack_webhook_conn_id="SLACK_NOTIFICATIONS", # Slack integration name slug -- double check in Datacoves integrations' admin
text="The DAG {{ dag.dag_id }} succeeded",
)
run_inform_failure = send_slack_webhook_notification(
slack_webhook_conn_id="SLACK_NOTIFICATIONS",
text="The DAG {{ dag.dag_id }} failed",
)
@dag(
default_args={
"start_date": datetime(2024, 1, 1),
"owner": "Noel Gomez", # Replace with your name
"email": "gomezn@example.com", # Replace with your email
"email_on_failure": True,
},
description="Sample DAG with Slack notification",
schedule="0 0 1 */12 *",
tags=["version_2"],
catchup=False,
on_success_callback=[run_inform_success],
on_failure_callback=[run_inform_failure],
)
def yaml_slack_dag():
@task.datacoves_dbt(connection_id="main")
def transform():
return "dbt run -s personal_loans"
transform()
# Instantiate the DAG
dag = yaml_slack_dag()
```
### YAML version
```yaml
description: "Sample DAG with Slack notification, custom image, and resource requests"
schedule: "0 0 1 */12 *"
tags:
- version_2
default_args:
start_date: 2024-01-01
owner: Noel Gomez
# Replace with the email of the recipient for failures
email: gomezn@example.com
email_on_failure: true
catchup: false
# Optional callbacks used to send Slack notifications
callbacks:
on_success_callback:
callback: airflow.providers.slack.notifications.slack_webhook.send_slack_webhook_notification
args:
- slack_webhook_conn_id: SLACK_NOTIFICATIONS
- text: Custom success message
on_failure_callback:
callback: airflow.providers.slack.notifications.slack_webhook.send_slack_webhook_notification
args:
- slack_webhook_conn_id: SLACK_NOTIFICATIONS
- text: Custom error message
# DAG Tasks
nodes:
transform:
operator: operators.datacoves.dbt.DatacovesDbtOperator
type: task
bash_command: "dbt run -s personal_loans"
```
## Getting Started Next Steps
Start [developing DAGs](/docs/getting-started/admin/creating-airflow-dags)
---
// File: how-tos/airflow/use-aws-secrets-manager
# How to use AWS Secrets Manager in Airflow
Datacoves integrates with the Airflow Secrets Backend Interface, offering support for its native Datacoves Secrets Backend, AWS Secrets Manager, and Azure Key Vault. For other Airflow-compatible Secrets Managers, please reach out to us.
Secrets backends can be configured at the project level, at the environment level, or both. See [configure your AWS Secrets Manager](/docs/how-tos/datacoves/how_to_projects/how_to_configure_aws_secrets_manager) for details.
## Read variable from AWS Secrets Manager
Airflow's `Variable.get` searches multiple places:
1. AWS Secrets Manager (if configured)
2. Datacoves Secrets Manager
3. Airflow environment variables
Once a variable is found, Airflow stops searching.

### Best practices
1. Call `Variable.get` from within an Airflow/Datacoves decorator to fetch at runtime only.
2. Use `connections_lookup_pattern` and `variables_lookup_pattern` to filter prefixes (e.g., `aws_`) to reduce unnecessary API calls. Example: `aws_my_secret`.
### Example DAG using AWS Secrets Manager
```python
from airflow.decorators import dag, task
from pendulum import datetime
from airflow.models import Variable
@dag(
catchup=False,
default_args={
"start_date": datetime(2024, 1, 1),
"owner": "Mayra Pena",
"email": "mayra@example.com",
"email_on_failure": True,
},
tags=["version_1"],
description="Testing task decorators",
schedule_interval="0 0 1 */12 *",
)
def task_decorators_example():
@task.datacoves_bash(connection_id="main")
def calling_vars_in_decorator() -> str:
my_var = Variable.get("aws_my_secret")
return "My variable is: " + my_var
calling_vars_in_decorator()
dag = task_decorators_example()
```
:::tip
To auto mask your secret you can use `secret` or `password` in the secret name since this will set `hide_sensitive_var_conn_fields` to True. eg `aws_my_password`. Please see [this documentation](https://www.astronomer.io/docs/learn/airflow-variables#hide-sensitive-information-in-airflow-variables) for a full list of masking words.
:::
## Using a secrets manager directly from Airflow
While not recommended, you can bypass the Datacoves secrets manager integration by configuring an Airflow connection and using the `SecretsManagerHook` in an Airflow DAG.
### Configure an Airflow Connection
Create a new Airflow Connection with the following parameters:
Connection Id: aws_secrets_manager
Connection Type: Amazon Web Services
AWS Access Key ID: ....
AWS Secret Access Key: ....
Extra:
```json
{
"region_name": "us-west-2"
}
```
```python
from airflow.decorators import dag, task
from pendulum import datetime
from airflow.providers.amazon.aws.hooks.secrets_manager import SecretsManagerHook
@dag(
catchup=False,
default_args={
"start_date": datetime(2024, 1, 1),
"owner": "Noel Gomez",
"email": "noel@example.com",
"email_on_failure": True,
},
tags=["sample"],
description="Testing task decorators",
schedule_interval="0 0 1 */12 *",
)
def variable_usage():
@task.datacoves_bash
def aws_var():
secrets_manager_hook = SecretsManagerHook(aws_conn_id='aws_secrets_manager')
var = secrets_manager_hook.get_secret("airflow/variables/aws_ngtest")
return f"export MY_VAR={var} && echo $MY_VAR"
aws_var()
dag = variable_usage()
```
## Check when secret is being fetched from AWS
It is a good idea to verify that Secrets are only being fetched when expected. To do this, you can use AWS CloudTrail.
1. From the AWS Console, go to `CloudTrail`
2. Click `Event History`
3. Click `Clear Filter`
4. In the `Lookup Attributes` dropdown, select `Event Name`
5. In the `Enter an Event Name` input box, enter `GetSecretValue`
Review the `Resource name` and `Event time`.
Note: it may take a few minutes for fetch events to show up in CloudTrail.
---
// File: how-tos/airflow/use-azure-key-vault
# How to use Azure Key Vault in Airflow
Datacoves integrates with the Airflow Secrets Backend Interface, offering support for its native Datacoves Secrets Backend, AWS Secrets Manager, and Azure Key Vault. For other Airflow-compatible Secrets Managers, please reach out to us.
Secrets backends can be configured at the project level, at the environment level, or both. See [configure your Azure Key Vault](/docs/how-tos/datacoves/how_to_projects/how_to_configure_azure_key_vault) for details.
When Datacoves runs in your Azure subscription, Airflow can authenticate to Key Vault with the cluster's Managed Identity, so no credentials need to be stored anywhere. Alternatively, a service principal with a client secret can be used on any Datacoves deployment.
## Read variable from Azure Key Vault
Airflow's `Variable.get` searches multiple places:
1. Azure Key Vault (if configured)
2. Datacoves Secrets Manager
3. Airflow variables and environment variables
Once a variable is found, Airflow stops searching.
### Secret naming
Variable keys and connection ids must start with `datacoves-` for the lookup to be sent to Azure Key Vault. The Key Vault secret name is the variable key with the `airflow-variables-` prefix (or `airflow-connections-` for connections), and underscores are translated to dashes because Key Vault secret names only allow letters, numbers and dashes:
| In your DAG | Key Vault secret name |
| --- | --- |
| `Variable.get("datacoves-my-secret")` | `airflow-variables-datacoves-my-secret` |
| `Variable.get("datacoves-my_secret")` | `airflow-variables-datacoves-my-secret` |
| Connection `datacoves-warehouse` | `airflow-connections-datacoves-warehouse` |
### Best practices
1. Call `Variable.get` from within an Airflow/Datacoves decorator to fetch at runtime only. Fetching at the top level of a DAG file would query Key Vault on every DAG parse.
2. Keep the `datacoves-` prefix on everything you store in Key Vault for Airflow; lookups without it never reach the vault.
### Example DAG using Azure Key Vault
```python
try:
# Airflow 3
from airflow.sdk import Variable, dag, task
except ImportError:
# Airflow 2
from airflow.decorators import dag, task
from airflow.models import Variable
from pendulum import datetime
@dag(
catchup=False,
default_args={
"start_date": datetime(2024, 1, 1),
"owner": "Mayra Pena",
"email": "mayra@example.com",
"email_on_failure": True,
},
tags=["version_1"],
description="Read a variable from Azure Key Vault",
schedule="0 0 1 */12 *",
)
def azure_key_vault_example():
@task
def read_secret_from_key_vault():
# Fetch at runtime (inside the task), never at the top level of the
# DAG file, so Key Vault is only called when the task runs.
my_var = Variable.get("datacoves-my-secret")
print(f"Fetched a {len(my_var)} character value from Azure Key Vault")
read_secret_from_key_vault()
dag = azure_key_vault_example()
```
:::tip
To auto mask your secret you can use `secret` or `password` in the variable name since this will honor `hide_sensitive_var_conn_fields`. eg `datacoves-my-password`. Please see [this documentation](https://www.astronomer.io/docs/learn/airflow-variables#hide-sensitive-information-in-airflow-variables) for a full list of masking words.
:::
## Using Azure Key Vault directly from Airflow
While not recommended, you can bypass the Datacoves secrets manager integration by configuring an Airflow connection and reading secrets with the Azure Key Vault SDK. The SDK (`azure-identity` and `azure-keyvault-secrets`) is already installed in Datacoves Airflow images as part of the Microsoft Azure provider.
When reading secrets this way, the [secret naming](#secret-naming) rules above do not apply: you fetch any Key Vault secret by its exact name, with no `airflow-variables-` or `datacoves-` prefix required.
### Configure an Airflow Connection
Create a new Airflow Connection with the service principal credentials:
Connection Id: `azure_key_vault`
Connection Type: Generic
Login: ``
Password: ``
Extra:
```json
{
"tenant_id": "",
"vault_url": "https://.vault.azure.net/"
}
```
### Example DAG reading Key Vault directly
```python
try:
# Airflow 3
from airflow.sdk import dag, task
except ImportError:
# Airflow 2
from airflow.decorators import dag, task
from airflow.hooks.base import BaseHook
from pendulum import datetime
@dag(
catchup=False,
default_args={
"start_date": datetime(2024, 1, 1),
"owner": "Noel Gomez",
"email": "noel@example.com",
"email_on_failure": True,
},
tags=["sample"],
description="Read a secret directly from Azure Key Vault",
schedule="0 0 1 */12 *",
)
def key_vault_direct_usage():
@task
def azure_secret():
from azure.identity import ClientSecretCredential
from azure.keyvault.secrets import SecretClient
conn = BaseHook.get_connection("azure_key_vault")
credential = ClientSecretCredential(
tenant_id=conn.extra_dejson["tenant_id"],
client_id=conn.login,
client_secret=conn.password,
)
client = SecretClient(
vault_url=conn.extra_dejson["vault_url"], credential=credential
)
secret = client.get_secret("my-secret-name")
print(f"Fetched a {len(secret.value)} character value from Azure Key Vault")
azure_secret()
dag = key_vault_direct_usage()
```
:::tip
When Datacoves runs in your Azure subscription with Managed Identity, no connection or credentials are needed at all: replace `ClientSecretCredential` with `DefaultAzureCredential()` from `azure.identity` and pass your vault URL to `SecretClient` directly.
:::
## Check when a secret is being fetched from Azure
It is a good idea to verify that secrets are only being fetched when expected. To do this, enable diagnostic logging on your Key Vault:
1. In the Azure Portal, go to your Key Vault
2. Click `Diagnostic settings` and send the `Audit` (AuditEvent) category to a Log Analytics workspace
3. In Log Analytics, query for `SecretGet` operations:
```kusto
AzureDiagnostics
| where ResourceType == "VAULTS" and OperationName == "SecretGet"
| project TimeGenerated, requestUri_s, identity_claim_appid_g, ResultSignature
| order by TimeGenerated desc
```
Review the request URI (which contains the secret name) and the timestamp. Note: it may take a few minutes for events to show up in Log Analytics.
---
// File: how-tos/airflow/use-datacoves-secrets-manager
# How to use Datacoves Secrets Manager in Airflow
Datacoves includes a built-in [Secrets Manager](/docs/reference/admin-menu/secrets) that allows you to securely store and manage secrets for both administrators and developers. Secrets can be stored at the project or environment level and easily shared across other tools in your stack, ensuring seamless integration and enhanced security. [Creating or editing a secret](/docs/how-tos/datacoves/how_to_secrets) in the Datacoves Secret Manager is straightforward. Be sure to prefix all secrets stored in Datacoves Secrets Manager with `datacoves-`.
## Read variable from Datacoves Secrets Manager
Once you save your variable in the Datacoves Secret Manager you are ready to use your variable in a DAG. This is done using `Variable.get`. Airflow will look in several places to find the variable.
### The order of places it will look for are as follows:
1. AWS Secrets Manager (if configured)
2. Datacoves Secrets Manager
3. Airflow variables
Once a variable is found, Airflow will stop its search.

### Best practices when using a Secrets Manager variable
1. Always call your `Variable.get` from within the Datacoves Task Decorators. This ensures the variable is only fetched at runtime.
2. Use prefixes based on where your variable is stored, like `datacoves-` (Datacoves Secrets Manager only searches for secrets with this prefix), `aws_`, or `airflow_` to help identify and debug variables. For example: `datacoves-mayras_secret`.
### Example DAG using Datacoves Secrets Manager
```python
from airflow.decorators import dag, task
from pendulum import datetime
from airflow.models import Variable
@dag(
default_args={
"start_date": datetime(2024, 1, 1),
"owner": "Amy Chan",
"email": "amy@example.com",
"email_on_failure": True,
},
catchup=False,
tags=["version_1"],
description="Testing task decorators",
schedule_interval="0 0 1 */12 *",
)
def task_decorators_example():
@task.datacoves_bash
def calling_vars_in_decorator() -> str:
my_var = Variable.get("datacoves-mayras_secret")
return "My variable is: " + my_var
calling_vars_in_decorator()
dag = task_decorators_example()
```
:::tip
To auto mask your secret you can use `secret` or `password` in the secret name since this will set `hide_sensitive_var_conn_fields` to True. eg `aws_mayras_password`. Please see [this documentation](https://www.astronomer.io/docs/learn/airflow-variables#hide-sensitive-information-in-airflow-variables) for a full list of masking words.
:::
---
// File: how-tos/airflow/customize-worker-environment
# How to set up a custom environment for your Airflow workers
If you need to run tasks on Airflow on a custom environment that comes with pre-installed libraries and tools, we recommend building your own custom docker image, upload it to a docker image repository such as dockerhub and reference it in your DAG's task operator.
## Using the custom image in your DAGs
Every task in an Airflow DAG can use a different docker image. Operators accept an `executor_config` argument that can be used to customize the executor context.
Given that Datacoves runs Airflow on a kubernetes execution context, you need to pass a `dict` with a `pod_override` key that will override the worker pod's configuration, as seen in the `TRANSFORM_CONFIG` dict in the example below. The variable name for the Config dict will depend on what DAG task you are requesting more resources for.
eg) When writing your yaml, if you add the config under ` marketing_automation` the `CONFIG` variable will be dynamically named `MARKETING_AUTOMATION_CONFIG`. In the yml examples below, we added the config in a transform task so the `CONFIG` variable is named `TRANSFORM_CONFIG`.
### Python version
```python
from pendulum import datetime
from airflow.decorators import dag, task
from kubernetes.client import models as k8s
TRANSFORM_CONFIG = {
"pod_override": k8s.V1Pod(
spec=k8s.V1PodSpec(
containers=[
k8s.V1Container(
name="base",
image=":",
)
]
)
),
}
@dag(
default_args={
"start_date": datetime(2022, 10, 10),
"owner": "Noel Gomez",
"email": "gomezn@example.com",
"email_on_failure": True,
},
description="Sample DAG with custom image",
schedule="0 0 1 */12 *", # Using 'schedule' instead of deprecated 'schedule_interval'
tags=["version_2"],
catchup=False,
)
def yaml_teams_dag():
@task.datacoves_bash(executor_config=TRANSFORM_CONFIG)
def transform():
return "echo SUCCESS!"
transform()
yaml_teams_dag()
```
### YAML version
In the yml dag you can configure the image.
```yaml
description: "Sample DAG with custom image"
schedule_interval: "0 0 1 */12 *"
tags:
- version_2
default_args:
start_date: 2022-10-10
owner: Noel Gomez
email: gomezn@example.com
email_on_failure: true
catchup: false
# DAG Tasks
nodes:
transform:
operator: operators.datacoves.bash.DatacovesBashOperator
type: task
config:
# Replace with your custom docker image :
image: :
bash_command: "echo SUCCESS!"
```
---
// File: how-tos/airflow/request-resources-on-workers
# How to request more memory or cpu resources on a particular DAG task
Sometimes you need to run tasks that require more memory or compute power. Airflow task's definition that use a kubernetes execution environment allow for this type of configuration.
Similarly to how you [overrode a worker's running environment](/docs/how-tos/airflow/customize-worker-environment), you need to specify the `resources` argument on the container spec.
## Example DAG
In the following example, we're requesting a minimum of 8Gb of memory and 1000m of cpu in the `requests` dict to run the task. [Click here](https://pwittrock.github.io/docs/tasks/configure-pod-container/assign-cpu-ram-container/) to learn more about resources requests and limits on a kubernetes running environment.
:::note
Keep in mind that if you request more resources than a node in the cluster could allocate the task will never run and the DAG will fail.
:::
```python
from datetime import datetime
from airflow.decorators import dag, task
from kubernetes.client import models as k8s
# Configuration for Kubernetes Pod Override with Resource Requests
TRANSFORM_CONFIG = {
"pod_override": k8s.V1Pod(
spec=k8s.V1PodSpec(
containers=[
k8s.V1Container(
name="transform",
resources=k8s.V1ResourceRequirements(
requests={"memory": "8Gi", "cpu": "1000m"}
),
)
]
)
),
}
@dag(
default_args={
"start_date": datetime(2022, 10, 10),
"owner": "Noel Gomez",
"email": "gomezn@example.com",
"email_on_failure": True,
},
description="Sample DAG with custom resources",
schedule="0 0 1 */12 *",
tags=["version_2"],
catchup=False,
)
def request_resources_dag():
@task.datacoves_bash(executor_config=TRANSFORM_CONFIG)
def transform():
return "echo 'Resource request DAG executed successfully!'"
transform()
request_resources_dag()
```
### YAML version
In the yml DAG you can configure the memory and cpu resources.
```yaml
description: "Sample DAG with custom resources"
schedule_interval: "0 0 1 */12 *"
tags:
- version_2
default_args:
start_date: 2022-10-10
owner: Noel Gomez
email: gomezn@example.com
email_on_failure: true
catchup: false
# DAG Tasks
nodes:
transform:
operator: operators.datacoves.bash.DatacovesBashOperator
type: task
config:
resources:
memory: 8Gi
cpu: 1000m
```
---
// File: how-tos/airflow/dags/create-dag-level-docs
# How to Add Docs at the DAG Level in Airflow
## Overview
The `dag.doc_md` attribute allows DAG authors to add markdown-formatted documentation directly to their DAGs. This documentation is visible in the Airflow web interface, offering a convenient way to describe the DAG's purpose, its dependencies, the tasks it includes, and any other relevant information. This feature enhances readability and maintainability, making it easier for teams to understand and collaborate on Airflow DAGs.
1. Start by writing a multi-line docstring at the beginning of your DAG file. This docstring may provide a detailed explanation of the DAG's functionality, its schedule, and any important considerations. You can use Markdown syntax for formatting.
2. After defining your DAG, assign the module's docstring (__doc__) to the doc_md variable. This makes the documentation written in the docstring visible in the Airflow UI.
3. Once your DAG is deployed, you can view the documentation by navigating to the DAG's details page in the Airflow web interface. The markdown-formatted documentation will be displayed under the DAG Details tab.

### Example:
```python
"""
# Example DAG
This DAG demonstrates how to use the `dag.doc_md` feature in Airflow.
It includes tasks for demonstration purposes.
## Schedule
- **Frequency**: Runs daily at midnight.
- **Catch Up**: False
## Tasks
1. **task_1**: Description of task 1.
2. **task_2**: Description of task 2.
"""
from airflow.decorators import dag, task
from pendulum import datetime
...
@dag(
# This is used to display the markdown docs at the top of this file in the Airflow UI when viewing a DAG
doc_md = __doc__,
...
# Invoke Dag
datacoves_sample_dag()
```
## Best Practices
**Clarity and Conciseness**: Write clear and concise documentation. Aim to provide enough detail for someone unfamiliar with the DAG to understand its purpose and operation.
**Use Markdown for Formatting**: Leverage Markdown syntax to format your documentation. Use headings, lists, code blocks, and links to make your documentation easy to read and navigate. See Github's Basic writing and formatting syntax for more information.
**Update Documentation as Necessary**: Keep the documentation up to date with changes to the DAG. This ensures that the documentation remains a reliable source of information for the DAG.
---
// File: how-tos/airflow/dags/external-python-dag
# External Python DAG
If you need additional libraries for your DAG such as pandas, let us know so that we can configure them in your environment.
:::note
Below we make use of a `python_scripts` folder inside the `orchestrate` folder and develop as a best practice we locate our custom scripts in this location.
:::
## orchestrate/python_scripts
```python
#sample_script.py
import pandas as pd
def print_sample_dataframe():
# Creating a simple DataFrame
data = {'Name': ['Alice', 'Bob', 'Charlie'],
'Age': [25, 30, 35],
'City': ['New York', 'San Francisco', 'Los Angeles']}
df = pd.DataFrame(data)
# Displaying the DataFrame
print("DataFrame created using Pandas:")
print(df)
print_sample_dataframe()
```
## orchestrate/dags
Create a DAG in the `dags` folder.
To run the custom script from an Airflow DAG, you will use the `@task.datacoves_bash` decorator as seen in the `python_task` below.
:::tip
See [Datacoves Decorators](/docs/reference/airflow/datacoves-decorators) documentation for more information on the Datacoves Airflow Decorators.
:::
```python
from airflow.decorators import dag, task
from pendulum import datetime
@dag(
default_args={
"start_date": datetime(2022, 10, 10),
"owner": "Noel Gomez",
"email": "gomezn@example.com",
"email_on_failure": True,
},
catchup=False,
tags=["version_6"],
description="Datacoves Sample DAG",
schedule="0 0 1 */12 *",
)
def datacoves_sample_dag():
@task.datacoves_bash()
def run_python_script():
return "python orchestrate/python_scripts/sample_script.py"
run_python_script()
datacoves_sample_dag()
```
---
// File: how-tos/airflow/dags/dynamically-set-schedule
# How to Dynamically set the schedule Interval
By default, DAGs are created with a `paused` state in Airflow, but you can change this with the `is_paused_on_creation=True` option. However, you will likely not want to schedule DAGs in a development Airflow instance. The steps below describe how do not set a schedule in a Development Airflow instance.
You can dynamically set the DAG schedule based on your Datacoves environment (development or production). By using a function called get_schedule, you can ensure that the correct schedule is applied only in the production Airflow instance.
Here is how to achieve this:
**Step 1:** Create a `get_schedule.py` file inside of `orchestrate/utils`
**Step 2:** Paste the following code:
Note: Find your environment slug [here](/docs/reference/admin-menu/environments)
```python
# get_schedule.py
import os
from typing import Union
DEV_ENVIRONMENT_SLUG = "dev123" # Replace with your environment slug
def get_schedule(default_input: Union[str, None]) -> Union[str, None]:
"""
Sets the application's schedule based on the current environment setting. Allows you to
set the the default for dev to none and the the default for prod to the default input.
This function checks the Datacoves Slug through 'DATACOVES__ENVIRONMENT_SLUG' variable to determine
if the application is running in a specific environment (e.g., 'dev123'). If the application
is running in the 'dev123' environment, it indicates that no schedule should be used, and
hence returns None. For all other environments, the function returns the given 'default_input'
as the schedule.
Parameters:
- default_input (Union[str, None]): The default schedule to return if the application is not
running in the dev environment.
Returns:
- Union[str, None]: The default schedule if the environment is not 'dev123'; otherwise, None,
indicating that no schedule should be used in the dev environment.
"""
env_slug = os.environ.get("DATACOVES__ENVIRONMENT_SLUG", "").lower()
if env_slug == DEV_ENVIRONMENT_SLUG:
return None
else:
return default_input
```
**Step 3:** In your DAG, import the `get_schedule` function using `from orchestrate.utils.get_schedule import get_schedule` and pass in your desired schedule.
ie) If your desired schedule is `'0 1 * * *'` then you will set `schedule=get_schedule('0 1 * * *')` as seen in the example below.
```python
from airflow.decorators import dag, task
from pendulum import datetime
from orchestrate.utils.get_schedule import get_schedule
@dag(
default_args={
"start_date": datetime(2022, 10, 10),
"owner": "Noel Gomez",
"email": "gomezn@example.com",
"email_on_failure": True,
},
is_paused_on_creation=True,
catchup=False,
tags=["version_8"],
description="Datacoves Sample DAG",
schedule=get_schedule('0 1 * * *'), # Replace with desired schedule
)
def datacoves_sample_dag():
@task.datacoves_dbt(connection_id="main")
def run_dbt_task():
return "dbt debug"
run_dbt_task()
datacoves_sample_dag()
```
---
// File: how-tos/airflow/dags/generate-dags-from-yml
# Generate DAGs from yml
You have the option to write out your DAGs in python or you can write them using yml and then have dbt-coves generate the python DAG for you.
## Configure config.yml
This configuration is for the `dbt-coves generate airflow-dags` command which generates the DAGs from your yml files. Visit the [dbt-coves docs](https://github.com/datacoves/dbt-coves?tab=readme-ov-file#settings) for the full dbt-coves configuration settings.
dbt-coves will read settings from `/.dbt_coves/config.yml`. We must create these files in order for dbt-coves to function.
**Step 1:** Create the `.dbt-coves` folder at the root of your dbt project (where the dbt_project.yml file is located). Then create a file called `config.yml` inside of `.dbt-coves`.
:::note
Datacoves' recommended dbt project location is `transform/` eg) `transform/.dbt-coves/config.yml`. This will require some minor refactoring and ensuring that the `dbt project path ` in your environment settings reflects accordingly.
:::
**Step 2:** We use environment variables such as `DATACOVES__AIRFLOW_DAGS_YML_PATH` that are pre-configured for you. For more information on these variables see [Datacoves Environment Variables](/docs/reference/vscode/datacoves-env-vars)
- `yml_path`: This is where dbt-coves will look for the yml files to generate your Python DAGs.
- `dags_path`: This is where dbt-coves will place your generated python DAGs.
Place the following in your `config.yml file`
```yml
generate:
...
airflow_dags:
# source location for yml files
yml_path: "/config/workspace/{{ env_var('DATACOVES__AIRFLOW_DAGS_YML_PATH') }}"
# destination for generated python dags
dags_path: "/config/workspace/{{ env_var('DATACOVES__AIRFLOW_DAGS_PATH') }}"
...
```
:::tip
If using an Extract and Load tool in your DAG you can dynamically generate your sources; however, additional configuration will be needed inside the config.yml file. See [Airbyte](/docs/how-tos/airflow/dags/run-airbyte-sync-jobs#generate-dags-from-yml-with-dbt-coves). For [Fivetran](/docs/how-tos/airflow/dags/run-fivetran-sync-jobs#configure-your-transform-dbt-coves-config-yml-file) contact us to complete the setup.
:::
## Create the yml file for your Airflow DAG
dbt-coves will look for your yml inside your `orchestrate/dags_yml_definition` folder to generate your Python DAGs. Please create these folders if you have not already done so.
:::note
When you create a DAG with YAML the name of the file will be the name of the DAG.
eg) `yml_dbt_dag.yml` generates a dag named `yml_dbt_dag`
:::
Let's create our first DAG using YAML.
**Step 1**: Create a new file named `my_first_yml.yml` in your `orchestrate/dags_yml_definition` folder.
**Step 2:** Add the following YAML to your file and be sure to change
```yml
description: "Sample DAG for dbt build"
schedule: "0 0 1 */12 *"
tags:
- version_2
default_args:
start_date: 2022-10-10
owner: Noel Gomez # Replace this with your name
email: gomezn@example.com # Replace with the email of the recipient for failures
email_on_failure: true
catchup: false
nodes:
run_dbt:
type: task
operator: operators.datacoves.dbt.DatacovesDbtOperator
bash_command: "dbt run -s personal_loans"
```
:::tip
In the examples we make use of the Datacoves Operators which handle things like copying and running dbt deps. For more information on what these operators handle, see [Datacoves Operators](/docs/reference/airflow/datacoves-operator)
:::
### How to create your own task group with YAML
The example below shows how to create your own task group with YAML.
#### Field Reference:
- **type**: This must be `task_group`
- **tooltip**: Hover message for the task group.
- **tasks**: Here is where you will define the individual tasks in the task group.
:::note
Specify the "task group" and "task" names at the beginning of their respective sections, as illustrated below:
:::
```yaml
nodes:
extract_and_load_dlt: # The name of the task group
type: task_group
tooltip: "dlt Extract and Load"
tasks:
load_us_population: # The name of the task
operator: operators.datacoves.bash.DatacovesBashOperator
# activate_venv: true
# Virtual Environment is automatically activated
cwd: "load/dlt/csv_to_snowflake/"
bash_command: "python load_csv_data.py"
# Add more tasks here
task_2:
...
```
## Generate your python file from your yml file
To generate your DAG, be sure you have the yml you wish to generate a DAG from open.
Select `more` in the bottom bar.
Select `Generate Airflow Dag for YML`. This will run the command to generate the individual yml.

## Generate all your python files
To generate all of the DAGs from your `orchestrate/dag_yml_definitions/` directory
- Run `dbt-coves generate airflow-dags` in your terminal.
All generated python DAGs will be placed in the `orchestrate/dags`
```python
from pendulum import datetime
from airflow.decorators import dag
from operators.datacoves.dbt import DatacovesDbtOperator
@dag(
default_args={
"start_date": datetime(2022, 10, 10),
"owner": "Noel Gomez",
"email": "gomezn@example.com",
"email_on_failure": True,
},
description="Sample DAG for dbt build",
schedule="0 0 1 */12 *",
tags=["version_2"],
catchup=False,
)
def yml_dbt_dag():
run_dbt = DatacovesDbtOperator(
task_id="run_dbt", bash_command="dbt run -s personal_loans"
)
dag = yml_dbt_dag()
```
---
// File: how-tos/airflow/dags/get-current-branch-name
# Retrieving the Current Branch Name in a Git Repository
In Airflow, Datacoves will place your repo into `/opt/airflow/dags/`
To retrieve the current branch name in a Git repository.
``` bash
cat /opt/airflow/dags/.git/HEAD | sed 's~ref: refs/heads/~~'
```
## This command consists of two parts:
`cat .git/HEAD`: This part of the command displays the content of the HEAD file, which contains a reference to the current branch in the Git repository.
`sed 's~ref: refs/heads/~~'`: The output of the cat command is then piped to the sed command, which is used to remove the `ref: refs/heads/` prefix from the branch name, thereby extracting the current branch name.
---
// File: how-tos/airflow/dags/s3-to-snowflake
# Loading S3 Files into Snowflake
## Schema Evolution
Snowflake has a built-in feature for [schema evolution](https://docs.snowflake.com/en/user-guide/data-load-schema-evolution). It allows us to create the initial table using a file as a template and then it will automatically handle any changes to the schema going forward.
### Caveats and limitations
Schema evolution is [limited to a change that adds a maximum of 10 columns or evolving no more than 1 schema per COPY operation](https://docs.snowflake.com/en/user-guide/data-load-schema-evolution#usage-notes)
You cannot go from a column containing `NUMBER` values to `VARCHAR`, but you can go from `VARCHAR` to `NUMBER` as it will insert it as `VARCHAR`.
**Step 1:** In a Snowflake SQL worksheet Navigate to the database and schema where you will be loading the data to.
**Step 2:** Create a custom file format for the data that you are planning to load. In this example we are using a custom CSV file format.
```sql
CREATE OR REPLACE FILE FORMAT MY_CSV_FORMAT
TYPE = 'CSV'
PARSE_HEADER = TRUE
ERROR_ON_COLUMN_COUNT_MISMATCH = FALSE;
```
**Step 3:** Now we will create a Snowflake stage and link our custom file format to it.
```sql
CREATE OR REPLACE STAGE TEST_STAGE
FILE_FORMAT = MY_CSV_FORMAT;
```
**Step 4:** We are now going to upload a csv file to this Snowflake stage that we will use as a template to create the table where data will be loaded. You can do this via the Snowflake UI or by using the SnowSQL command line tool.
This example will use SnowSQL and our data looks like this:

The SnowSQL command to upload the file to the Snowflake stage is below:
```
PUT file://test_file.csv @TEST_STAGE;
```
Where test_file.csv is in the same folder from where we are running the SnowSQL command.
**Step 5:** Once the file has been uploaded to the test stage, we create the initial table using it as a template and enabling schema evolution.
```sql
CREATE OR REPLACE TABLE TEST_TABLE
ENABLE_SCHEMA_EVOLUTION== TRUE
USING TEMPLATE (
SELECT ARRAY_AGG(OBJECT_CONSTRUCT(*))
FROM TABLE(
INFER_SCHEMA(
LOCATION->'@TEST_STAGE/test_file.csv.gz,
FILE_FORMAT=>'my_csv_format'
)
)
);
```
The TEST_TABLE schema now looks like this:

However, the table does not have any data loaded into it.

**Step 6:** To load the data from the file we used as a template we use the following COPY INTO SQL.
```sql
COPY INTO TEST_TABLE
FROM '@TEST_STAGE/test_file.csv.gz'
FILE_FORMAT = 'my_csv_format'
MATCH_BY_COLUMN_NAME = CASE_INSENSITIVE;
```
And we can now see the data in the table:

**Step 7:** Now we’re going to load another file into TEST_TABLE that has an additional column.

Again, we will use the SnowSQL PUT command seen below:
```
PUT files://test_file_copy.csv @TEST_STAGE;
```
**Step 8:** Now we can run another COPY INTO statement that references the new file.
```sql
COPY INTO TEST_TABLE
FROM '@TEST_STAGE/test_file_copy.csv.gz'
FILE_FORMAT = 'my_csv_format'
MATCH_BY_COLUMN_NAME = CASE_INSENSITIVE;
```
And now the table has an additional column called COUNTRY_CODE:

## Loading JSON data into a variant column
If the data that you want to load is in JSON format and the schema is likely to change then a recommended pattern is to load the JSON into a single Snowflake variant column. This allows you to parse out and model the data downstream without having to worry about the change in schema.
**Step 1:** 1. Create a Snowflake table with a single variant column.
```sql
CREATE OR REPLACE TABLE VARIABLE_TABLE (MAIN_COLUMN VARIANT);
```
**Step 2:** Now create a custom file format for the JSON data.
```sql
CREATE OR REPLACE FILE FORMAT MY_JSON_FORMAT
TYPE = 'JSON'
STRIP_OUTER_ARRAY = TRUE;
```
**Step 3:** After this we create a Snowflake stage that uses the JSON custom file format.
```sql
CREATE OR REPLACE STAGE JSON_STAGE
FILE_FORMAT = MY_JSON_FORMAT;
```
**Step 4:** We can now load JSON files that have been staged using the following COPY INTO command.
```sql
COPY INTO VARIANT_TABLE
FROM @JSON_STAGE
```
Our variant table now looks like this:

---
// File: how-tos/airflow/dags/run-adf-pipeline
# Use Microsoft Azure Data Factory Operators
You can use Airflow in Datacoves to trigger a Microsoft Azure Data Factory pipeline. This guide will walk you through the configuration process.
## Prerequisites
- You will need to set up a [Microsoft Entra Application](https://learn.microsoft.com/en-us/entra/identity-platform/howto-create-service-principal-portal).
- Assign the `Data Factory Contributor` role to your Microsoft Entra Application. You can do this by heading into Resource Groups and then following [these instructions](https://learn.microsoft.com/en-us/entra/identity-platform/howto-create-service-principal-portal#assign-a-role-to-the-application).
- Collect the following values from your ADF account, more information on where to find these items in the next section:
- `DATA_FACTORY_NAME`
- `RESOURCE_GROUP_NAME`
- `SUBSCRIPTION_ID`
- `APPLICATION_CLIENT_ID`
- `TENANT_ID`
- `CLIENT_SECRET`
### How to get the ADF information
**Step 1:** Login to your Microsoft Azure console and navigate to the [Data Factories service](https://portal.azure.com/#view/HubsExtension/BrowseResource/resourceType/Microsoft.DataFactory%2FdataFactories).
**Step 2:** Copy the`DATA_FACTORY_NAME` for the factory which holds your data pipeline.
**Step 3:** Open the factory and copy the `RESOURCE_GROUP_NAME`, and the `SUBSCRIPTION_ID` from the Overview tab
**Step 4:** Navigate to the Microsoft Entra ID service, click on number next to *Applicaitons* on the Overview tab. Next click the *All Applications* tab, open the application or register a new application then open it and copy the `APPLICATION_CLIENT_ID` and Directory`TENANT_ID`.
**Step 5:** Click on *Certificates and Secrets* and generate a new secret for your Microsoft Entra Application and copy the *Value*. This is the `CLIENT_SECRET`.
## Create a Microsoft Azure Data Factory Connection in Airflow
**Step 1:** In Datacoves, a user with the `securityadmin` role must go to the `Airflow Admin -> Connection` menu.

**Step 2:** Create a new connection using the following details.
- **Connection Id:** `azure_data_factory_default` - this name will be used in the Airflow DAG and is the default name used by the ADF Operator
- **Connection Type:** `Azure Data Factory`
- **Client ID:** Your `APPLICATION_CLIENT_ID`
- **Secret:** Your `CLIENT_SECRET`
- **Tenant ID:** Your `TENANT_ID`
- **Factory Name**: Your `DATA_FACTORY_NAME`
- **Resource Group Name**: Your `RESOURCE_GROUP_NAME`
- **Subscription ID:** Your `SUBSCRIPTION_ID`
:::note
Replace the values in the screenshot below with the actual values found above.
:::

## Example DAG
:::note
You will need to update the `pipeline_name`, `resource_group_name`, and `factory_name` arguments below with the correct names.
:::
Once you have configured your Databricks connection and variables, you are ready to create your DAG. Head into the `Transform` tab to begin writing your DAG inside `orchestrate/dags`.
```python
"""Example Airflow Azure Data Factory DAG."""
from datetime import datetime
from airflow.decorators import dag, task_group
from airflow.providers.microsoft.azure.operators.data_factory import AzureDataFactoryRunPipelineOperator
from airflow.providers.microsoft.azure.sensors.data_factory import AzureDataFactoryPipelineRunStatusSensor
@dag(
schedule="@daily",
start_date=datetime(2024, 1, 1),
tags=["version_1"],
catchup=False,
default_args={
"azure_data_factory_conn_id": "azure_data_factory_default",
"factory_name": "your-factory-name",
"resource_group_name": "your-resource-name",
},
)
def adf_example_run():
"""Run an Azure Data Factory pipeline with async status checking."""
@task_group(group_id="adf_pipeline_group", tooltip="ADF Pipeline Group")
def adf_pipeline_tasks():
run_pipeline = AzureDataFactoryRunPipelineOperator(
task_id="run_pipeline",
pipeline_name="myTestPipeline", # Rename to your Pipeline name
parameters={"myParam": "value"},
wait_for_termination=False,
)
# Deferrable sensor for async pipeline status checking
pipeline_run_async_sensor = AzureDataFactoryPipelineRunStatusSensor(
task_id="pipeline_run_async_sensor",
run_id=run_pipeline.output["run_id"],
deferrable=True,
)
run_pipeline >> pipeline_run_async_sensor
adf_pipeline_group = adf_pipeline_tasks()
DAG = adf_example_run()
```
## Understanding the Airflow DAG
- Understand how to [authenticate with ADF](https://airflow.apache.org/docs/apache-airflow-providers-microsoft-azure/stable/connections/adf.html).
- The DAG makes use of the [AzureDataFactoryRunPipelineOperator](https://airflow.apache.org/docs/apache-airflow-providers-microsoft-azure/stable/operators/adf_run_pipeline.html) to run an Azure Data Factory pipeline. It also shows how it’s possible to pass parameters that can be used in the pipeline.
---
// File: how-tos/airflow/dags/run-airbyte-sync-jobs
# Run Airbyte sync jobs
In our quest to simplify the way tools integrate in the Modern Data Stack, we developed the generate airflow-dags command in the dbt-coves library.
The main idea behind this concept is to use tags defined on dbt sources and determine which data to load via different tools (e.g. Airbyte or Fivetran). Using this information, we can dynamically create _Extract and Load_ tasks in an Airflow DAG before running dbt.
:::note
Support for Fivetran Tasks coming soon. More Information in [run Fivetran sync jobs](/docs/how-tos/airflow/dags/run-fivetran-sync-jobs).
:::
## Before you start
### Ensure your Airflow environment is properly configured
Follow this guide on [How to set up Airflow](/docs/how-tos/airflow/initial-setup)'s environment.
### Airbyte connection
As Airflow will trigger connections in the Airbyte's server, Datacoves automatically adds the connection in Airflow.
To view this connection, a user with the Datacoves sysadmin group can go to the Airflow `Admin -> Connections` menu.

:::note
`host` is created using your environment (3 letters + 3 digits like xyz123) ` + "-airbyte-airbyte-server-svc"`.
:::

### Turn off Airbyte's scheduler
To avoid conflicts between Airflow triggering Airbyte jobs and Airbyte scheduling its own jobs at the same time, we suggest you set `replication frequency` to `manual` on each Airbyte connection that will be triggered by Airflow:

### Generate DAG's from yml with dbt-coves
To connect Extract & Load with Transform in your DAG, you must configure your dbt-coves config file. We recommend the path to be `transform/.dbt-coves/config.yml`.
### Field reference:
- **yml_path**: Relative path to dbt project where yml to generate python DAGs will be stored
- **dags_path**: Relative path to dbt project where generated python DAGs will be stored
- **dbt_project_path**: Relative path to dbt project, used to run `dbt ls` to discover sources
- **airbyte_connection_id**: Id of the airflow connection that holds the information to connect to Airbyte system. (this was set up above)
:::tip
We make use of environment variables that we have configured for you upon set up. For more information on these variables please see [Datacoves Environment Variables](/docs/reference/vscode/datacoves-env-vars)
:::
```yml
generate:
...
airflow_dags:
# source location for yml files
yml_path: "/config/workspace/{{ env_var('DATACOVES__AIRFLOW_DAGS_YML_PATH') }}"
# destination for generated python dags
dags_path: "/config/workspace/{{ env_var('DATACOVES__AIRFLOW_DAGS_PATH') }}"
generators_params:
AirbyteDbtGenerator:
# Airbyte server
host: "{{ env_var('DATACOVES__AIRBYTE_HOST_NAME') }}"
port: "{{ env_var('DATACOVES__AIRBYTE_PORT') }}"
# Aiflow Connection
airbyte_conn_id: airbyte_connection
# dbt project location for dbt ls
dbt_project_path: "{{ env_var('DATACOVES__DBT_HOME') }}"
# Optional
run_dbt_compile: true
run_dbt_deps: false
```
## Example YML DAG
Now you are ready to write out your DAG using yml. In the following example DAG, you can notice a special task `load` that uses a `generator` instead of an `operator`. This will allow for the information to be pulled dynamically from airbyte such as connection_id.
:::tip
We make use of special generators from the dbt-coves extension. For more information please see [DAG Generators](/docs/reference/airflow/dag-generators)
:::
### Field reference:
- **generator**: The Airbyte Tasks Generator uses the value `AirbyteDbtGenerator`.
- **dbt_list_args**: arguments sent to `dbt ls` to retrieve the dbt project sources used to retrieve Airbyte connections. The AirbyteDbtGenerator generator will find the Airbyte connections to trigger using dbt sources's database, schema and table name.
### YML version
```yml
description: "Loan Run"
schedule: "0 0 1 */12 *"
tags:
- version_1
default_args:
start_date: 2021-01
catchup: false
nodes:
extract_and_load_airbyte:
generator: AirbyteDbtGenerator
type: task_group
tooltip: "Airbyte Extract and Load"
# The daily_run_airbyte tag must be set in the source.yml
dbt_list_args: "--select tag:daily_run_airbyte"
transform:
operator: operators.datacoves.bash.DatacovesBashOperator
type: task
bash_command: "dbt build -s 'tag:daily_run_airbyte+'"
dependencies: ["extract_and_load_airbyte"]
```
---
// File: how-tos/airflow/dags/run-dbt
# How to run dbt from an Airflow worker
Airflow synchronizes a git repository's [configured git branch](/docs/how-tos/datacoves/how_to_environments#services-configuration) every minute. (The branch specified in the `Git branch name` field in the environment's DAGs sync configuration)
To run `dbt` commands easily, we provide a pre-configured virtual environment with the necessary python dependencies such as dbt. Our Airflow Operator also does the following automatically:
- Copies the cloned dbt project to a writable folder within the Airflow file system
- Runs `dbt deps` if `dbt_modules` and `dbt_packages` folders do not exist
- Sets the current directory to the dbt_project_folder
This means that you can simply run `dbt ` in your Airflow DAG and we will handle the rest.
## Create a DAG that uses the script
If your dbt command like `dbt run` works in your development environment(**Try dbt run in your terminal**), then you should be able to create an Airflow DAG that will run this command automatically.
:::tip
Keep in mind that in an Airflow context `dbt` is installed in an isolated Python Virtual Environment to avoid clashing with Airflow python dependencies. Datacoves default Python's virtualenv is located in `/opt/datacoves/virtualenvs/main`. No need to worry about the complexity when using the `@task.datacoves_dbt` decorator because it will automatically activate that environment amongst other actions.
See [Datacoves Decorators](/docs/reference/airflow/datacoves-decorators) for more information.
:::
### Lets create a DAG!
**Step 1:** If using Git Sync, switch to your configured branch (`airflow_development` or `main`), create a python file inside of `orchestrate/dags` named `my_sample_dag.py`
**Step 2:** Paste in the code below and be sure to replace information such as name, email and model name with your own.
### Python version
```python
from pendulum import datetime
from airflow.decorators import dag, task
@dag(
default_args={
"start_date": datetime(2024, 1, 1),
"owner": "Noel Gomez", # Replace with name
"email": "gomezn@example.com", # Replace with your email
"email_on_failure": True,
},
description="Sample DAG for dbt run",
schedule="0 0 1 */12 *", # Replace with your desired schedule
tags=["version_2"],
catchup=False,
)
def my_sample_dag():
@task.datacoves_dbt(connection_id="main")
def run_dbt():
return "dbt run -s personal_loans" # Replace with your model
run_dbt()
my_sample_dag()
```
**Step 3:** Push your changes to the branch.
**Step 4:** Head over to Airflow in the Datacoves UI and refresh. It may take a minute but you should see your DAG populate.
**Step 5:** Regardless of the schedule you set, the default during development is to have the DAG paused. You can trigger the DAG to see it in action or turn it on to test the schedule.
### YAML version
If you are making use of the `dbt-coves generate airflow-dags` command, you can write DAGs using YML.
The name of the file will used as the DAG name.
```yaml
description: "Sample DAG for dbt run"
schedule: "0 0 1 */12 *"
tags:
- version_2
default_args:
start_date: 2024-01-01
owner: Noel Gomez # Replace with your name
# Replace with the email of the recipient for failures
email: gomezn@example.com
email_on_failure: true
catchup: false
nodes:
run_dbt:
type: task
operator: operators.datacoves.dbt.DatacovesDbtOperator
bash_command: "dbt run -s personal_loans" # Replace with your model name
```
---
// File: how-tos/airflow/dags/retry-dbt-tasks
# Retry a dbt task
## Overview
Retrying failed dbt models is a common workflow requirement when working with data transformations. This guide explains how to implement dbt task retry functionality in Airflow using Datacoves' custom `datacoves_dbt` decorator.
## Prerequisites
- Datacoves version 3.4 or later
- dbt API feature enabled in your environment (contact support for further assistance)
## How dbt Retries Work
The retry mechanism works by:
1. **Capturing results** of a dbt run including any failures
2. **Storing these results** using the dbt API
3. **Retrieving the previous run state** when a retry is initiated
4. **Selectively running** only the failed models and their downstream dependencies
## Implementing dbt Retries
### Step 1: Configure the `datacoves_dbt` Decorator
When defining your task, enable the necessary parameters for retries:
```python
@task.datacoves_dbt(
connection_id="your_connection",
dbt_api_enabled=True, # Enable dbt API functionality
download_run_results=True, # Allow downloading previous run results
)
```
### Step 2: Add Conditional Logic for Retry
Implement logic in your task function to check for existing results and execute the appropriate dbt command:
```python
@task.datacoves_dbt(
connection_id="your_connection",
dbt_api_enabled=True,
download_run_results=True,
)
def dbt_build(expected_files: list = []):
if expected_files:
return "dbt build -s result:error+ --state logs"
else:
return "dbt build -s your_models+"
```
### Step 3: Call the Task with Expected Files Parameter
```python
dbt_build(expected_files=["run_results.json"])
```
## Complete Example
Here's a complete DAG implementation:
```python
"""
## Retry dbt Example
This DAG demonstrates how to retry a DAG that fails during a run
"""
from airflow.decorators import dag, task
from orchestrate.utils import datacoves_utils
@dag(
doc_md = __doc__,
catchup = False,
default_args=datacoves_utils.set_default_args(
owner = "Your Name",
owner_email = "your.email@example.com"
),
schedule = datacoves_utils.set_schedule("0 0 1 */12 *"),
description="Sample DAG demonstrating how to run the dbt models that fail",
tags=["dbt_retry"],
)
def retry_dbt_failures():
@task.datacoves_dbt(
connection_id="your_connection",
dbt_api_enabled=True,
download_run_results=True,
)
def dbt_build(expected_files: list = []):
if expected_files:
return "dbt build -s result:error+ --state logs"
else:
return "dbt build -s model_a+ model_b+"
dbt_build(expected_files=["run_results.json"])
retry_dbt_failures()
```
---
// File: how-tos/airflow/dags/run-databricks-notebook
# Run Databricks Notebooks
You can use Airflow in Datacoves to trigger a Databricks notebook. This guide will walk you through the configuration process.
## Prerequisites
- **Databricks Host:** This is the URL of your Databricks cluster. It typically looks like `https://.databricks.com`.
- **Databricks Cluster ID:** This is the identifier of the cluster you want to use to run your notebook.
- **Databricks Token:** If you do not have admin privileges, work with an admin to get the token. Follow the [Databricks documentation here](https://docs.databricks.com/en/dev-tools/auth/pat.html).
- **Databricks Notebook Repo Path:** This is the full path to the notebook you want to trigger from Airflow. We recommend using the Git Notebook feature in Databricks. This notebook is usually located in a Repos directory in Databricks.
### How to get Databricks Host and Databricks Cluster ID
**Step 1:** Sign into your Databricks account.
**Step 2:** Navigate to compute.

**Step 3:** Click on your desired cluster.
**Step 4:** Scroll to `Advanced Options` and `JDBC/ODBC`. Copy the value under `Server Hostname`. The host value will look something like this: `.databricks.com`.
**Step 5:** Scroll to `Tags` and expand `Automatically added tags`. Your `ClusterId` should look something like this: `0123-5678910-abcdefghijk`.
### How to get Databricks Token
If you do not have admin privileges, work with an admin to get the token. Follow the [Databricks documentation here](https://docs.databricks.com/en/dev-tools/auth/pat.html).
### How to get Databricks Notebook Path
**Step 1:** Navigate to your notebook in the Databricks user interface.
**Step 2:** To the right of the notebook name, there will be three dots. Click on this and select the option to copy the full path to your clipboard.

## Handling Databricks Variables in Airflow
It is best practice to use Airflow variables for values that may need to change in your Airflow DAG. This allows for easy updates without redeployment of your Airflow code.
It is possible to hardcode these two variables in your DAG if you don’t see them needing to be changed.
- **DATABRICKS_CLUSTER_ID**: Your databricks Cluster ID
- **MY_NOTEBOOK_REPO_PATH**: This should be a meaningful name as you may have many notebooks you wish to trigger eg) INSERT_INTO_RAW_REPO_PATH
**Step 1:** A user with Airflow admin privileges must go to the Airflow `Admin -> Variables` menu and add the variables and their values.
## Create a Databricks Connection in Airflow
**Step 1:** A user with Airflow admin privileges must go to the `Airflow Admin -> Connection` menu.

**Step 2:** Create a new connection using the following details:
- **Connection Id:** `databricks_default` - this name will be used in your DAG
- **Connection Type:** `Databricks`
- **Host:** Your Databricks host. E.g. `https://.databricks.com`
- **Password:** Enter your `Databricks Token`

**Step 3:** Click `Save`
## Example DAG
Once you have configured your Databricks connection and variables, you are ready to create your DAG. Head into the `Transform` tab to begin writing your DAG inside the dags folder, e.g. `orchestrate/dags`.
### Git Notebook as the source (Recommended)
We recommend using a git as the source to leverage version control when developing notebooks. Be aware that if changes are made in the databricks tracked branch (`GIT_BRANCH`), they will be executed in Airflow regardless if the changes are committed into Git. The best practice is to have users develop on feature branches and then merge to main.
```python
import os
from datetime import datetime
from airflow.models import Variable
from airflow.decorators import dag
from airflow.providers.databricks.operators.databricks import DatabricksSubmitRunDeferrableOperator
DATABRICKS_CLUSTER_ID = Variable.get("DATABRICKS_CLUSTER_ID")
MY_NOTEBOOK_REPO_PATH = "/PATH/TO/MY/NOTEBOOK"
GIT_BRANCH = "main" # Specify the branch you want to use
@dag(
schedule="@daily",
start_date=datetime(2024, 1, 1),
tags=["version_1"],
catchup=False
)
def databricks_example_run():
notebook_task_params = {
"task_key": "unique-task-key",
"notebook_task": {
"notebook_path": MY_NOTEBOOK_REPO_PATH,
"base_parameters": {
"branch": GIT_BRANCH # Specify the branch in variable
}
},
"source": "GIT",
"existing_cluster_id": DATABRICKS_CLUSTER_ID,
"run_name": "databricks_workbook_run", # Update with a unique name
}
DatabricksSubmitRunDeferrableOperator(
task_id="notebook_task", # Rename with appropriate name
json=notebook_task_params,
databricks_conn_id="databricks_default" # Must match databricks connection id set above
)
dag = databricks_example_run()
```
## Understanding the Airflow DAG
- The DAG makes use of the [`DatabricksSubmitRunDeferrableOperator`](https://airflow.apache.org/docs/apache-airflow-providers-databricks/stable/operators/submit_run.html) which uses the [jobs/runs/submit](https://docs.databricks.com/api/workspace/jobs/submit) endpoint of the Databricks API. You can see the full list of options available by looking at the previous two links.
- We’re passing a [Notebook task object](https://docs.databricks.com/api/workspace/jobs/submit#notebook_task) with the source set to `GIT`, meaning the notebook will be retrieved from Databricks Repos, which is synced with a version-controlled Git repository. Alternatively, you can set the source to `WORKSPACE` to pull the notebook code directly from the local Databricks workspace. Using `GIT` is generally more reliable for production environments because it ensures that the notebook code is managed through a version-controlled system, providing consistency and traceability.
- And lastly, we have customized the `run_name`. In a non-example DAG, you would want this to be unique so you can better identify the runs in Airflow and Databricks.
---
// File: how-tos/airflow/dags/run-fivetran-sync-jobs
# Run Fivetran sync jobs
In Addition to triggering Airbyte loads jobs [run Airbyte sync jobs](/docs/how-tos/airflow/dags/run-airbyte-sync-jobs) you can also trigger Fivetran jobs from your Airflow DAG.
## Before you start
### Ensure your Airflow environment is properly configured
Follow this guide on [How to set up Airflow](/docs/how-tos/airflow/initial-setup)'s environment.
### Fivetran connection
Airflow needs to be connected to your Fivetran account to both read and trigger your Connectors, so first you need to set up a connection.
A user with Airflow admin privileges must go to the Airflow `Admin -> Connections` menu.

Create a new connection using the following details:

:::tip
Once your Fivetran API key and secret have been generated, for security reasons, the secret cannot be viewed again through the Fivetran interface. If you lose or forget your API secret, you will need to generate a new API key and secret pair so be sure to store them somewhere secure for reference later. See Fivetran Documentation on how to generate your Fivetran `API Key` and `API Secret`.
:::
### Configure your transform dbt-coves config yml file
By default, dbt-coves cannot query the necessary information for Fivetran connections. You will need to configure these in your yml DAG manually, or contact us to configure Datacoves with the necessary information.
Below are the configurations in for dbt-coves airflow-dags. You will need to configure these if using dbt-coves to generate DAGs from YML
### Field reference:
- **yml_path**: Relative path to dbt project where yml to generate python DAGs will be stored
- **dags_path**: Relative path to dbt project where generated python DAGs will be stored
:::tip
We make use of environment variables that we have configured for you upon set up. For more information on these variables please see [Datacoves Environment Variables](/docs/reference/vscode/datacoves-env-vars)
:::
```yaml
generate:
...
airflow_dags:
# source location for yml files
yml_path: "/config/workspace/{{ env_var('DATACOVES__AIRFLOW_DAGS_YML_PATH') }}"
# destination for generated python dags
dags_path: "/config/workspace/{{ env_var('DATACOVES__AIRFLOW_DAGS_PATH') }}"
```
## Example DAG
### Python version
```python
from pendulum import datetime
from airflow.decorators import dag, task, task_group
from fivetran_provider_async.operators import FivetranOperator
from fivetran_provider_async.sensors import FivetranSensor
@dag(
default_args={"start_date": datetime(2024, 1, 1)},
description="Loan Run",
schedule="0 0 1 */12 *",
tags=["version_1"],
catchup=False,
)
def daily_loan_run():
@task_group(
group_id="extract_and_load_fivetran",
tooltip="Fivetran Extract and Load"
)
def extract_and_load_fivetran():
fivetran_trigger = FivetranOperator(
task_id="datacoves_snowflake_google_analytics_4_trigger",
connector_id="speak_menial",
do_xcom_push=True,
fivetran_conn_id="fivetran_connection",
)
fivetran_sensor = FivetranSensor(
task_id="datacoves_snowflake_google_analytics_4_sensor",
connector_id="speak_menial",
poke_interval=60,
fivetran_conn_id="fivetran_connection",
)
fivetran_trigger >> fivetran_sensor # Ensure proper task execution order
tg_extract_and_load_fivetran = extract_and_load_fivetran()
@task.datacoves_dbt(connection_id="main")
def transform():
return "dbt build -s 'tag:daily_run_fivetran+'"
transform_task = transform()
transform_task.set_upstream([tg_extract_and_load_fivetran])
dag = daily_loan_run()
```
### Fields reference
- **extract_and_load_fivetran**: The name of the task group. This can be named whatever you like and will show up in airflow.

- **tooltip**: The tooltip argument allows you to provide explanatory text or helpful hints about specific elements in the Airflow UI
- **tasks**: Define all of your tasks within the task group.
You will need to define two operators: `fivetran_provider.operators.fivetran.FivetranOperator` and `fivetran_provider.sensors.fivetran.FivetranSensor`
- **example_task_trigger**: Name your trigger task accordingly and define arguments below.
- **operator**: `fivetran_provider.operators.fivetran.FivetranOperator`
- **connector_id**: Find in Fivetran UI. Select your desired source. Click into `Setup` and locate the `Fivetran Connector ID`

- **do_xcom_push**: Indicate that the output of the task should be sent to XCom, making it available for other tasks to use.
- **fivetran_conn_id**: This is the `connection_id` that was configured above in the Fivetran UI as seen [above](#fivetran-connection).
- **example_task_sensor**: Name your Sensor task accordingly and define arguments below.
- **operator**: `fivetran_provider.sensors.fivetran.FivetranSensor`
- **connector_id**: Find in Fivetran UI.
- **poke_interval**: The poke interval is the time in seconds that the sensor waits before rechecking if the connector is done loading data. Defaults to 60.
- **fivetran_conn_id**: This is the `connection_id` that was configured above in the Fivetran UI as seen [above](#fivetran-connection).
- **dependencies**: A list of tasks this task depends on.
### YAML version
```yaml
description: "Loan Run"
schedule: "0 0 1 */12 *"
tags:
- version_1
default_args:
start_date: 2024-01-01
catchup: false
# DAG Tasks
nodes:
# The name of the task group. Will populate in Airflow DAG
extract_and_load_fivetran:
type: task_group
# Change to fit your use case
tooltip: "Fivetran Extract and Load"
tasks:
# Rename with your desired task name. We recommend the suffix _trigger
datacoves_snowflake_google_analytics_4_trigger:
operator: fivetran_provider_async.operators.FivetranOperator
# Change this to your specific connector ID
connector_id: speak_menial
do_xcom_push: true
fivetran_conn_id: fivetran_connection
# Rename with your desired task name. We recommend the suffix _sensor
datacoves_snowflake_google_analytics_4_sensor:
operator:fivetran_provider_async.sensors.FivetranSensor
# Change this to your specific connector ID
connector_id: speak_menial
# Set your desired poke interval. Defaults to 60.
poke_interval: 60
fivetran_conn_id: fivetran_connection
# Set your dependencies for tasks. This task depends on datacoves_snowflake_google_analytics_4_trigger
dependencies:
- datacoves_snowflake_google_analytics_4_trigger
transform:
operator: operators.datacoves.dbt.DatacovesDbtOperator
type: task
# The daily_run_fivetran tag must be set in the source.yml
bash_command: "dbt build -s 'tag:daily_run_fivetran+'"
dependencies: ["extract_and_load_fivetran"]
```
---
// File: how-tos/airflow/dags/test-dags
# Run DAG tests in your CI/CD
In Datacoves you can easily test your Airflow DAGs using [pytest](/docs/reference/airflow/datacoves-commands#datacoves-my-pytest) in the command line. However you can also run these validations in your CI/CD pipeline.
To do this follow these steps:
## Step 1: Create your pytest validations file in the `orchestrate/test_dags` directory.
Here is an example script:
```python
# orchestrate/test_dags/validate_dags.py
"""Example DAGs test. This test ensures that all Dags have tags, retries set to two, and no import errors.
This is an example pytest and may not be fit the context of your DAGs. Feel free to add and remove tests."""
import os
import logging
from contextlib import contextmanager
import pytest
import warnings
from airflow.models import DagBag
APPROVED_TAGS = {'extract_and_load',
'transform',
'python_script',
'ms_teams_notification',
'slack_notification',
'marketing_automation',
'update_catalog',
'parameters',
'sample'}
ALLOWED_OPERATORS = [
"_PythonDecoratedOperator", # this allows the @task decorator
"DatacovesBashOperator",
"DatacovesDbtOperator",
"DatacovesDataSyncOperatorSnowflake",
"_DatacovesDataSyncSnowflakeDecoratedOperator",
"_DatacovesDataSyncRedshiftDecoratedOperator",
"AirbyteTriggerSyncOperator",
'FivetranOperator',
'FivetranSensor',
]
@contextmanager
def suppress_logging(namespace):
logger = logging.getLogger(namespace)
old_value = logger.disabled
logger.disabled = True
try:
yield
finally:
logger.disabled = old_value
### Custom tests start here ###
def get_import_errors():
"""
Generate a tuple for import errors in the dag bag
"""
with suppress_logging("airflow"):
dag_bag = DagBag(include_examples=False)
def strip_path_prefix(path):
return os.path.relpath(path, os.environ.get("AIRFLOW_HOME"))
# prepend "(None,None)" to ensure that a test object is always created even if it's a no op.
return [(None, None)] + [
(strip_path_prefix(k), v.strip()) for k, v in dag_bag.import_errors.items()
]
def get_dags():
"""
Generate a tuple of dag_id, in the DagBag
"""
with suppress_logging("airflow"):
dag_bag = DagBag(include_examples=False)
def strip_path_prefix(path):
return os.path.relpath(path, os.environ.get("AIRFLOW__CORE__DAGS_FOLDER"))
return [(k, v, strip_path_prefix(v.fileloc)) for k, v in dag_bag.dags.items()]
@pytest.mark.parametrize(
"rel_path,rv", get_import_errors(), ids=[x[0] for x in get_import_errors()]
)
def test_file_imports(rel_path, rv):
"""Test for import errors on a file"""
if rel_path and rv:
raise Exception(f"{rel_path} failed to import with message \n {rv}")
@pytest.mark.parametrize(
"dag_id,dag,fileloc", get_dags(), ids=[x[2] for x in get_dags()]
)
def test_dag_tags(dag_id, dag, fileloc):
"""
test if a DAG is tagged and if TAGs are in the approved list
"""
assert dag.tags, f"{dag_id} in {fileloc} has no tags"
if APPROVED_TAGS:
assert not set(dag.tags) - APPROVED_TAGS
@pytest.mark.parametrize(
"dag_id,dag, fileloc", get_dags(), ids=[x[2] for x in get_dags()]
)
def test_dag_has_catchup_false(dag_id, dag, fileloc):
"""
test if a DAG has catchup set to False
"""
assert (
dag.catchup == False
), f"{dag_id} in {fileloc} must have catchup set to False."
@pytest.mark.parametrize(
"dag_id, dag, fileloc", get_dags(), ids=[x[0] for x in get_dags()]
)
def test_dag_uses_allowed_operators_only(dag_id, dag, fileloc):
"""
Test if a DAG uses only allowed operators.
"""
for task in dag.tasks:
assert any(
task.task_type == allowed_op for allowed_op in ALLOWED_OPERATORS
), f"{task.task_id} in {dag_id} ({fileloc}) uses {task.task_type}, which is not in the list of allowed operators."
@pytest.mark.parametrize(
"dag_id,dag, fileloc", get_dags(), ids=[x[2] for x in get_dags()]
)
def test_dag_retries(dag_id, dag, fileloc):
"""
test if a DAG has retries set
"""
num_retries = dag.default_args.get("retries", 0)
if num_retries == 0 or num_retries is None:
pytest.fail(f"{dag_id} in {fileloc} must have task retries >= 1 it currently has {num_retries}.")
elif num_retries < 3:
warnings.warn(f"{dag_id} in {fileloc} should have task retries >= 3 it currently has {num_retries}.", UserWarning)
else:
assert num_retries >= 3, f"{dag_id} in {fileloc} must have task retries >= 2 it currently has {num_retries}."
```
**Summary**
This file defines a set of pytest-based validation tests for Airflow DAGs. It ensures that:
- DAG Import Validation – Detects and reports any import errors in DAG files.
- Tag Compliance – Checks that all DAGs have at least one tag and that tags are within an approved list.
- Catchup Settings – Ensures that all DAGs have catchup set to False to prevent unintended backfills.
- Operator Validation – Restricts DAGs to use only a predefined set of allowed operators.
- Retry Configuration – Validates that DAGs have a retry setting of at least 1 and warns if it is less than 3.
## Step 2 Add the `conftest.py` file to your `orchestrate/test_dags` directory.
This file will import custom tests that the Datacoves team has created such as validating [variable calls are not made at the highest level](/docs/how-tos/datacoves/how_to_projects/how_to_configure_aws_secrets_manager) of a DAG.
```python
# orchestrate/test_dags/conftest.py
from datacoves_airflow_provider.testing.custom_reporter import *
```
## Step 3: Add the following file to your github actions.
```yaml
# 10_integrate_airflow_changes.yml
name: 🎯 Airflow Validations
on: # yamllint disable-line rule:truthy
pull_request:
paths:
- orchestrate/*
- orchestrate/**/*
# Allows you to run this workflow manually from the Actions tab
workflow_dispatch:
# This cancels a run if another change is pushed to the same branch
concurrency:
group: orchestrate-${{ github.ref }}
cancel-in-progress: true
jobs:
airflow:
name: Pull Request Airflow Tests
runs-on: ubuntu-latest
# container: datacoves/ci-airflow-dbt-snowflake:3.3
container: datacoves/ci-airflow-dbt-snowflake:3.3
env:
AIRFLOW__CORE__DAGS_FOLDER: /__w/${{ github.event.repository.name }}/${{ github.event.repository.name }}/orchestrate/dags
AIRFLOW__CORE__DAGBAG_IMPORT_TIMEOUT: 300
AIRFLOW__ARTIFACTS_PATH: /__w/${{ github.event.repository.name }}/${{ github.event.repository.name }}/orchestrate
DATACOVES__DBT_HOME: /__w/${{ github.event.repository.name }}/${{ github.event.repository.name }}/transform
DATACOVES__REPO_PATH: /__w/${{ github.event.repository.name }}/${{ github.event.repository.name }}
PYTHONPATH: /__w/${{ github.event.repository.name }}/${{ github.event.repository.name }}
FORCE_COLOR: 1
OUTPUT_FILE: /__w/${{ github.event.repository.name }}/${{ github.event.repository.name }}/test_output.md
steps:
- name: Checkout branch
uses: actions/checkout@v4
with:
fetch-depth: 0
ref: ${{ github.event.pull_request.head.sha }}
- name: Test DAGs Load time and variable usage at top level
id: test_load_time_variables
run: python /usr/app/test_dags.py --dag-loadtime-threshold 1 --check-variable-usage --write-output --filename "$OUTPUT_FILE"
# if write-output is set in the prior step, the following step will run
- name: Add PR comment of results of test_load_time_variables tests
uses: thollander/actions-comment-pull-request@v2
with:
filePath: ${{ env.OUTPUT_FILE }}
comment_tag: Test DAGs Load time and variable usage at top level
- name: Custom Airflow Validation Tests
env:
NO_COLOR: 1
run: pytest $AIRFLOW__ARTIFACTS_PATH/test_dags/validate_dags.py --output-file "$OUTPUT_FILE"
- name: Add PR comment of results of custom Airflow validation tests
if: always()
uses: thollander/actions-comment-pull-request@v2
with:
# filePath: formatted_output.md
filePath: ${{ env.OUTPUT_FILE }}
comment_tag: Custom Tests
GITHUB_TOKEN: ${{ github.token }}
```
**Summary**
This GitHub Actions workflow automatically:
- Triggers when changes are made to the orchestrate directory.
- Tests for variable usage at the top level in DAGs to prevent costly issues.
- Runs custom validation tests and comments results on the PR.
By integrating this workflow, you can ensure Airflow DAGs meet quality standards before deployment.
---
// File: how-tos/airflow/dags/use-variables-and-connections
# Variables and Connections
:::note
dbt-coves generate airflow-dags does not support reading variables/connections, but you may generate the initial Python Airflow DAG and add the connection / variable information.
:::
The best way to store and retrieve information within Airflow is to use `Variables` and `Connections`, both available on the `Admin` upper dropdown.

The main difference between them is that [Variables](https://airflow.apache.org/docs/apache-airflow/2.3.1/howto/variable.html) is a generic multi-purpose store, while [Connections](https://airflow.apache.org/docs/apache-airflow/2.3.1/howto/connection.html) are aimed at third-party providers.
:::tip
Rather than using connections or variables stored in Airflow's database, we recommend using a Secrets Manager. These secrets are encrypted and can be stored either in [Datacoves Secrets manager](/docs/how-tos/airflow/use-datacoves-secrets-manager) or a third-party secrets manager like [AWS Secrets Manager](/docs/how-tos/airflow/use-aws-secrets-manager)
:::
## Usage
### Variables
After creating a variable in Airflow's UI, using it is as simple as importing the `Variable` model in your DAG and `getting` it's name. If a variable contains `SECRET` on it's name, value will be hidden:

```python
from pendulum import datetime
from airflow.decorators import dag, task
from airflow.models import Variable
@dag(
default_args={"start_date": datetime(2024, 1, 1)},
description="DAG that outputs a Variable",
schedule="0 0 1 */12 *",
tags=["version_1"],
catchup=False,
)
def variables_dag():
@task.datacoves_bash(="main")
def transform():
daily_run_tag = Variable.get("DBT_DAILY_RUN_TAG")
return f"dbt build -s 'tag:{daily_run_tag}'"
transform()
variables_dag()
```
### Connections
Consuming connections data is also straightforward, though you need to take it's attributes into consideration, as they'll vary depending on the provider.
In the following example, a connection of `type Airbyte` is created, and it's `host` is echoed in a DAG.

```python
from pendulum import datetime
from airflow.decorators import dag, task
from airflow.models import Connection
@dag(
default_args={"start_date": datetime(2024, 1, 1)},
description="DAG that outputs Airbyte Hostname",
schedule="0 0 1 */12 *",
tags=["version_1"],
catchup=False,
)
def connections_dag():
@task.datacoves_bash()
def echo_airbyte_host():
airbyte_connection = Connection.get_connection_from_secrets(conn_id="AIRBYTE_CONNECTION")
return f"echo 'Airbyte hostname is {airbyte_connection.host}'"
echo_airbyte_host()
connections_dag()
```
---
// File: how-tos/datacoves/how_to_connection_template
# How to Create/Edit Connection Template
Navigate to the Connection Template page

To create a new connection template click the `Create Connection Template` in the navigation menu.

## Each Connection Template consist of the following fields:
- **Name** This is the name users will see when selecting the base connection template when entering credentials for themselves or service accounts.
- **Project** This defines the Datacoves project that should be associated with this connection template.
- **Type** Defines the data warehouse provider so that users are presented the appropriate fields when entering their credentials.
- **Enabled for users** This flag indicates whether this template will be available for users or only for service accounts. To simplify the end-user experience, it is best to show them only the templates they should use when entering their database credentials. If enabled, a new field will appear:
- **User field configuration** Defines how the DB connection `Username` field will be treated. It can be `provided` by the end-user or inferred using two strategies: from their email, or based on custom templates. The difference in these approaches will be noticed when the final user creates their respective connections in `Settings -> Database connections`
- **Email**: Use the users email as used to authenticate with Datacoves. In this case the format of the email must match in both Snowflake and Datacoves. For example, if the login in Snowflake is `Noel@example.com` but in Datacoves you authenticate with `noel@example.com` the emails will not match and authentication to Snowflake will fail.

- **Email (Uppercase)**: Use the email used to log into Datacoves, but transforms it to uppercase.

- **Provided by user** With this strategy, the user will have free to enter the desired username when creating a connection. You cannot select `provided by user` if snowflake public key is automatically added to Snowflake by datacoves using: `_alter user \ set rsa_public_kay = '\';`

- **Username from email** Defines the username field as read-only, pre-populating it with the user's email username (what comes before @domain.com)

- **Custom template** With this last approach, you can choose a template from which the username will be generated. If selected a new field will appear to select one of those. By default we support `Connection username for admins` template. With this template, the username will see `admin_{{username}}` when creating a DB connection. Contact us to create a custom template for your account if you have different requirements.


>[!NOTE] The templates above are to simplify the user experience and minimize errors, however the user field is simply the the username for your data warehouse.
- **Default values** Based on the Provider Type selected, available default parameters will be displayed. ie) Snowflake, Redshift etc.
## For Snowflake, the available fields are:
- `Account`: To locate this, visit your Snowflake account > Click on the menu in the bottom left corner > Select the account > select the `Copy account identifier`.
>[!ATTENTION]You must replace the `.` with a `-` eg) `my.account` > `my-account` or you will get an error.

- `Warehouse` - The default connection template warehouse
- `Database` - The default connection template database
- `Role`- The default connection template role

## For Redshift, the available fields are:
- `Host`
- `Database`

---
// File: how-tos/datacoves/how_to_secrets
# How to Create/Edit a Secret
Datacoves includes a built-in [Secrets Manager](/docs/reference/admin-menu/secrets) that allows you to securely store and manage secrets for both administrators and developers. Secrets can be stored at the project or environment level and easily shared across other tools in your stack, ensuring seamless integration and enhanced security. Follow this guide to create/edit a secret in the Datacoves Secrets Manager.
:::note
Datacoves Secret Manager will ONLY look for variables that are prefixed with `datacoves-`
:::
**Step 1:** Navigate to `Secrets` in the Admin menu

**Step 2:** Select `+ New Secret`
**Step 3:** Define the following
- **Reference Key (slug):** This is how the secret will be retrieved in your DAG. Prefix all of your secrets stored in the Datacoves Secrets Manager with `datacoves-`.
- **Format:** Select what format you would like to use to store your secret. ie) key-value, JSON, or multiple key-value pairs.
- **Scope:** Select whether you want to share the secret at the project or environment level.
- **Project** Select what project this variable belongs to.
**Step 4:** Toggle on `Share with developers` if this variable needs to be accessed by developers who do not have Admin access.
**Step 5:** Toggle on `Share with stack services`. This must be toggled on for Airflow to have access to the variable

To learn how to read a variable from the Datacoves secrets manager check out our [How To](/docs/how-tos/airflow/use-datacoves-secrets-manager)
:::note
If the secret isn’t shared with the developers or services, only the author can use it.
:::
---
// File: how-tos/datacoves/how_to_environments
# How to Create/Edit an Environment
Navigate to the Environments page

To create a new environment click the `New Environment` button.
Environment Settings are separated into different tabs.

## Basic information
This tab has the base information for the environment.
- The `name` to be displayed on the launchpad
- The `Project` the environment should be associated with
- The `type` of environment (development, test or prod). It is best practice for users to perform their work in a development environment and production jobs to run in a production environment which is typically more governed.
## Stack Services
Define which tools will be enabled for this environment. At least one service must be enabled.
Available services include:
- `LOAD (Airbyte)`
- `TRANSFORM (dbt and VS Code)`
- `OBSERVE (dbt docs)`
- `ORCHESTRATE (Airflow)`
- `ANALYZE (Superset)`

## Services Configuration
The services enabled for the environment may require additional configurations. This tab is where the services will be configured.
- TRANSFORM (dbt & VS Code) requires:
- **dbt project path:** The path the location of the `dbt_project.yml` this allows you to either have the dbt project at the root of your git repository or in some sub-folder. If you have implemented the recommended folder structure this will be `transform`. If your dnt project is at the root, leave it blank.
- **dbt profile name:** dbt profile name as defined in dbt_project.yml with the key profile. The standard is `default`.

- ORCHESTRATE (Airflow) requires:
- **branch:** Determines git branch to synchronize to Airflow. This allows you to have one branch for a development environment and `main` for a production environment. In other words, in development we recommend making this field `airflow_development` and `main` in production. Please be aware that you will need to create an `airflow_development` branch in your repository.
- **dbt profiles path:** The location where Airflow will find dbt profiles.yml file to use during a dbt run. This should be `automate/dbt`. Please be aware that you will need to create the `automate` and`dbt` folders as well as the `profiles.yml` in your repository.
- **YAML DAGs path:** When using yml based Airflow DAGs Airflow will look for the yml files in this location. We recommend this be set to `orchestrate/dags`. Please be aware that you will need to create the `orchestrate` and `dags` folders in your repository.
- **Python DAGs path:** This is the location Airflow will look for the DAG definition files. We recommend this be set to `orchestrate/dag_yml_definitions`. Please be aware that you will need to create the `orchestrate` and `dag_yml_definitions` folders in your repository.
- **Additional Secrets Backend:** Allows you to configure AWS Secrets Manager for this specific environment. This can be set independently of the project-level configuration, or left as `Use Project Settings` to inherit it if one exists. See [Configure AWS Secrets Manager](/docs/how-tos/datacoves/how_to_projects/how_to_configure_aws_secrets_manager) for details.
- OBSERVE (Docs) requires:
- **branch:** Here we specify the branch that will be synchronized for production dbt docs. This branch must exist in your git repository.

---
// File: how-tos/datacoves/how_to_groups
# How to Create/Edit a Group
Navigate to the groups page in the admin menu

Each group consist of three main components:
- `Name`
- `Description` (to help identify what each group permits and restricts)
- A list of `Permissions`, which consist of single `read` and `write` authorizations, to help granulate the user experience as much as possible.
Apart from these main fields, you can optionally map the group to a comma-separated list of `Active Directory groups`, as well as `Filter` the available permissions to enable/disable them with ease.

In terms of specific application permissions, i.e. Airflow and Superset, you can use both general and specific scopes:
- To work permissions at global level (the entire application), you can give `read` or `write` permissions to it's entire scope:

- Giving an application scope `write` access, gives the group the entire set of the application's permissions, and with it also to it's resources.
- Giving an application scope `read` access, sets the group as viewer (read-only)
- To give permissions to certain resources of an application, you can toggle `write` access on only those of interest, leaving the general scope (for example, `Workbench>Airflow`) unmarked.

Some of the specific component permissions include:
- `Airflow > Admin`: access to Airflow's Admin menu (connections, variables, etc)
- `Airflow > Security`: access to Airflow's Security menu (users and roles administration)
- `Airflow > Dags`: running DAGs and jobs
- `Superset > Data-Sources`: Superset data sources administration
- `Superset > Security`: access to Superset's Security menu (users, roles, permissions, etc.)
---
// File: how-tos/datacoves/how_to_integrations
# How to Create/Edit an Integration
Navigate to the Integrations Menu

To create a new integration click the `New Integration` button.

An Integration consists of the following fields:
- **Name** This is the identifier used to configure the integration within your environments.
- **Type** This is the type of integration such as `SMTP` and `MS Teams`. Depending on the type of integration selected, additional fields will be displayed. For information on these fields, see the following pages:
- SMTP -> [send email notifications from Airflow](/docs/how-tos/airflow/send-emails)
- MS Teams -> [send Microsoft Teams messages from Airflow](/docs/how-tos/airflow/send-ms-teams-notifications)
- Slack: -> [send Slack messages from Airflow](/docs/how-tos/airflow/send-slack-notifications)
---
// File: how-tos/datacoves/how_to_invitations
# How to Invite a User to your Account
Navigate to the invitations page

Select the `+ invite user` button
You will need the user's:
- Name
- Email
Using the checkboxes below you can select the Security Groups the user should belong to for Development and Production Environments
:::tip
See the [Groups](/docs/reference/admin-menu/groups) reference page for more information on Datacoves groups and their permissions.
:::

---
// File: how-tos/datacoves/how_to_service_connections
# How to Create/Edit a Service Connection
Navigate to the Service Connection page

To create a new Service Connection click the `New Connection` button.
Select the environment you wish to configure.

A Service Connection consists of the following fields:
- **Name** Defines how the connection will be referred to by the automated service. It is typically called `main` and will be included in the name of the environment variables seen below. It will be set as the Airflow connection_id if that option is selected.
- **Environment** The Datacoves environment associated with this service connection.
- **Service** The Datacoves stack service where this connection should be made available e.g. Airflow
- **Delivery Mode** Datacoves currently supports 2 Delivery modes
- **Airflow Connection** (preferred method) This method will create a connection entry in Airlfow using the credentials you configure which will allow you to make use of the custom [Airflow Decorators](/docs/reference/airflow/datacoves-decorators) by passing the `Name` of the connection you created as the `connection_id`.
- **Environment Variables** The legacy method Datacoves used which would inject the connection credentials as environment variables into Airflow. The name of the service connection will be used to dynamically create [environment variables](/docs/reference/airflow/environment-service-connection-vars) which we inject into Airflow.
.
- **Connection Template** The connection template to base this service connection on(i.e. the defaults)
Depending on the template selected, additional fields will be displayed with the default values entered in the connection template. These default values can be overridden by toggling the indicator next to the given value. Enter the appropriate user, schema, and password. This is commonly a service account created specifically for Airflow and may differ between the development and production environment.

## Getting Started Next Steps
In the following step, you will update your repository by incorporating the necessary folders and files for Airflow. Specifically, you will add the `orchestrate/dags` directories along with `automate/dbt/profiles.yml`.
[Update repository](/docs/getting-started/admin/configure-repository)
---
// File: how-tos/datacoves/how_to_environment_variables
# How to use custom VSCode Environment Variables
Even though you can create environment variables in your VSCode instance by using the traditional `export` command, having your Environment configured with custom variables can be an important time-saver, as these are not cleared when your Environment restarts (due to inactivity, maintenance, or changes in its settings)
You can configure environment variables in 3 different places:
- `Project Settings`: applies to the entire Project (with all its Environment)
- `Environment Settings`: applies to the desired Environment
- `User Settings`: applies to the user's VSCode instance.
As the UI is almost the same in the 3 pages, we'll illustrate the process using the `Environment Settings` screen
To configure custom VSCode environment variables:
- Navigate to `VS Code Environment Variables` inside your Environment settings. Once there, click `Add`

- A pop-up will appear, where you must specify `Key` and `Value` for your environment variable. Once set, click `Add`

- You will be sent back to your Environment settings, where you should see the newly created environment variable.
- Once there, make sure to `Save Changes` to your Environment

That's all! Now you can use this new persistent variable in your VSCode instance.

---
// File: how-tos/datacoves/how_to_worker_usage
# Billing API
Datacoves provides API endpoints for users to retrieve billing information about their environments. Specifically, admins can get the number of minutes billed for Airflow and Airbyte services. These endpoints are secured and require a **Project-level token** for authentication.
This guide explains how to use the Datacoves Billing API to retrieve worker usage minutes for your environment(s).
## Billing API URL & Generating an API Key
To obtain the Billing API URL and your API key:
1. Navigate to your project settings in the Datacoves admin panel
2. Go to the **Keys** section
3. Copy the **Billing API URL** we will use it below
4. Click on **Generate New API Key**

Once generated, copy and securely store your API key. It will only be shown once.
## General API information
### Authentication
Include the key in the `Authorization` header:
```
Authorization: Token YOUR_API_KEY
```
### Service Types
The API categorizes worker usage by service type:
- **airflow**: Usage from Airflow workers
- **airbyte**: Usage from Airbyte workers
- **unknown**: Usage that couldn't be categorized
### Notes
- API can only be accessed from within the same cluster e.g. you can run the script in the terminal in VS Code or in Airflow
- All dates should be in `YYYY-MM-DD` format
- If no dates are provided, the API defaults to providing the usage for the last 30 days
- If no `service` parameter is provided, results include both Airflow and Airbyte.
- The `amount_minutes` field represents the total minutes of worker usage excluding "warm-up" time
- Data is aggregated per day and per service.
- Times are returned in UTC format
- Only environments you have access to via your project token are included.
**Query Note:**
- Maximum allowed date range is 6 months (180 days). To query more than this, multiple queries must be run.
- If the date range exceeds 6 months, the API returns an error.
### Troubleshooting
- Ensure your token is valid and has access to the requested environments.
- Check date formats and range limits.
- For further assistance, contact Datacoves support.
## API Endpoints
The Billing API URL should be similar to `https://api./api/v1/billing`
### Get Usage for All Environments
**GET** `/`
Returns usage data for all environments in your account.
### Get Usage for a Specific Environment
`env-slug` is the slug for the specific environment like `abc123`
**GET** `/{env-slug}/`
Returns usage data for the environment specified.
#### Path Parameters
| Parameter | Type | Required | Description |
|-----------|------|----------|-------------|
| `env-slug` | string | Yes | The slug identifier for your environment |
### Query Parameters
| Parameter | Type | Required | Default | Description |
|-----------|------|----------|---------|-------------|
| `start_date` | string (YYYY-MM-DD) | No | Today - 30 days | The start date for the usage period |
| `end_date` | string (YYYY-MM-DD) | No | Today's date | The end date for the usage period |
| `service` | string | No | All services | Filter by service type: `airflow`, `airbyte`, or `unknown` |
## Response Format
The API returns an array of usage records with the following fields:
| Field | Type | Description |
|-------|------|-------------|
| `environment_slug` | string | The environment identifier |
| `service` | string | The service type: `airflow`, `airbyte`, or `unknown` |
| `date` | datetime | The timestamp of the usage record |
| `amount_minutes` | integer | The number of minutes used |
### Sample Response
```json
[
{
"environment_slug": "abc123",
"service": "airflow",
"date": "2025-11-15T10:30:00Z",
"amount_minutes": 120
},
{
"environment_slug": "abc123",
"service": "airbyte",
"date": "2025-11-15T14:20:00Z",
"amount_minutes": 60
}
]
```
## Sample Error Responses
- **Invalid date format:**
```json
{ "error": "Invalid date format. Use YYYY-MM-DD." }
```
- **Date range exceeds 6 months:**
```json
{ "error": "Date range cannot exceed 6 months (180 days)." }
```
- **Start date after end date:**
```json
{ "error": "start_date must be before end_date." }
```
## Sample Python Script
Create a `.env` file with the following variables
```shell
DATACOVES__API_URL = "https://..."
DATACOVES__API_TOKEN = "...."
DATACOVES__ENVIRONMENT = "abc123"
```
Use the API in a Python script to query usage:
```python
import requests
import os
from dotenv import load_dotenv
load_dotenv()
API_URL = os.getenv("DATACOVES__API_URL")
API_KEY = os.getenv("DATACOVES__API_TOKEN")
ENV_SLUG = os.getenv("DATACOVES__ENVIRONMENT")
def get_worker_usage(start_date=None, end_date=None, service=None, env_slug=None):
"""
Retrieve worker usage minutes for an environment or all environments.
Args:
env_slug (str, optional): Environment slug. If None, returns data for all environments
start_date (str, optional): Start date in YYYY-MM-DD format
end_date (str, optional): End date in YYYY-MM-DD format
service (str, optional): Filter by service type (airflow, airbyte, unknown)
Returns:
list: Usage records
"""
if env_slug:
url = f"{API_URL}/{env_slug}/"
else:
url = f"{API_URL}/"
params = {}
if start_date:
params['start_date'] = start_date
if end_date:
params['end_date'] = end_date
if service:
params['service'] = service
response = requests.get(
url=url,
headers={"Authorization": f"Token {API_KEY}"},
params=params
)
print(f"Fetching: {response.url}")
if not response.ok:
print(response.text)
return
response.raise_for_status()
return response.json()
def calculate_total_minutes_by_service(usage_data):
"""
Calculate total minutes used per service.
Args:
usage_data (list): Usage records from API
Returns:
dict: Total minutes per service
"""
totals = {}
for record in usage_data:
service = record['service']
minutes = record['amount_minutes']
totals[service] = totals.get(service, 0) + minutes
return totals
def print_usage_info(usage):
totals = calculate_total_minutes_by_service(usage)
for service, minutes in totals.items():
hours = minutes / 60
print(f" {service}: {minutes} minutes ({hours:.2f} hours)")
# Example: Get usage for last 30 days
print("#### Usage for last 30 days ####")
usage = get_worker_usage()
if usage:
print_usage_info(usage)
else:
print("No Usage Data Returned for the last 30 days")
# Example: Specific date range
start_date = "2025-07-01"
end_date = "2025-12-27"
print(f"\n#### Usage for {start_date} through {end_date} ####")
usage = get_worker_usage(start_date, end_date)
if usage:
print_usage_info(usage)
else:
print(f"No Usage Data Returned for {start_date} to {end_date}")
# Example: specific environment
print(f"\n#### Usage for environment {ENV_SLUG} ####")
usage = get_worker_usage(env_slug=ENV_SLUG)
if usage:
print_usage_info(usage)
else:
print(f"No Usage Data Returned for environment {ENV_SLUG} from {start_date} to {end_date}")
```
---
// File: how-tos/datacoves/how_to_manage_users
# How to Manage Users
Navigate to the Users page

## Edit a User
When you edit a user record, you can modify the users `Name`, `Email` and the assigned `Permission Groups`
:::note
Select the project to edit user access.
:::

## Delete a User
On the User listings page, clicking on the trash can will delete the user from your account.

---
// File: how-tos/datacoves/how_to_projects/README
import Tabs from '@theme/Tabs';
import TabItem from '@theme/TabItem';
# How to Create/Edit a Project
Navigate to the Projects page:


A Project configuration consists of the following fields:
- **Name:** This is what will be displayed in the Datacoves landing page.
- **Git Repo:** This is the git repository associated with this project.
- **Clone strategy:** Determines how Datacoves will communicate with your git repository (SSH, HTTPS, or Azure DevOps Secret/Certificate). Select your desired cloning strategy to see configuration instructions:
When SSH is selected, an SSH public key will be automatically generated for you to configure in your git provider as a deployment key.

When HTTPS is selected, the following fields must be filled in: `Git HTTPS url`, `Username`, and `Password`.

When Azure DevOps Secret is selected, a secret key is required for authentication. This assumes you have already created your EntraID application and added it as a user.
See this [how-to guide on configuring Azure DevOps](/docs/how-tos/datacoves/how_to_projects/how_to_configure_azure_devops) for detailed configuration information.
- **Git SSH url:** [Cloning URL](/docs/how-tos/datacoves/how_to_projects/how_to_configure_azure_devops) found in Azure DevOps Portal
- **Azure HTTPS Clone url:** [Cloning URL](/docs/how-tos/datacoves/how_to_projects/how_to_configure_azure_devops) found in Azure DevOps Portal
- **Tenant ID:** [ID found in Azure Portal](/docs/how-tos/datacoves/how_to_projects/how_to_configure_azure_devops)
- **Application ID:** [ID found in Azure Portal](/docs/how-tos/datacoves/how_to_projects/how_to_configure_azure_devops)
- **Client Secret:** [Secret value](/docs/how-tos/datacoves/how_to_projects/how_to_configure_azure_devops) found in Azure DevOps Portal
- **Release Branch:** This will be the branch you would like to clone. Typically `main`.
When Azure DevOps Certificate is selected, a certificate is needed for secure communication.
See this [how-to guide on configuring Azure DevOps](/docs/how-tos/datacoves/how_to_projects/how_to_configure_azure_devops) for detailed instructions.
- **Certificate PEM file:** Copy the PEM file to your desktop and [upload in Azure](/docs/how-tos/datacoves/how_to_projects/how_to_configure_azure_devops)
- **Git SSH url:** [Cloning URL](/docs/how-tos/datacoves/how_to_projects/how_to_configure_azure_devops) found in Azure DevOps Portal
- **Azure HTTPS Clone url:** [Cloning URL](/docs/how-tos/datacoves/how_to_projects/how_to_configure_azure_devops) found in Azure DevOps Portal
- **Tenant ID:** [ID found in Azure Portal](/docs/how-tos/datacoves/how_to_projects/how_to_configure_azure_devops)
- **Application ID:** [ID found in Azure Portal](/docs/how-tos/datacoves/how_to_projects/how_to_configure_azure_devops)
- **Release Branch:** Defines the default branch in your repository. Typically `main` or `master`.
- **CI/CD Provider:** When provided, this will display a link to your CI/CD jobs on the Observe tab of a Datacoves environment. Once you choose your provider, you will be able to specify your `CI jobs home URL`.
- **Secrets Backend:** Datacoves provides a Secrets Backend out of the box; you can also configure additional Secrets Backends at the project level, at the environment level, or both. See [AWS Secrets Manager](/docs/how-tos/datacoves/how_to_projects/how_to_configure_aws_secrets_manager) for details.

---
// File: how-tos/datacoves/how_to_projects/how_to_configure_aws_secrets_manager
# Configuring AWS Secrets Manager
## Table of Contents
- [Prereqs](#prereqs)
- [Create your Secret in AWS Secrets Manager](#create-your-secret-in-aws-secrets-manager)
- [Configure your Secrets Backend in Project settings](#configure-your-secrets-backend-in-project-settings)
- [Project-level configuration](#project-level-configuration)
- [Environment-level override](#environment-level-override)
- [Use an IAM role instead of access keys (IRSA)](#use-an-iam-role-instead-of-access-keys-irsa)
## Prereqs
1. Create an IAM user with permissions to manage secrets
2. Configure access to AWS Secrets Manager on the project settings page
Please follow the how-to below to achieve these requirements.
:::tip
When Datacoves runs on AWS (EKS), you can skip the IAM user and access keys entirely and authenticate with an IAM role instead. See [Use an IAM role instead of access keys (IRSA)](#use-an-iam-role-instead-of-access-keys-irsa).
:::
### Create an IAM user with permissions to manage secrets
**Step 1:** On AWS, create an IAM User with an attached policy like this one:
:::note
Be sure to replace the ARN for the resource below to your ARN.
:::
```json
{
"Version": "2012-10-17",
"Statement": [
{
"Effect": "Allow",
"Action": [
"secretsmanager:GetResourcePolicy",
"secretsmanager:GetSecretValue",
"secretsmanager:DescribeSecret",
"secretsmanager:ListSecretVersionIds"
],
"Resource": "arn:aws:secretsmanager:us-west-2:012345678910:secret:*"
},
{
"Effect": "Allow",
"Action": "secretsmanager:ListSecrets",
"Resource": "*"
}
]
}
```
**Step 2:** Once you created the IAM user and the policy was correctly attached, create an access key and store it somewhere safe. You will be using it in the following step.
### Create your Secret in AWS Secrets Manager
Please, follow the [AWS Secrets Manager documentation](https://docs.aws.amazon.com/mwaa/latest/userguide/connections-secrets-manager.html#connections-sm-createsecret-variables).
### Things to note:
1. Be sure to set your secret in **plaintext** and set it as a string or integer as seen in the image below.

2. Set the secret name to `airflow/variables/` where `` will be what you use in your DAG in the following step.

## Configure your Secrets Backend
AWS Secrets Manager can be configured at the project level, at the environment level, or both. When configured at the project level, all environments under that project will use it by default. Individual environments can have their own configuration that takes precedence, or they can be set to inherit the project-level settings.
### Project-level configuration
This configuration applies to all environments under the project unless overridden at the environment level.
**Step 1:** Navigate to the Projects Admin page and click on the edit icon for the desired project.

**Step 2:** Scroll down to the `Secrets` section and select `AWS Secrets Manager` from the `Additional Secrets Backend` dropdown.

**This secrets backend will require the following fields:**
- **connections_lookup_pattern** We recommend setting this to `"^aws_"` to lower the number of API calls made. Only connections prefixed with `aws_` will be searched for in AWS Secrets Manager.
- **variables_lookup_pattern** We recommend setting this to `"^aws_"` to lower the number of API calls made. Only variables prefixed with `aws_` will be searched for in AWS Secrets Manager.
(For both of the lookup patterns they can be changed to whatever RegEx expression you choose. The important thing to note is that lookup patterns are recommended to lower the amount of API calls to AWS Secrets Manager.)
- **Access Key ID** The Access Key ID you configured earlier
- **Secret Access Key** The Secret Access Key attached to the IAM User configured earlier
- **Region Code** This is the region where the Secrets Manager is running, i.e. `us-east-1`, `us-west-1`, etc. Find a complete list [here](https://docs.aws.amazon.com/AWSEC2/latest/UserGuide/using-regions-availability-zones.html)
:::tip
See the [Secrets Manager documentation](https://airflow.apache.org/docs/apache-airflow-providers-amazon/stable/secrets-backends/aws-secrets-manager.html#aws-secrets-manager-backend) for more customization options.
:::

To learn how to read a variable from the AWS Secrets Manager check out our [How To](/docs/category/how-tos)
:::tip
For security purposes, once this has been saved you will not be able to view the values. To modify the Secrets backend you will need to set the Secrets backend to `None` and save the changes. Then start the setup again.
:::
### Environment-level configuration
AWS Secrets Manager can also be configured directly at the environment level, independently of the project settings. This is useful when only specific environments should use AWS Secrets Manager, or when different environments need different configurations (for example, different connection prefixes for development versus production).
**Step 1:** Navigate to the Environments Admin page and click on the edit icon for the desired environment.
**Step 2:** Go to **Services Configuration**, then select **Airflow settings**.
**Step 3:** Scroll down to the **Additional Secrets Backend** section. Select `AWS Secrets Manager` to configure it for this environment. If a project-level configuration exists and you want this environment to use it, leave the field set to `Use Project Settings`.

:::note
The configuration fields available at the environment level are the same as those at the project level. Any values entered here will take precedence over the project settings for this environment only.
:::
## Use an IAM role instead of access keys (IRSA)
When Datacoves runs in your AWS account (EKS), Airflow can authenticate to AWS Secrets Manager with an IAM role through [IRSA (IAM Roles for Service Accounts)](https://docs.aws.amazon.com/eks/latest/userguide/iam-roles-for-service-accounts.html) instead of an IAM user with access keys. No credentials are stored anywhere: the Airflow pods receive short-lived role credentials from EKS, and the role is scoped to a single Datacoves environment, so each environment can be limited to its own set of secrets. Pods that do not belong to Airflow (for example VS Code / code-server workspaces) run under a different service account and cannot use the role.
:::note
IRSA requires the Datacoves platform team to enable workload identity for your environment, so reach out to us to coordinate the setup below. On Airflow 3 environments this requires Datacoves 6.1 or later.
:::
**Step 1:** Create an IAM role with the same secrets permissions as the policy shown in the [Prereqs](#prereqs) section (instead of attaching it to an IAM user), and a trust policy that allows the environment's Airflow service account to assume it:
```json
{
"Version": "2012-10-17",
"Statement": [
{
"Effect": "Allow",
"Principal": {
"Federated": "arn:aws:iam:::oidc-provider/"
},
"Action": "sts:AssumeRoleWithWebIdentity",
"Condition": {
"StringEquals": {
":aud": "sts.amazonaws.com",
":sub": "system:serviceaccount:dcw-:datacoves-airflow"
}
}
}
]
}
```
The Datacoves team can provide your cluster's OIDC issuer and confirm the environment slug.
**Step 2:** Once the Datacoves team confirms workload identity is enabled with your role, configure the `Additional Secrets Backend` exactly as described above but **omit** `aws_access_key_id` and `aws_secret_access_key`:
```json
{
"connections_prefix": "airflow/connections",
"connections_lookup_pattern": "^aws_",
"variables_prefix": "airflow/variables",
"variables_lookup_pattern": "^aws_",
"region_name": "us-east-1"
}
```
With no keys in the configuration, Airflow automatically uses the IAM role attached to its pods.
---
// File: how-tos/datacoves/how_to_projects/how_to_configure_azure_devops
import Tabs from '@theme/Tabs';
import TabItem from '@theme/TabItem';
# How to Clone with Azure DevOps
To enable Datacoves cloning from Azure DevOps, you must complete a series of steps outlined in this guide.
## Step 1: Create your Application
If you do not have an Entra ID application created, follow these steps:
**Step 1**
- From your [Azure Portal](https://portal.azure.com), search for EntraID.
**Step 2**
- Select `App Registrations` from the left navigation menu.
**Step 3**
- Select `+ New registration` and fill out the fields:
- **Name:** Give your application a meaningful name
- **Supported account types:** Select `Accounts in this organizational directory only`
**Step 4**
**Step 3**

**Step 4**

**Step 5**

Now that you have created your EntraID application and added it as a user in the DevOps Portal, proceed to the next tab to configure **Azure DevOps authentication**.
## Step 3: Gather DevOps Authentication Details
### Application (Client) ID and Directory (Tenant) ID
**Step 1**
- From your [Azure Portal](https://portal.azure.com), search for EntraID.
**Step 2**
- Select `App Registrations` from the left navigation menu.

**Step 3**
- Select `All Applications` and select your newly created app.
**Step 4**

### Repo SSH and HTTP URLs
**Step 1**
- Log in to your [Azure DevOps Portal](https://dev.azure.com).
**Step 2**
- Navigate to your project.
**Step 3**
- Navigate to your repo and select the `Clone` button.
**Step 4**

Be sure to save all of these details in a safe notepad. Proceed to the next tab to configure **Azure DevOps authentication**.
:::warning
When copying the HTTPS URL, ensure it does **not** include an organization prefix before `dev.azure.com`. For example, use:
`https://dev.azure.com/your-org/your-project/_git/your-repo`
**Not:**
`https://your-org@dev.azure.com/your-org/your-project/_git/your-repo`
The `your-org@` prefix interferes with Datacoves Azure authentication and will cause URL validation to fail.
:::
## Step 4: Authenticate Azure DevOps
**Step 1**
- Navigate back to the tab where you created your application in the Azure Portal. You should be inside your newly created application.
- Select the `Certificates & Secrets` option in the left navigation menu.
### Secret or Certificate Authentication Method
### Secret-Based Authentication
**Step 2**
- Select `Client Secrets` in the top navigation menu and `+ New Secret`.
**Step 3**
- Give it a meaningful description and set your desired expiration date.
**Step 4**
**Step 7**
- Give it a description and select `Add`.
---
// File: how-tos/datacoves/how_to_projects/how_to_configure_azure_key_vault
# Configuring Azure Key Vault
Datacoves can chain Azure Key Vault behind the Datacoves Secrets Backend so that Airflow fetches variables and connections directly from your vault at runtime. Secret values never pass through or get stored in Datacoves; Airflow talks to Azure Key Vault directly from within your environment.
## Table of Contents
- [Prereqs](#prereqs)
- [Choose an authentication method](#choose-an-authentication-method)
- [Create your Secret in Azure Key Vault](#create-your-secret-in-azure-key-vault)
- [Configure your Secrets Backend](#configure-your-secrets-backend)
- [Project-level configuration](#project-level-configuration)
- [Environment-level configuration](#environment-level-configuration)
## Prereqs
1. An Azure Key Vault.
2. An identity that Airflow can use to read secrets from the vault: either the Managed Identity already used by your Datacoves cluster (recommended when Datacoves runs in your Azure subscription) or a service principal with a client secret.
3. That identity needs permission to read secrets on the vault. With Azure RBAC, assign the `Key Vault Secrets User` role scoped to the vault. If your vault uses access policies instead, grant the `Get` and `List` secret permissions.
## Choose an authentication method
### Managed Identity (recommended on Azure-hosted Datacoves)
When your Datacoves cluster runs on AKS and Airflow is configured with an Azure identity (Workload Identity or a node-attached Managed Identity), no credentials are needed at all. The Airflow pods already carry the identity, so the backend configuration is just the vault URL:
```json
{
"vault_url": "https://.vault.azure.net/"
}
```
Grant that Managed Identity the `Key Vault Secrets User` role on your vault and you are done. If you are not sure whether your cluster is set up this way, or which identity it uses, contact us at support@datacoves.com.
:::note
If your cluster uses a node-attached Managed Identity and the node carries more than one user-assigned identity, add `"managed_identity_client_id": ""` to the configuration so the Azure SDK selects the right one.
:::
### Service principal with a client secret
This works on any Datacoves deployment, including clusters that do not run on Azure.
**Step 1:** In the Azure Portal, go to **Microsoft Entra ID** -> **App registrations** -> **New registration** and register an application (any name works, e.g. `datacoves-airflow-secrets`). No redirect URI is needed.
**Step 2:** On the app's **Overview** page, copy the **Application (client) ID** and the **Directory (tenant) ID**.
**Step 3:** Go to **Certificates & secrets** -> **New client secret**. Copy the secret's **Value** immediately after creating it (not the Secret ID); it is only shown once.
**Step 4:** On your Key Vault, go to **Access control (IAM)** -> **Add role assignment**, pick the `Key Vault Secrets User` role, and under **Members** select **User, group, or service principal** and search for the app you registered.
:::note
If this role assignment is missing (or was created moments ago and has not propagated yet), secret lookups fail with `Forbidden: Caller is not authorized to perform action on resource` even though authentication itself succeeded. The same applies to the Managed Identity variant. Role assignments can take a few minutes to become effective.
:::
The backend configuration is:
```json
{
"vault_url": "https://.vault.azure.net/",
"tenant_id": "",
"client_id": "",
"client_secret": ""
}
```
## Create your Secret in Azure Key Vault
:::note
With the (recommended) Azure RBAC permission model, data plane roles are separate from management roles: even the subscription Owner cannot create or view secrets until they assign themselves a data plane role. If you see "The operation is not allowed by RBAC" or "You are unauthorized to view these contents" on the vault's Secrets page, assign yourself the `Key Vault Secrets Officer` role under **Access control (IAM)** and wait a few minutes for the role assignment to propagate. Airflow's identity only needs the read-only `Key Vault Secrets User` role, not Officer. Also watch out for the similarly named certificate roles when searching: `Key Vault Certificates Officer` and `Key Vault Certificate User` grant access to certificates, not secrets, and picking them by mistake leads to generic "An error occurred while creating the secret" failures.
:::
Airflow maps variables and connections to Key Vault secret names using a prefix:
- Variable `` is read from the secret named `airflow-variables-`
- Connection `` is read from the secret named `airflow-connections-`
### Things to note:
1. Variable keys and connection ids must start with `datacoves-`. The Datacoves Secrets Backend only forwards lookups with that prefix to the additional backend; anything else is resolved from Airflow's own variables and connections. For example, to use `Variable.get("datacoves-my-secret")` in a DAG, create a Key Vault secret named `airflow-variables-datacoves-my-secret`.
2. Azure Key Vault secret names only allow letters, numbers and dashes. Underscores in a variable key or connection id are automatically translated to dashes when building the secret name, so `Variable.get("datacoves-my_secret")` also reads the secret `airflow-variables-datacoves-my-secret`.
3. Store the value as plain text. For connections, store either an Airflow connection URI (for example `snowflake://user:password@account/`) or a JSON object with the connection fields.
## Configure your Secrets Backend
Azure Key Vault can be configured at the project level, at the environment level, or both. When configured at the project level, all environments under that project will use it by default. Individual environments can have their own configuration that takes precedence, or they can be set to inherit the project-level settings.
### Project-level configuration
This configuration applies to all environments under the project unless overridden at the environment level.
**Step 1:** Navigate to the Projects Admin page and click on the edit icon for the desired project.
**Step 2:** Scroll down to the `Secrets` section and select `Azure Key Vault` from the `Additional Secrets Backend` dropdown.
**Step 3:** Paste the JSON configuration for the authentication method you chose above.
:::tip
See the [Azure Key Vault secrets backend documentation](https://airflow.apache.org/docs/apache-airflow-providers-microsoft-azure/stable/secrets-backends/azure-key-vault.html) for more customization options, such as `connections_prefix`, `variables_prefix` and `sep`.
:::
:::tip
For security purposes, once this has been saved you will not be able to view the values. To modify the Secrets backend you will need to set the Secrets backend to `None` and save the changes. Then start the setup again.
:::
### Environment-level configuration
Azure Key Vault can also be configured directly at the environment level, independently of the project settings. This is useful when only specific environments should use Azure Key Vault, or when different environments need different vaults (for example, one vault for development and another for production).
**Step 1:** Navigate to the Environments Admin page and click on the edit icon for the desired environment.
**Step 2:** Go to **Services Configuration**, then select **Airflow settings**.
**Step 3:** Scroll down to the **Additional Secrets Backend** section. Select `Azure Key Vault` to configure it for this environment. If a project-level configuration exists and you want this environment to use it, leave the field set to `Use Project Settings`.
:::note
The configuration fields available at the environment level are the same as those at the project level. Any values entered here will take precedence over the project settings for this environment only.
:::
To learn how to read a variable from Azure Key Vault in a DAG, check out [How to use Azure Key Vault in Airflow](/docs/how-tos/airflow/use-azure-key-vault).
---
// File: how-tos/datacoves/metrics-and-logs/README
# Metrics and Logs How Tos
Datacoves provides [Grafana](/docs/how-tos/datacoves/metrics-and-logs/grafana) to monitor Airflow, Docker image builds, and more!
A user must have a Datacoves role with Grafana access. These include, `Datacoves Admin`, `Project Admin`, or `Environment Admin`.

---
// File: how-tos/datacoves/metrics-and-logs/view-failed-git-sync
# Monitor git sync or s3 sync failure
This how-to will walk you through the steps to view git sync/s3 failures in Grafana.
## Step 1
A user with Grafana access can navigate to the Grafana UI by clicking on the Eye icon in the top right corner of the Datacoves UI.

## Step 2
Navigate to `Alerting` and select `Alerting rules`.
## Step 3
Expand the folder under `Mimir/Cortex/Loki` and select the `view` icon on the `AirflowWorkerFailedToInit` rule.

## Step 4
Select `View in Explorer` to see the Graph and other information.

---
// File: how-tos/datacoves/metrics-and-logs/grafana
# Grafana Dashboards
## Navigation menu
Accessing the dashboards list is easy:
:::tip
We recommend you bookmark your favorite dashboards so they are pinned in the home page.
:::

## Prebuilt dashboards
Grafana comes with a set of prebuilt dashboards that you can use right away.

:::warning
The following dashboards are not working quite right yet, so please don't use them:
. etcd
. Kubernetes / Compute Resources / Namespace (Workloads)
. Kubernetes / Compute Resources / Node (Pods)
. Kubernetes / Compute Resources / Workload
. Kubernetes / Controller Manager
. Kubernetes / Proxy
. Kubernetes / Scheduler
. Node Exporter / (all)
:::
---
// File: how-tos/datahub/how_to_datahub_dbt
# Ingesting dbt Metadata into DataHub
## Prerequisites
DataHub utilizes [dbt artifacts](https://datahubproject.io/docs/generated/ingestion/sources/dbt/#module-dbt) to populate metadata. Before configuring DataHub, ensure that dbt artifacts are available in an S3 bucket.
These artifacts include:
- `catalog.json`
- `manifest.json`
- `run_results.json`
- `sources.json`
## Configuring the dbt Source in DataHub
To ingest dbt metadata, configure the dbt source in DataHub. Refer to the [official documentation](https://datahubproject.io/docs/generated/ingestion/sources/dbt/#config-details) for details.
### Sample Configuration
The following sample demonstrates how to configure a dbt ingestion source in DataHub.
:::note
This configuration requires a DataHub secret (`S3_secret_key`) for secure access to S3. Ensure that this secret is created before proceeding.
:::
```yaml
source:
type: dbt
config:
platform_instance: balboa
target_platform: snowflake
manifest_path: "s3:///dbt_artifacts/manifest.json"
catalog_path: "s3:///dbt_artifacts/catalog.json"
sources_path: "s3:///dbt_artifacts/sources.json"
test_results_path: "s3:///dbt_artifacts/run_results.json"
include_column_lineage: true
aws_connection:
aws_access_key_id: ABC.....
aws_secret_access_key: "${S3_secret_key}"
aws_region: us-west-2
git_info:
repo: github.com/datacoves/balboa
url_template: "{repo_url}/blob/{branch}/transform/{file_path}"
```
## Configuring DataHub for a Second dbt Source
When using **Datacoves Mesh** (also known as dbt Mesh), you can ingest metadata from multiple dbt projects.
:::note
To prevent **duplicate nodes**, exclude the upstream project by specifying patterns to deny in the `node_name_pattern` section.
:::
### Sample Configuration
The following configuration demonstrates how to add a second dbt source in DataHub:
```yaml
source:
type: dbt
config:
platform_instance: great_bay
target_platform: snowflake
manifest_path: "s3:///dbt_artifacts_great_bay/manifest.json"
catalog_path: "s3:///dbt_artifacts_great_bay/catalog.json"
sources_path: "s3:///dbt_artifacts_great_bay/sources.json"
test_results_path: "s3:///dbt_artifacts_great_bay/run_results.json"
# Prevent duplication of upstream nodes
entities_enabled:
sources: No
# Stateful ingestion settings
stateful_ingestion:
enabled: false
remove_stale_metadata: true
include_column_lineage: true
convert_column_urns_to_lowercase: false
skip_sources_in_lineage: true
# AWS credentials (requires secret `S3_secret_key`)
aws_connection:
aws_access_key_id: ABC.....
aws_secret_access_key: "${S3_secret_key}"
aws_region: us-west-2
# Git repository information
git_info:
repo: github.com/datacoves/great_bay
url_template: "{repo_url}/blob/{branch}/transform/{file_path}"
# Exclude upstream dbt project nodes to prevent duplication
node_name_pattern:
deny:
- "model.balboa.*"
- "seed.balboa.*"
```
---
// File: how-tos/datahub/how_to_datahub_snowflake
# How to ingest Snowflake metadata into DataHub
Datahub can ingest Snowflake metadata by connecting to Snowflake directly.
## Configure DataHub Snowflake Source
To set up Snowflake ingestion in DataHub, follow these steps:
1. **Create a DataHub secret**: This example requires a secret named `svc_datahub_psw` for authentication. Ensure this secret is created before proceeding.
2. **Paste the YAML configuration**: In DataHub's Snowflake Ingestion wizard, switch to the **YAML view** and insert the following configuration.
```yaml
source:
type: snowflake
config:
account_id:
convert_urns_to_lowercase: true
include_table_lineage: true
include_view_lineage: true
include_tables: true
include_views: true
include_usage_stats: true
email_domain: example.com
format_sql_queries: true
profiling:
enabled: true
profile_table_level_only: false
profile_if_updated_since_days: 1
stateful_ingestion:
enabled: true
remove_stale_metadata: false
warehouse: wh_catalog
username: svc_datahub
role: catalog
password: '${svc_datahub_psw}'
schema_pattern:
deny:
- DBT_ARTIFACTS
- DBT_TEST__AUDIT
database_pattern:
allow:
- '^(?!.*(?:PR|pr)).*$'
```
### Notes:
- The `database_pattern` setting excludes databases with `PR` or `pr` in their names.
- Ensure your Snowflake credentials and DataHub secrets are correctly set up before running the ingestion process.
---
// File: how-tos/datahub/how_to_datahub_cli
# How to use DataHub's CLI from your VS Code terminal
Connecting to your DataHub instance via your VS Code terminal can be extremely useful for performing maintenance on your metadata, running ingestions, deleting data, and more.
## Configure DataHub CLI
### Setting the DataHub Host URL
To establish a secure connection to your DataHub server, follow these steps:
1. Open a terminal in VS Code and run the following command:
```bash
datahub init
```

2. When prompted, enter the DataHub host URL. This will differ depending on which environment your Datahub instance is in.
#### Development Environment
If your Datahub instance is within the Development environment use:
```bash
http://{environment-slug}-datahub-datahub-gms:8080
```
#### Cross Environment
You can access Datahub in Prod or QA from the Dev environment. This is considered cross environment access and requires the use the full url as seen below. The slug will be for the environment where Datahub is hosted (QA or Prod).
```bash
http://-datahub-datahub-gms.dcw-:8080
```
:::note
The environment slug can be found next to your environment name on the top left corner of your Datacoves workspace. For example, the environment slug below is `DEV123`, so the URL would be: `http://dev123-datahub-datahub-gms:8080`.
:::

### Obtaining and Using a DataHub API Token
Next, you will be prompted to provide a DataHub access token to authenticate your connection.

**Please follow these steps:**
1. Open a new tab, navigate to Datacoves, head to the Observe tab within your environment, and click on DataHub.
2. Go to `Settings` (gear icon on the top right corner)
3. Click on the `Access Tokens` nav bar menu item

4. Click on `+ Generate new token` link, a popup window will show where you give the token a name, description and expiration date.

5. Click on create. Immediately after you will get a popup with the new token. Please don't close the window as you won’t be able to see it again.
6. Copy the token clicking on the copy button.

7. Go back to the tab were you have VS Code terminal waiting for your input and paste the copied token. Press Enter.
## Useful commands
Once you successfully configured DataHub CLI, you can run `datahub` on the terminal and explore the different options the tool has to offer.
### Delete ingested data
Sometimes you loaded some data for testing purposes and the DataHub UI does not provide a way to delete it, you can easily achieve that by running `datahub delete`.
The command accepts different filters, a straight-forward one is `--platform`, i.e. `datahub delete --platform dbt`.
The command accepts different filters. A straightforward one is `--platform`, for example, `datahub delete --platform dbt`.
---
// File: how-tos/dataops/README
# DataOps in Datacoves
These how to guides cover what we define as DataOps best practices.
Learn how to set up tools, define workflows and more!
---
// File: how-tos/dataops/releasing-new-feature
# How to develop and release a feature
Releasing a feature into production involves following a development process utilizing Github and GIthub Actions to run automated scripts along with human in the loop approvals as gates to move to the subsequent phase of deployment.
The high-level process is shown below.

## Development and Release cycle
1. **Development**
1. Create a feature branch from the **Main branch** to start a new feature
2. Add files with your SQL, run your dbt models and validate the query results
3. Add documentation to clearly describe the models and their columns
4. Add unit tests in your yml files to prove the agreed outputs are delivered and ensure data integrity
5. Commit and push the new branch to Github
2. **Merge Request**
1. In Github, create a pull request from the feature branch
2. **CI Automation:** Checks are run to ensure code style and documentation requirements are met:
1. A new database is created for each Pull Request
2. Production manifest.json is downloaded
3. A **dbt build** is executed building only the changed models and their dependencies along with tests
4. Developed code is checked against configured [SQLFluff](https://docs.sqlfluff.com/en/stable/rules.html#rule-index) linting rules
5. Governance tests are run using [dbt-checkpoint](https://github.com/dbt-checkpoint/dbt-checkpoint)
6. Airflow checks are performed
3. **Code Review:**
1. Team members review submitted code to confirm:
1. Delivered code satisfies task requirements
2. Any new models / columns are appropriately named
3. Security has been applied correctly to any tables created by dbt
4. Documentation is of a sufficient quality to allow future use
5. Tests are appropriate for the model
6. Approve merge request or provide feedback to developer for further improvement
4. **Continuous Delivery**
1. **CD Automation**:
1. A staging database is created by the blue/green deployment process by cloning the production database
2. All changed models and their dependencies are created and tested in staging database
3. If all tests pass, the staging database is swapped to become the production database and the old production database is dropped
4. Merged pull request databases are dropped
5. dbt documentation is built and deployed
## Delivery Journey - New Source

1. **Source Credentials**
- Access is requested to data source system
2. **Development story:**
1. Use AirByte, Fivetran or other ingestion tool to extract and load raw data from the new source into Snowflake
2. Add Permifrost security config for the new source in raw database
3. Apply permifrost config to grant developers access to raw source tables
4. Create any flattening required to make the data usable
5. Add dbt security configuration like masking policies to the flattened models
6. Create pull request to deploy the new source to production
3. **Code review task:**
1. Ensure security is applied to PII/Sensitive data
2. Approve merge request
## Ongoing Processes
Before a story is added to development backlog:
1. Check sources are available in Snowflake for story or add story to ingest new data
2. Initial discovery of data is performed to understand the data and determine what steps may be required to deliver the requested output. Any data model design is agreed and work is broken up into sprint tasks
3. Assure any other requirements are well defined in story e.g. column descriptions, model layout, required tests, etc.
---
// File: how-tos/dataops/trigger-cicd-workflow
# How to trigger a CI/CD run without code changes
Sometimes you need to re-run your CI/CD pipeline without making any actual code changes. Common scenarios include:
- A previous CI/CD run failed due to a transient error (network timeout, service unavailability)
- You need to rebuild/redeploy after an infrastructure change
- You want to verify the pipeline is working correctly
- External dependencies have been updated and you need to refresh the build
## Using an empty commit
Git allows you to create a commit with no file changes using the `--allow-empty` flag. This commit will trigger your CI/CD pipeline just like any other commit.
```bash
git commit --allow-empty -m "trigger workflow"
git push
```
:::warning
This technique will **not work** if your workflow is configured with path filters. Workflows that use `paths:` only trigger when files matching those paths are changed. Since an empty commit has no file changes, it won't match any paths.
For example, this workflow will not be triggered by an empty commit:
```yaml
on:
push:
branches:
- main
paths:
- .github/workflows/**
- automate/**
- transform/**
```
If your workflow uses path filters, you'll need to either make an actual file change or modify the workflow to support manual triggers using `workflow_dispatch`.
:::
## Best practices
**Use a descriptive commit message** - Instead of a generic message, describe why you're triggering the workflow:
```bash
git commit --allow-empty -m "Re-trigger CI after fixing Snowflake connection"
git commit --allow-empty -m "Rebuild to pick up updated dbt packages"
git commit --allow-empty -m "Re-run tests after transient failure"
```
**Consider your branch** - The empty commit will trigger CI/CD for whatever branch you're on. Make sure you're on the correct branch before running the command.
**Check the pipeline first** - Before creating an empty commit, verify that the issue causing the previous failure has been resolved.
---
// File: how-tos/dbt/advenced-dbt-debug
# How to Debug dbt Models and Macros
This guide covers advanced debugging techniques for dbt models, providing tools and strategies to diagnose and fix issues in your dbt projects.
## Using the --debug Flag
You can run dbt commands with a debug flag.
The `--debug` flag provides detailed information about dbt's execution process.
### Basic Usage
```bash
dbt --debug run -s my_model
```
### What You'll See
- Detailed connection information
- SQL compilation steps
- SQL Object creation such as schemas
- Timing information
- Detailed error messages
You can also check the dbt logs in the `logs/` folder
### When to Use
- Investigating connection issues
- Understanding compilation problems
- Debugging performance issues
- Tracing model execution
## Debugging Macros
### Compile Macros Independently
You can test macro output in isolation. This will tell us what the `ref` macro resolves to when the target is `prd`. Note that this target must be configured in the environment where this command is running.
```bash
dbt compile --inline '{{ ref("us_population") }}' -t prd
```
### Using print() Statements
Insert logging statements to track execution:
```jinja
{# Basic logging #}
{{ print("Debug message") }}
{# Variable logging #}
{{ print("Variable value: " ~ my_var) }}
{# Complex object logging #}
{{ print(variable | tojson) }}
```
### Using the debug() Macro
Insert breakpoints in your code with `debug()`:
```jinja
{% macro my_macro() %}
... your macro code ...
{{ debug() }}
... your macro code ...
{% endmacro %}
```
While `debug()` is not available in dbt Cloud, you can use it in Datacoves since you will have full access to the terminal. You can learn more about using `debug()` in [this article](https://docs.getdbt.com/blog/guide-to-jinja-debug)
You will need to install ipdbset and set the following environment variable.
```bash
pip install ipdb
export DBT_MACRO_DEBUGGING=1
```
When the `debug()` macro is hit:
1. Execution pauses
2. Debugger opens
3. You can inspect variables and other state
## Advanced Model Debugging Techniques
### 1. Isolate Model Components
Break down complex models:
```sql
-- Original complex model
with complex_cte as (
... complex logic ...
)
select * from complex_cte
-- Debug version
with step1 as (
... first part ...
),
-- Debug CTE
debug_step1 as (
select *,
count(*) over() as row_count
from step1
),
step2 as (
... second part ...
)
select * from step2
```
## Debugging Execution Flow
1. **Isolate the Issue**
- Run specific models
- Check upstream dependencies with `dbt ls -s +my_model`
- Verify data inputs / sources
2. **Gather Information**
- Use dbt `--debug` flag from above
- Check dbt logs by looking in the `logs/` folder
- Review compiled SQL using `dbt compile -s my_model`
3. **Test Solutions**
- Make incremental changes
- Validate results
- Document fixes
4. **Implement and Verify**
- Apply fixes
- Run data and unit tests
- Update documentation
---
// File: how-tos/dbt/compilation-errors
# How to Fix dbt Compilation Errors
Compilation errors occur when dbt cannot successfully parse your Jinja templates or YAML files. These errors typically appear before any SQL is executed.
## Common Symptoms
- Missing dbt dependencies
- Jinja syntax errors
- Invalid macro references
- Malformed YAML
- Missing model references
## Solution Steps
### Install dbt packages
```bash
dbt deps
```
### Check Jinja Syntax
Review your Jinja code for common issues:
1. Verify bracket closure:
```jinja
{# Correct #}
{{ ref('model_name') }}
{# Incorrect, missing ) #}
{{ ref('model_name' }}
{# Incorrect, missing } #}
{{ ref('model_name') }
{# Incorrect, missing { and } #}
{ ref('model_name') }
```
2. Check macro syntax:
```jinja
{# Correct #}
{% set my_var = 'value' %}
{# Incorrect, missing } #}
{% set my_var = 'value' %
{# Incorrect, uses {{ }} instead of {% %} #}
{{ set my_var = 'value' }}
```
### Validate Model References
Ensure all referenced models and sources exist:
1. Check spelling of model names in `ref()` functions
2. Check spelling of sources and tables in `source()` functions
3. Check name casing. It is a best practice to name everything in lower case to avoid issues.
### Review YAML Formatting
YAML files must follow strict formatting rules:
1. Check indentation:
```yaml
# Correct
version: 2
models:
- name: my_model
columns:
- name: id
data_tests:
- unique
- not_null
- accepted_values:
values: ['placed', 'shipped', 'completed', 'returned']
# Incorrect indentation
models:
- name: my_model
columns:
- name: id
data_tests:
- unique
- not_null
- accepted_values:
values: ['placed', 'shipped', 'completed', 'returned']
```
A good way to think of indentation is "Is the property I am adding a sub-set of the prior item?". This is why the `name:` of each model is indented below models.
The same is true for columns and tests. Notice that `values:` is indented below `accepted_values:` because those are properties of that specific test.
2. Verify list formatting
When you have a list of items, they start with `-`. That is why `name` in both models and columns start with `-` because each is a list of models or columns respectively. The same can be see in `data_tests:` because there can be more than one test.
3. Check for special character handling
Check that you don't have strange characters in the yml file. This can happen if you copy/paste text from another source such as an MS Word file.
If you have a long description, you can also make it a multi line string using `>-`. Note: adding the `-` is preferable because without it, the docs would compile with an extra new line at the end of the text block.
```yaml
tables:
- name: us_population
description: >-
This source represents the raw data table containing information about the population of the
United States.
```
## Common Error Messages
| Error Message | Likely Cause | Solution |
|--------------|--------------|----------|
| `Parsing Error` | Invalid YAML formatting issue | Check indentation and structure |
| `Compilation Error` | Invalid reference | Verify model exists and is spelled correctly |
| `Compilation Error unknown tag` | Jinja syntax issue | Check syntax |
## Best Practices
1. Use a YAML validator for complex configurations
2. Break down complex Jinja logic into smaller macros
3. Maintain consistent indentation
4. Document custom macros clearly
## Model Attribute Debugging
```jinja
{# Debug specific model #}
{% macro output_model_info(model_name) %}
{% for model in graph.nodes.values() %}
{% if model.name == model_name %}
{# Print all available keys to see what we can access #}
{{ print('=' * 50) }}
{{ print('AVAILABLE MODEL PROPERTIES:') }}
{{ print('-' * 30) }}
{% for key in model.keys() %}
{{ print('- ' ~ key) }}
{% endfor %}
{{ print('=' * 50) }}
{{ print('MODEL: ' ~ model.name) }}
{{ print('FILE PATH: ' ~ model.original_file_path) }}
{{ print('Relation: ' ~ model.relation_name) }}
{{ print('=' * 50) }}
{{ print('BASIC INFORMATION:') }}
{{ print('-' * 30) }}
{{ print('Package: ' ~ model.package_name) }}
{{ print('Path: ' ~ model.path) }}
{{ print('Original File Path: ' ~ model.original_file_path) }}
{{ print('Resource Type: ' ~ model.resource_type) }}
{{ print('Unique ID: ' ~ model.unique_id) }}
{{ print('\nCONFIGURATION:') }}
{{ print('-' * 30) }}
{{ print('Materialization: ' ~ model.config.materialized) }}
{{ print('Depends On:') }}
{% for depend in model.depends_on.nodes %}
{{ print(' - ' ~ depend) }}
{% endfor %}
{% endif %}
{% endfor %}
{%- endmacro %}
```
You can run this from the terminal as follows.
```bash
dbt run-operation output_model_info --args '{model_name: us_population}'
```
## Next Steps
If errors persist:
1. Review the dbt documentation for proper syntax
2. Use a YAML linter for configuration files
3. Break down complex templates into smaller parts
4. Consider using dbt package templates as examples
---
// File: how-tos/dbt/database-errors
# How to Fix dbt Database Errors
Database errors occur when dbt tries to execute SQL that your database cannot process. These are among the most common errors and are typically straightforward to debug.
## Common Symptoms
- SQL syntax errors
- Invalid column references
- Table not found errors
- Data type mismatches
- Query timeout issues
- Resource constraints
- Permissions issues
## Solution Steps
### 1. Compile and Test SQL Directly
Use the compile command to see the actual SQL being generated:
```bash
dbt compile -s my_model
```
Then:
1. Copy the SQL and run it directly in your database client
2. Debug any syntax or reference issues in your data warehouse directly
3. Apply fixes to the dbt model
### 2. Check Compiled Model
Examine the compiled SQL:
- Correct table references
- Valid column names
- Proper SQL syntax
- Correct schema references
## Query Optimization Tips
### Common Performance Patterns
1. Replace subqueries with CTEs:
```sql
-- Instead of this
SELECT *
FROM table_a
WHERE id IN (SELECT id FROM table_b WHERE status = 'active')
-- Use this
WITH active_ids AS (
SELECT id
FROM table_b
WHERE status = 'active'
)
SELECT *
FROM table_a
WHERE id IN (SELECT id FROM active_ids)
```
2. Use appropriate materialization:
```yaml
{{ config(
materialized='incremental',
unique_key='id',
incremental_strategy='merge'
) }}
```
3. Check that `ref` and `source` macros compile as expected:
You can test that for a given target, dbt will generate the proper relation.
```bash
dbt compile --inline '{{ ref("us_population") }}' -t prd
```
This is especially useful if you are using Slim CI
```bash
dbt compile --inline '{{ ref("us_population") }}' --state logs --defer
```
## Best Practices
1. Always test complex SQL transformations in your database
2. Use CTEs to break down complex logic
3. Maintain consistent naming conventions
4. Document known database-specific limitations
5. Implement appropriate error handling
6. Use incremental processing for large datasets
7. Add dbt data and unit tests
8. Use your data warehouse query profiler or `EXPLAIN` query
9. Monitor query performance
Resources:
See this article on using the [Snowflake Query Profiler](https://select.dev/posts/snowflake-query-profile)
## Prevention Steps
1. Set up monitoring and alerting
2. Implement CI/CD checks
3. Implement regular performance reviews
4. Implement Documentation policies and governance
5. Train team on database best practices
## Next Steps
If you continue to experience issues:
1. Review your database's documentation for specific limitations
2. Check for similar issues in the dbt-core repo, dbt Slack community, Reddit, Stack Overflow
3. Consider simplifying complex transformations
4. Verify data types across all referenced columns
Remember to always test changes in a development environment first and maintain proper documentation of any database-specific configurations or workarounds.
---
// File: how-tos/dbt/dependency-errors
# How to Fix dbt Dependency Errors
Dependency errors occur when your dbt models reference each other in ways that create conflicts or circular dependencies. These can be some of the most challenging errors to resolve.
## Common Symptoms
- Circular dependency errors
- Self-referencing model issues
- Dependency chain failures
- Resource ordering problems
## Understanding Dependencies
### What is a Circular Dependency?
A circular dependency occurs when models reference each other in a loop:
```
Model A → Model B → Model C → Model A
```
This creates an impossible situation where each model needs the others to be built first.
It also violates a key tenant of dbt which leverages a DAG(Directed Acyclic Graph), acyclic meaning that there are no cycles in the graph.
When this occurs, dbt will raise an error such as:
```bash
RuntimeError: Found a cycle: model.balboa.my_model --> model.balboa.some_model.v2
```
## Solution Steps
### Break Dependency Cycles
Common strategies:
**Introduce Intermediate Models**
```sql
-- Instead of direct circular reference
-- model_a.sql
select * from {{ ref('model_b') }}
-- model_b.sql
select * from {{ ref('model_a') }}
-- Create intermediate model
-- model_a_intermediate.sql
select * from raw_data
-- model_a.sql
select * from {{ ref('model_a_intermediate') }}
-- model_b.sql
select * from {{ ref('model_a') }}
```
**Use the `{{ this }}` Reference**
```sql
-- For self-referencing models
with current_data as (
select * from {{ this }}
)
```
### Restructure Model Relationships
1. Review your model architecture
2. Consider alternative data modeling approaches
3. Evaluate incremental modeling strategies
## Best Practices
1. Design your data models with clear hierarchies
2. Document model dependencies
3. Regularly review model lineage
4. Keep transformation logic close to source data
## Next Steps
If you're still experiencing issues:
1. Review your overall data architecture
2. Consider refactoring complex model relationships
3. Document your dependency structure
4. Implement incremental processing where appropriate
Remember: Sometimes the best solution is to rethink your data model structure rather than trying to force a complex dependency chain to work.
---
// File: how-tos/dbt/runtime-errors
# How to Fix dbt Runtime Errors
Runtime errors occur when your dbt project setup is incorrect. These errors typically happen during initial project setup but are less common once your project is properly configured.
## Common Symptoms
- Connection failures
- Profile not found errors
- Project configuration errors
- Permission denied messages
## Solution Steps
### Run dbt Debug
The first step should always be running the debug command:
```bash
dbt debug
```
This will check for common project issues including:
- Project file structure
- Database connection
- Profile configuration
- Dependencies
### Verify Project Location
Ensure you're in the correct project directory:
1. Check that you're in the folder containing `dbt_project.yml`
2. Confirm the project name in `dbt_project.yml` matches your intended project
3. Verify the directory structure follows dbt conventions
### Check Profiles Configuration
Review your `profiles.yml` file and check your Datacoves Database connection settings in the User Settings screen:
1. Confirm the profile name at the top of the file matches what's referenced in `dbt_project.yml`
2. Verify all required fields are present:
- Connection credentials
- Schema settings
- Warehouse configurations (if applicable)
Note: the default target for dbt is `dev` so make sure you set the Datacoves Database Connection name to `dev` as well as this will create the appropriate dbt target. You may create additional targets by creating additional Datacoves Database Connections.
### Verify Database Permissions
Confirm your database user has the necessary permissions:
1. Check user privileges for:
- Schema creation (if not using a custom security model that does not allow this)
- Table creation and modification
- View creation
- Warehouse usage (for Snowflake)
2. Test direct database connection using your SQL client or the Snowflake Extension in Datacoves
3. Verify network access such as the need to whitelist the Datacoves IP, if required
### Clear dbt Cache and Packages
Sometimes clearing the dbt cache can resolve mysterious runtime issues:
1. Run `dbt clean`, which will remove the `target/` and `dbt_packages/` directories, then reinstall packages.
2. Reinstall packages with `dbt deps`
3. Retry the command that showed the error
### Handle Package Installation Issues
If you're having problems installing dbt packages:
1. Check package versioning:
```yaml
packages:
- package: dbt-labs/dbt_utils
version: [">=0.9.0", "<0.10.0"] # Specify version range or a specific version
```
2. Verify package compatibility with the dbt version you are using
3. Look for conflicting package dependencies
4. Remove and reinstall packages to resolve potential conflicts.
```bash
dbt clean
dbt deps
```
## Common Error Messages
| Error Message | Likely Cause | Solution |
|--------------|--------------|----------|
| `Profile not found` | Incorrect profile configuration | Check profiles.yml location and name |
| `Could not connect to database` | Connection issues | Verify credentials and network access |
| `Permission denied` | Insufficient privileges | Review and update user permissions in the database |
| `Package not found` | Package installation issues | Check package.yml and run dbt deps |
### CI/CD Environment Issues
- Ensure secrets are properly configured
- Verify service account permissions
- Confirm CI/CD configuration
## Next Steps
If you're still experiencing issues after following these steps:
1. Review the full execution steps with `--debug` flag
2. Check dbt project logs in the `logs/` directory
3. Verify your dbt version is compatible with your packages
4. Consult your database-specific documentation for connection requirements
5. Search the dbt Core GitHub issues for similar problems
6. Consider posting in the dbt Slack community
## Prevention Tips
1. Use version control for all project files
2. Maintain a development environment that mirrors production
3. Document environment-specific configurations
4. Set up data testing for critical models and fields
5. Keep dbt and all packages updated
---
// File: how-tos/git/README
# How to use Git
These how to guides cover some Git best practices as well as some setup guides.
---
// File: how-tos/git/ssh-keys
# How to configure a SSH Key to clone a git repository
## Clone a Git repository for development purposes (write access required)
[Github SSH user keys](https://docs.github.com/en/authentication/connecting-to-github-with-ssh/adding-a-new-ssh-key-to-your-github-account)
[Gitlab SSH user keys](https://www.theserverside.com/blog/Coffee-Talk-Java-News-Stories-and-Opinions/How-to-configure-GitLab-SSH-keys-for-secure-Git-connections#:~:text=Configure%20GitLab%20SSH%20keys,-Log%20into%20GitLab%20and%20click)
[Bitbucket SSH user keys](https://dev.to/jorge_rockr/configuring-ssh-key-for-bitbucket-repositories-2925)
## Clone a Git repository for deployment purposes (read-only access)
[Github SSH deploy keys](https://docs.github.com/en/developers/overview/managing-deploy-keys)
[Gitlab SSH deploy keys](https://docs.gitlab.com/ee/user/project/deploy_keys/)
[Bitbucket SSH deploy keys](https://support.atlassian.com/bitbucket-cloud/docs/add-access-keys/)
---
// File: how-tos/my_airflow/README
# My Airflow 101
Datacoves makes it easy to test DAGs quickly with My Airflow, a stand alone user instance of Airflow which tracks whatever branch the user is making changes to in VS Code. My Airflow allows developers to test their DAGs without need to push to their changes to a branch such as `airflow_development`. My Airflow is meant to test DAG naming, import errors, and basic configurations of a DAG. It has limitations and thus it is important to test your DAG in Team Airflow before pushing to production. That is because Team Airflow is more robust as it is configured to match your Production Airflow instance and runs using the Kubernetes Executor.
## Limitations
While My Airflow will make writing and testing DAGs quick it is important to cover its limitations.
1. My Airflow uses Sqlite
2. My Airflow **cannot** run tasks in parallel. It will run one task at a time.
3. Connections and variables from Team Airflow **will not** be automatically ported over to My Airflow. You will need to perform a variable import either manually or using the [`datacoves my import`](/docs/how-tos/my_airflow/my-import) command in your terminal.
4. Emailing is not available in My Airflow.
5. Slack and Teams notifications are not available in My Airflow.
## Banner Colors
You can differentiate My Airflow from Team Airflow by the color of the banner
My Airflow = Light Blue

Team Airflow = Dark Blue

---
// File: how-tos/my_airflow/migrating-service-connections
# Migrating from Environment Service Connections to Airflow Service Connections
To leverage **My Airflow** and **Datacoves Decorators**, you'll need to update your configurations and refactor your DAGs. This guide walks you through the necessary steps.
Previously, Datacoves injected environment variables into Airflow when a service connection was created. While this method is still supported, the new and recommended approach is to add credentials directly to Airflow as a connection. This transition enables seamless integration with [Datacoves Decorators](/docs/reference/airflow/datacoves-decorators) and **My Airflow**.
## Step 1: Update Your Service Connection
Edit an existing or create a new [service connection](/docs/how-tos/datacoves/how_to_service_connections), ensuring that **`Airflow Connection`** is selected as the **Delivery Mode**.
## Step 2: Start Your My Airflow Instance
Launch your [My Airflow](/docs/how-tos/my_airflow/start-my-airflow) instance to begin the migration process.
## Step 3: Import Variables and Connections
Run the [My Import](/docs/how-tos/my_airflow/my-import) process to import variables and connections from **Team Airflow** to **My Airflow**.
:::note
Secret values will not be automatically transferred and must be manually provided via the command line. `datacoves my import` only imports connections created by a Datacoves service connections, all other connections must be imported manually.
:::
**When prompted to add secret values:**
- enter the value
- press enter
- Press Ctrl-D
## Step 4: Refactor Your DAGs
Update your DAGs by replacing [Datacoves Operators](/docs/reference/airflow/datacoves-operator) with [Datacoves Decorators](/docs/reference/airflow/datacoves-decorators) to align with the new service connection structure.
By following these steps, you'll ensure a smooth transition to Airflow service connections while optimizing your workflow within Datacoves.
---
// File: how-tos/my_airflow/my-import
# Importing connections and variables from Team Airflow
For security purposes, connections and variables **do not** auto populate from Team Airflow ➡️ My Airflow. This means that **every user** will need to perform a variable/connection import to their My Airflow. An import will need to be done any time there is a new variable or connection added to keep Team Airflow and My Airflow in sync. Once connections and variables are added to a user's My Airflow they will persist.
## datacoves my import
:::note
You must have [initiated My Airflow](/docs/how-tos/my_airflow/start-my-airflow) before attempting to use the `datacoves my import` command.
:::
This command will import your Data Warehouse connections and Airflow variables over from Team Airflow to My Airflow. While the tool will do most of the work for you, sensitive variables will not be ported over for security reasons. You will be prompted to provide those secrets in the terminal.
Only connections that correspont to dbt adapter will be imported to My Airflow. Other connections will need to be re-created manually. Use the following command in your Datacoves VS Code terminal to start importing your Team Airflow variables and connections.
```bash
datacoves my import
```

---
// File: how-tos/my_airflow/start-my-airflow
# How to use My Airflow
## Spin up your individual Airflow instance
:::warning
Unlike Team Airflow which is always running, My Airflow will spin down after 4 hours of inactivity. If you are an existing Datacoves user you may need to [migrate your environment variable based service connections](/docs/how-tos/my_airflow/migrating-service-connections). Users need both the sysadmin and the developer [groups](/docs/reference/admin-menu/groups) to access My Airflow.
:::
My Airflow is a single instance allocated to a user. This allows the user to test their DAG in isolation before pushing it to Team Airflow for more robust testing. To spin up your own My Airflow:
**Step 1:** Select the `Orchestrate` tab and select `Start My Airflow`.

This will restart your development environment.

**Step 2:** Once your environment has restarted. You will be notified that My Airflow is ready. Select `Open My Airflow` and click sign in.

Thats it, your My Airflow instance is ready to use! 🎉
## Using My Airflow to Develop DAGs
:::note
You must add or import connections and variables from Team Airflow. You can do this easily using `datacoves my import`. For more information follow [this documentation](/docs/how-tos/my_airflow/my-import).
:::
Developing your DAG using My Airflow is quick and easy.
**Step 1:** Navigate to the `Transform` tab and start writing your DAG in the `orchestrate` directory. My Airflow will track whatever branch you have checked out ,however, we recommend developing in a feature branch.
In the example below I have added a new DAG called `my_airflow_dag_test`.

**Step 2:** Switch to your My Airflow browser tab to see your DAG changes populate in near real time. Notice the Light Blue Airflow Banner which is distinct for My Airflow.

**Step 3:** Continue iterating until you are ready to test running your DAG. The limitation of My Airflow is that tasks cannot be run in parallel so robustly testing a DAG run is limited. Once you are ready to test a DAG run merge your feature branch into `airflow_development`. This will populate your DAG in Team Airflow.
---
// File: how-tos/my_airflow/use-my-airflow-api
# How to use the My Airflow API
:::warning
The API allows you to view secrets values in plain text. Always exercise the principle of least privilege.
:::
This guide walks you through configuring API access for your personal My Airflow instance.
## Step 1: Navigate to User Settings
Click on your avatar in the top right corner and select `Settings`.
## Step 2: Select the My Airflow API tab
In the left sidebar, click on `My Airflow API`. You will see a list of environments where you have My Airflow enabled.

## Step 3: Copy the API URL
For your target environment, copy the `My Airflow API URL`.
## Step 4: Generate an API Key
1. Click "Manage API Keys" to expand the key management section
2. Optionally enter a name for your key (e.g., "My Script", "CI/CD Token")
3. Click "Generate New API Key"
4. Copy your API key immediately - it will not be shown again
## Step 5: Add your credentials to a .env file
Create a `.env` file inside your `orchestrate/` directory and be sure to add the file to your `.gitignore`. Add your credentials there.
```env
MY_AIRFLOW_API_URL = "https://your-slug-api-airflow-env.domain.com/api/v1/"
MY_AIRFLOW_API_KEY = "your-api-key-here"
```
## Step 6: Use it in a Python script
Below is a sample script that makes use of the Airflow API.
**This script does the following:**
- Initializes the Airflow API client using authentication details from environment variables.
- Fetches a list of all DAGs from the Airflow API.
- Prints a sorted list of DAG IDs for better readability.
- Triggers a new DAG run for a specified DAG using the API.
- Updates an Airflow dataset using the API.
- Handles API errors and retries requests if necessary.
```python
# airflow_api_call.py
import requests
import os
import json
from dotenv import load_dotenv
load_dotenv()
API_URL = os.getenv("MY_AIRFLOW_API_URL")
API_KEY = os.getenv("MY_AIRFLOW_API_KEY")
def update_dataset(name):
url = f"{API_URL}/datasets/events"
response = requests.post(
url=url,
headers={
"Authorization": f"Token {API_KEY}",
},
json={"dataset_uri": "upstream_data"}
)
return response.json()
def trigger_dag(dag_id):
url = f"{API_URL}/dags/{dag_id}/dagRuns"
response = requests.post(
url=url,
headers={
"Authorization": f"Token {API_KEY}",
},
json={"note": "Trigger from API"}
)
return response.json()
def list_dags():
url = f"{API_URL}/dags"
response = requests.get(
url=url,
headers={
"Authorization": f"Token {API_KEY}",
"Content-Type": "application/json",
},
)
# Extract just the DAG names from the response
dags_data = response.json()
dag_names = [dag['dag_id'] for dag in dags_data['dags']]
# Sort the names alphabetically for better readability
dag_names.sort()
return dag_names
def print_response(response):
if response:
msg = json.dumps(response, indent=2)
print(f"Event posted successfully:\n{'='*30}\n\n {msg}")
if __name__ == "__main__":
# Update an Airflow Dataset
# dataset_name = "upstream_data"
# response = update_dataset(dataset_name)
# print_response(response)
# Trigger a DAG
# dag_id = "bad_variable_usage"
# response = trigger_dag(dag_id)
# print_response(response)
# List DAGs
response = list_dags()
print_response(response)
```
:::note
Your API keys work for both My Airflow and Team Airflow (if you have access). The token is validated based on your user permissions.
:::
## Alternative: Generate keys via CLI
You can also manage API keys directly from the terminal using the `datacoves` CLI:
```bash
# List existing keys
datacoves my api-key list
# Generate a new key
datacoves my api-key generate --name "My Script"
# Delete a key (use the prefix shown in list)
datacoves my api-key delete abc12345
```
See [Datacoves CLI Commands](/docs/reference/airflow/datacoves-commands#datacoves-my-api-key) for more details.
---
// File: how-tos/snowflake/snowflake-key-based-auth
# How to set up Snowflake Key-Based Auth for CI Service Accounts
## Overview
Snowflake service accounts must be set up with key-based auth as password based auth is being deprecated. These accounts are typically used for CI/CD.
## Creating key pair
Outside of Snowflake create a key-pair following the information on the [Snowflake documentation](https://docs.snowflake.com/en/user-guide/key-pair-auth)
First Generate the Private Key
`openssl genrsa 2048 | openssl pkcs8 -topk8 -inform PEM -out rsa_key.p8 -nocrypt`
From the Private Key, generate the Public Key
`openssl rsa -in rsa_key.p8 -pubout -out rsa_key.pub`
Store the private and public keys somewhere secure.
## Configure the service user in Snowflake
Print out the public key and add to Snowflake
`cat rsa_key.pub`
This will show your public kay which will replace `` below.
:::note
Exclude the --BEGIN-- and --END-- lines from the public key
:::
`ALTER USER SVC_GITHUB_ACTIONS SET RSA_PUBLIC_KEY='';`
## Verify the public key was set correctly
Run the following command in Snowflake
```
DESC USER SVC_GITHUB_ACTIONS;
SELECT SUBSTR((SELECT "value" FROM TABLE(RESULT_SCAN(LAST_QUERY_ID()))
WHERE "property" = 'RSA_PUBLIC_KEY_FP'), LEN('SHA256:') + 1);
```
Run the following command in the terminal
`openssl rsa -pubin -in rsa_key.pub -outform DER | openssl dgst -sha256 -binary | openssl enc -base64`
Compare both outputs. If both outputs match, the user correctly configured their public key.
## Configure Github Actions
In Github, you must configure the Private Key. To do this visit the settings page of your repo. In the `Security` section click `Secrets and Variables` then select `Actions`.
In the `Secrets` tab add a `New Repository Secret`.
Give it a `Name` like `DATACOVES__MAIN__PRIVATE_KEY`
Print the Private Key generated earlier.
`cat rsa_key.p8`
>[!NOTE] Exclude the --BEGIN-- and --END-- lines from the private key
Copy the content and of the private key and paste it as the value for the Github `Secret` and `Add Secret`.
## Configure the dbt profile
Update the profile you use for CI/CD. Typically this is located in `automate/dbt/profiles.yml` if using the recommended Datacoves location.
It should look something like this:
```yaml
default:
target: default_target
outputs:
default_target:
type: snowflake
threads: 16
client_session_keep_alive: true
account: "{{ env_var('DATACOVES__MAIN__ACCOUNT') }}"
database: "{{ env_var('DATACOVES__MAIN__DATABASE') }}"
schema: "{{ env_var('DATACOVES__MAIN__SCHEMA') }}"
user: "{{ env_var('DATACOVES__MAIN__USER') }}"
private_key: "{{ env_var('DATACOVES__MAIN__PRIVATE_KEY') }}"
role: "{{ env_var('DATACOVES__MAIN__ROLE') }}"
warehouse: "{{ env_var('DATACOVES__MAIN__WAREHOUSE') }}"
```
---
// File: how-tos/snowflake/warehouses-schemas-roles
# How to add Warehouses, Schemas, and Roles to Snowflake
Since we want all changes to the warehouse to be driven by code, we employ Permifrost and some additional scripts to manage changes to Snowflake. (contact us for assistance configuring your repository with the additional scripts needed)
Using Permifrost Configuration Files, we will manage the following:
- Warehouse Creation
- Schema Creation
- Role Creation
We will also need to configure dbt to use custom schemas by updating `dbt_project.yml`
## create_snowflake_objects.py
To create objects in Snowflake, we leverage a script we created `create_snowflake_objects.py`. This script uses the permifrost config files and dbt to apply the changes to Snowflake. Note: When you run these scripts your user will need to have the SYSADMIN or SECURITYADMIN to create specific objects in Snowflake.

## Warehouse Creation
In the `secure/` folder of your repo, find the `warehouses.yml` file. Configure each warehouse you want to create in Snowflake.

Once the `warehouses.yml` file is configured run `secure/create_snowflake_objects.py -s warehouses -t prd` to create the warehouses using your dbt `prd` target for authentication.
You can use the `--dry-run` option to see the expected changes before they are applied to Snowflake.
The script will also report objects that exist in Snowflake but which are missing from the `warehouses.yml` configuration file. If no changes are needed in Snowflake because the warehouse already exists, this will also be displayed.

## Schema Creation
Schema creation is similar to warehouse creation. Schemas are configured in `secure/databases.yml` and the `secure/create_snowflake_objects.py -s schemas -t prd` command is run to create them. Note this script should run with the same role that normally runs your dbt jobs like _TRANSFORMER_DBT_

These schemas should align with what is configured in `dbt_project.yml`

## Role Creation
Before permifrost can be run, warehouses, schemas, and roles must already exist in Snowflake. Roles are defined in `secure/roles.yml` and created using `secure/create_snowflake_objects.py -s roles -t prd`. Note that roles will be created with the SECURITYADMIN role, so your user must have that role granted.
## Roles.yml
The roles.yml file contains all the roles and their associated grants. To keep things [DRY](https://en.wikipedia.org/wiki/Don%27t_repeat_yourself) we define object roles and then assign those to higher level roles and eventually to functional roles.
Object roles are created for; warehouses, databases, schemas, and tables (we use a single role to grant access to all tables within a schema).
We follow a naming convention as follows `z_
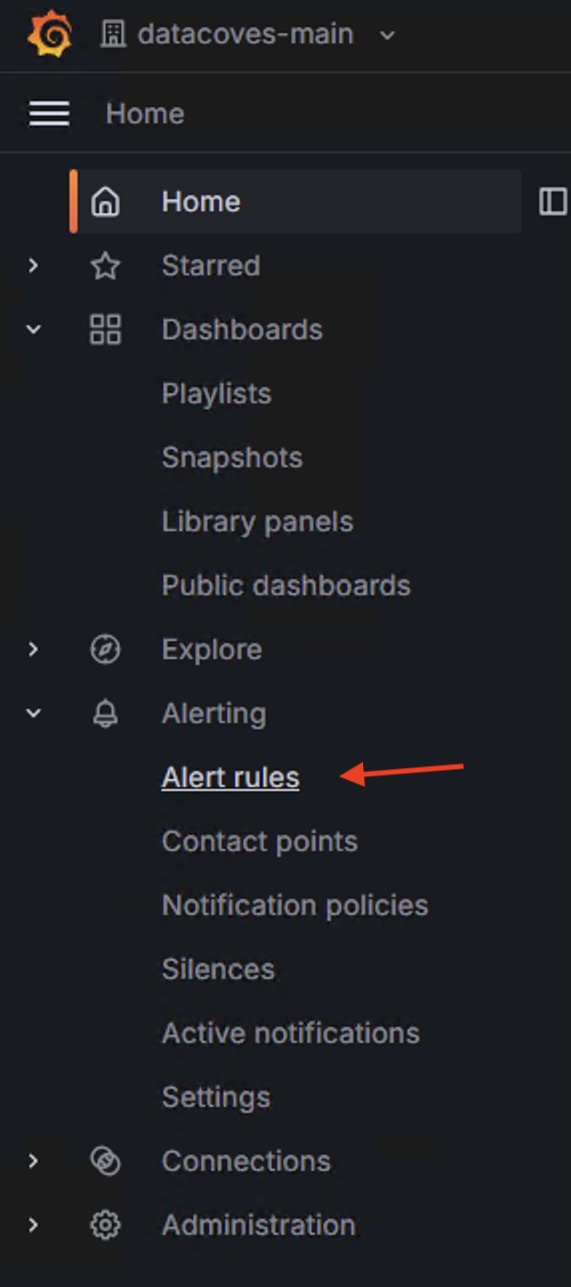 ## Step 3
Expand the folder under `Mimir/Cortex/Loki` and select the `view` icon on the `AirflowWorkerFailedToInit` rule.

## Step 4
Select `View in Explorer` to see the Graph and other information.

---
// File: how-tos/datacoves/metrics-and-logs/grafana
# Grafana Dashboards
## Navigation menu
Accessing the dashboards list is easy:
:::tip
We recommend you bookmark your favorite dashboards so they are pinned in the home page.
:::

## Prebuilt dashboards
Grafana comes with a set of prebuilt dashboards that you can use right away.

:::warning
The following dashboards are not working quite right yet, so please don't use them:
. etcd
. Kubernetes / Compute Resources / Namespace (Workloads)
. Kubernetes / Compute Resources / Node (Pods)
. Kubernetes / Compute Resources / Workload
. Kubernetes / Controller Manager
. Kubernetes / Proxy
. Kubernetes / Scheduler
. Node Exporter / (all)
:::
---
// File: how-tos/datahub/how_to_datahub_dbt
# Ingesting dbt Metadata into DataHub
## Prerequisites
DataHub utilizes [dbt artifacts](https://datahubproject.io/docs/generated/ingestion/sources/dbt/#module-dbt) to populate metadata. Before configuring DataHub, ensure that dbt artifacts are available in an S3 bucket.
These artifacts include:
- `catalog.json`
- `manifest.json`
- `run_results.json`
- `sources.json`
## Configuring the dbt Source in DataHub
To ingest dbt metadata, configure the dbt source in DataHub. Refer to the [official documentation](https://datahubproject.io/docs/generated/ingestion/sources/dbt/#config-details) for details.
### Sample Configuration
The following sample demonstrates how to configure a dbt ingestion source in DataHub.
:::note
This configuration requires a DataHub secret (`S3_secret_key`) for secure access to S3. Ensure that this secret is created before proceeding.
:::
```yaml
source:
type: dbt
config:
platform_instance: balboa
target_platform: snowflake
manifest_path: "s3://
## Step 3
Expand the folder under `Mimir/Cortex/Loki` and select the `view` icon on the `AirflowWorkerFailedToInit` rule.

## Step 4
Select `View in Explorer` to see the Graph and other information.

---
// File: how-tos/datacoves/metrics-and-logs/grafana
# Grafana Dashboards
## Navigation menu
Accessing the dashboards list is easy:
:::tip
We recommend you bookmark your favorite dashboards so they are pinned in the home page.
:::

## Prebuilt dashboards
Grafana comes with a set of prebuilt dashboards that you can use right away.

:::warning
The following dashboards are not working quite right yet, so please don't use them:
. etcd
. Kubernetes / Compute Resources / Namespace (Workloads)
. Kubernetes / Compute Resources / Node (Pods)
. Kubernetes / Compute Resources / Workload
. Kubernetes / Controller Manager
. Kubernetes / Proxy
. Kubernetes / Scheduler
. Node Exporter / (all)
:::
---
// File: how-tos/datahub/how_to_datahub_dbt
# Ingesting dbt Metadata into DataHub
## Prerequisites
DataHub utilizes [dbt artifacts](https://datahubproject.io/docs/generated/ingestion/sources/dbt/#module-dbt) to populate metadata. Before configuring DataHub, ensure that dbt artifacts are available in an S3 bucket.
These artifacts include:
- `catalog.json`
- `manifest.json`
- `run_results.json`
- `sources.json`
## Configuring the dbt Source in DataHub
To ingest dbt metadata, configure the dbt source in DataHub. Refer to the [official documentation](https://datahubproject.io/docs/generated/ingestion/sources/dbt/#config-details) for details.
### Sample Configuration
The following sample demonstrates how to configure a dbt ingestion source in DataHub.
:::note
This configuration requires a DataHub secret (`S3_secret_key`) for secure access to S3. Ensure that this secret is created before proceeding.
:::
```yaml
source:
type: dbt
config:
platform_instance: balboa
target_platform: snowflake
manifest_path: "s3://