Use Microsoft Azure Data Factory Operators
You can use Airflow in Datacoves to trigger a Microsoft Azure Data Factory pipeline. This guide will walk you through the configuration process.
Prerequisites
- You will need to set up a Microsoft Entra Application.
- Assign the
Data Factory Contributorrole to your Microsoft Entra Application. You can do this by heading into Resource Groups and then following these instructions. - Collect the following values from your ADF account, more information on where to find these items in the next section:
DATA_FACTORY_NAMERESOURCE_GROUP_NAMESUBSCRIPTION_IDAPPLICATION_CLIENT_IDTENANT_IDCLIENT_SECRET
How to get the ADF information
Step 1: Login to your Microsoft Azure console and navigate to the Data Factories service.
Step 2: Copy theDATA_FACTORY_NAME for the factory which holds your data pipeline.
Step 3: Open the factory and copy the RESOURCE_GROUP_NAME, and the SUBSCRIPTION_ID from the Overview tab
Step 4: Navigate to the Microsoft Entra ID service, click on number next to Applicaitons on the Overview tab. Next click the All Applications tab, open the application or register a new application then open it and copy the APPLICATION_CLIENT_ID and DirectoryTENANT_ID.
Step 5: Click on Certificates and Secrets and generate a new secret for your Microsoft Entra Application and copy the Value. This is the CLIENT_SECRET.
Create a Microsoft Azure Data Factory Connection in Airflow
Step 1: In Datacoves, a user with the securityadmin role must go to the Airflow Admin -> Connection menu.
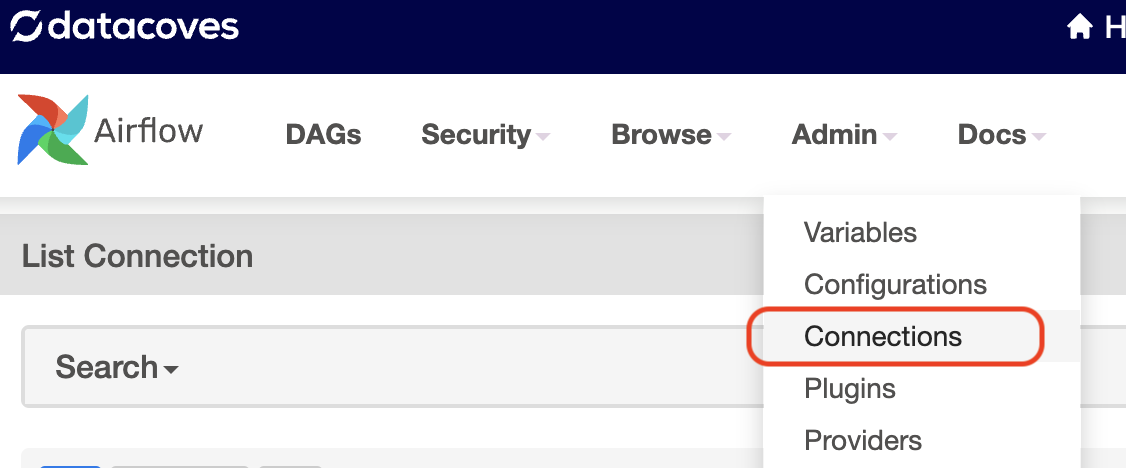
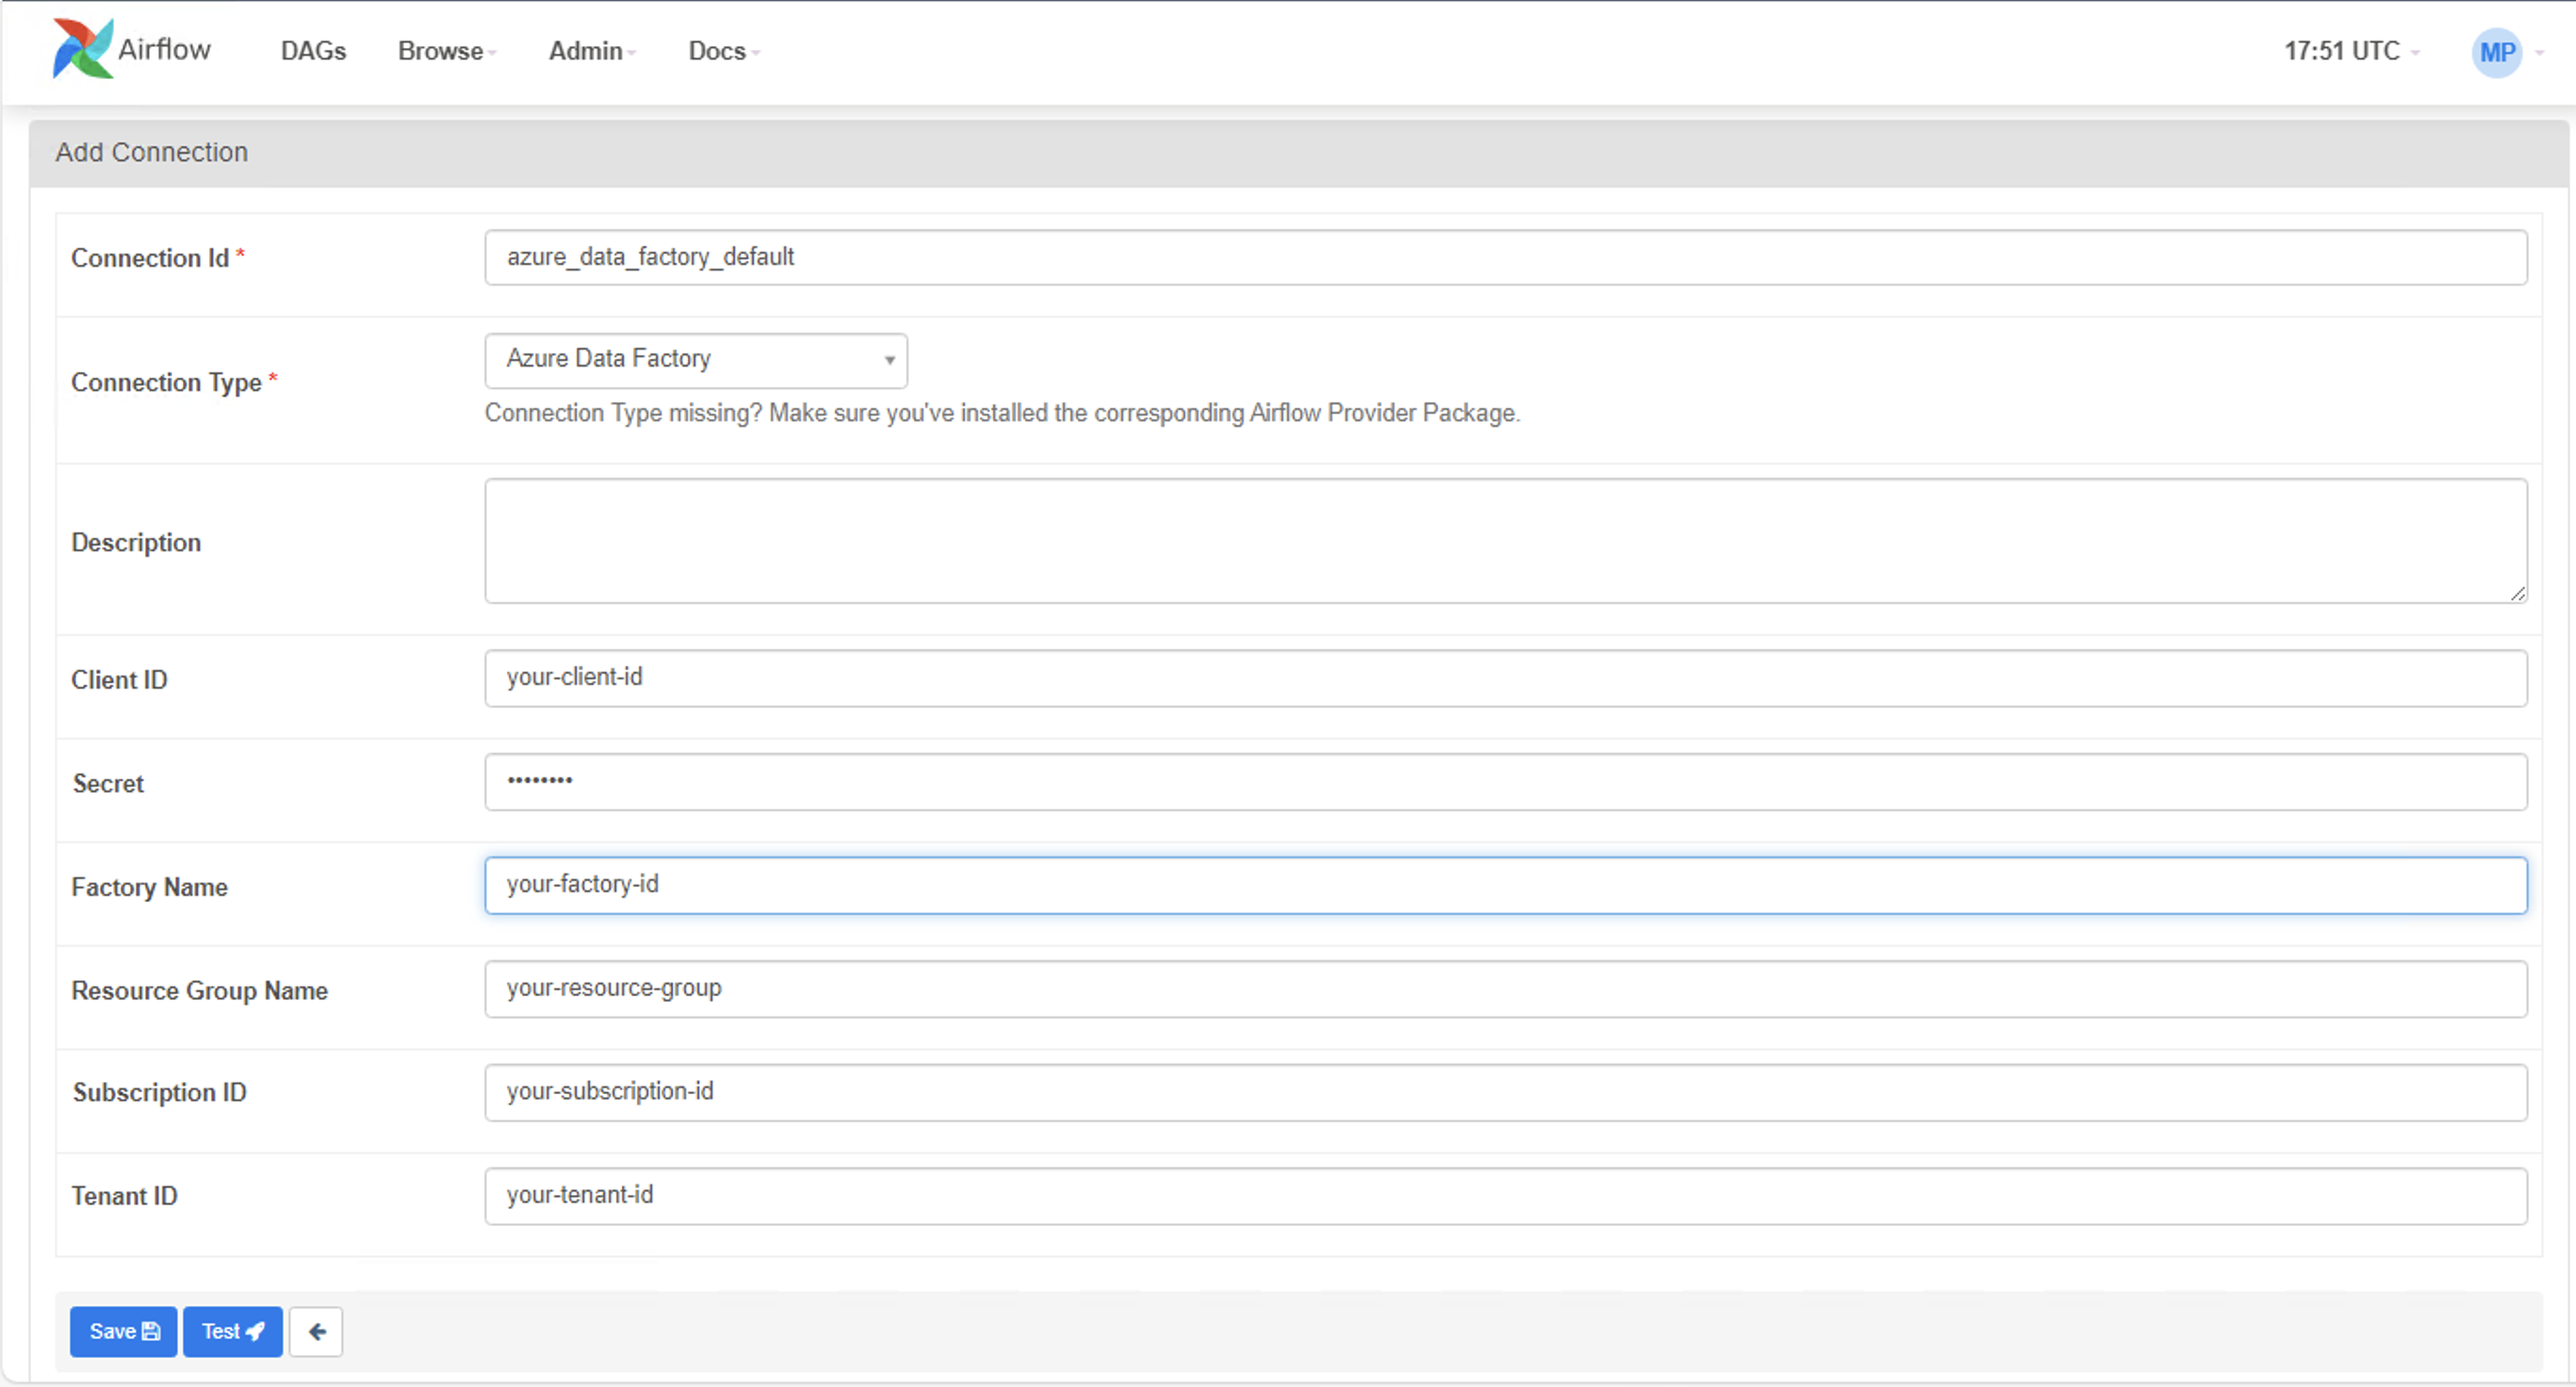
Step 2: Create a new connection using the following details.
-
Connection Id:
azure_data_factory_default- this name will be used in the Airflow DAG and is the default name used by the ADF Operator -
Connection Type:
Azure Data Factory -
Client ID: Your
APPLICATION_CLIENT_ID -
Secret: Your
CLIENT_SECRET -
Tenant ID: Your
TENANT_ID -
Factory Name: Your
DATA_FACTORY_NAME -
Resource Group Name: Your
RESOURCE_GROUP_NAME -
Subscription ID: Your
SUBSCRIPTION_ID
Replace the values in the screenshot below with the actual values found above.
Example DAG
You will need to update the pipeline_name, resource_group_name, and factory_name arguments below with the correct names.
Once you have configured your Databricks connection and variables, you are ready to create your DAG. Head into the Transform tab to begin writing your DAG inside orchestrate/dags.
"""Example Airflow Azure Data Factory DAG."""

from datetime import datetime
from airflow.decorators import dag, task_group
from airflow.providers.microsoft.azure.operators.data_factory import AzureDataFactoryRunPipelineOperator
from airflow.providers.microsoft.azure.sensors.data_factory import AzureDataFactoryPipelineRunStatusSensor

@dag(
    schedule="@daily",
    start_date=datetime(2024, 1, 1),
    tags=["version_1"],
    catchup=False,
    default_args={
        "azure_data_factory_conn_id": "azure_data_factory_default",
        "factory_name": "your-factory-name",
        "resource_group_name": "your-resource-name",
    },
)
def adf_example_run():
    """Run an Azure Data Factory pipeline with async status checking."""

    @task_group(group_id="adf_pipeline_group", tooltip="ADF Pipeline Group")
    def adf_pipeline_tasks():
        run_pipeline = AzureDataFactoryRunPipelineOperator(
            task_id="run_pipeline",
            pipeline_name="myTestPipeline",  # Rename to your Pipeline name
            parameters={"myParam": "value"},
            wait_for_termination=False,
        )

        # Deferrable sensor for async pipeline status checking
        pipeline_run_async_sensor = AzureDataFactoryPipelineRunStatusSensor(
            task_id="pipeline_run_async_sensor",
            run_id=run_pipeline.output["run_id"],
            deferrable=True,
        )

        run_pipeline >> pipeline_run_async_sensor

    adf_pipeline_group = adf_pipeline_tasks()

DAG = adf_example_run()
Understanding the Airflow DAG
- Understand how to authenticate with ADF.
- The DAG makes use of the AzureDataFactoryRunPipelineOperator to run an Azure Data Factory pipeline. It also shows how it’s possible to pass parameters that can be used in the pipeline.