How to Clone with Azure DevOps
To enable Datacoves cloning from Azure DevOps, you must complete a series of steps outlined in this guide.
- 1. Create your Application
- 2. Add your Application as a User in the DevOps Portal
- 3. Gather DevOps Authentication details
- 4. Authenticate Azure DevOps
Step 1: Create your Application
If you do not have an Entra ID application created, follow these steps:
Step 1
- From your Azure Portal, search for EntraID.
Step 2
- Select
App Registrationsfrom the left navigation menu.

Step 3
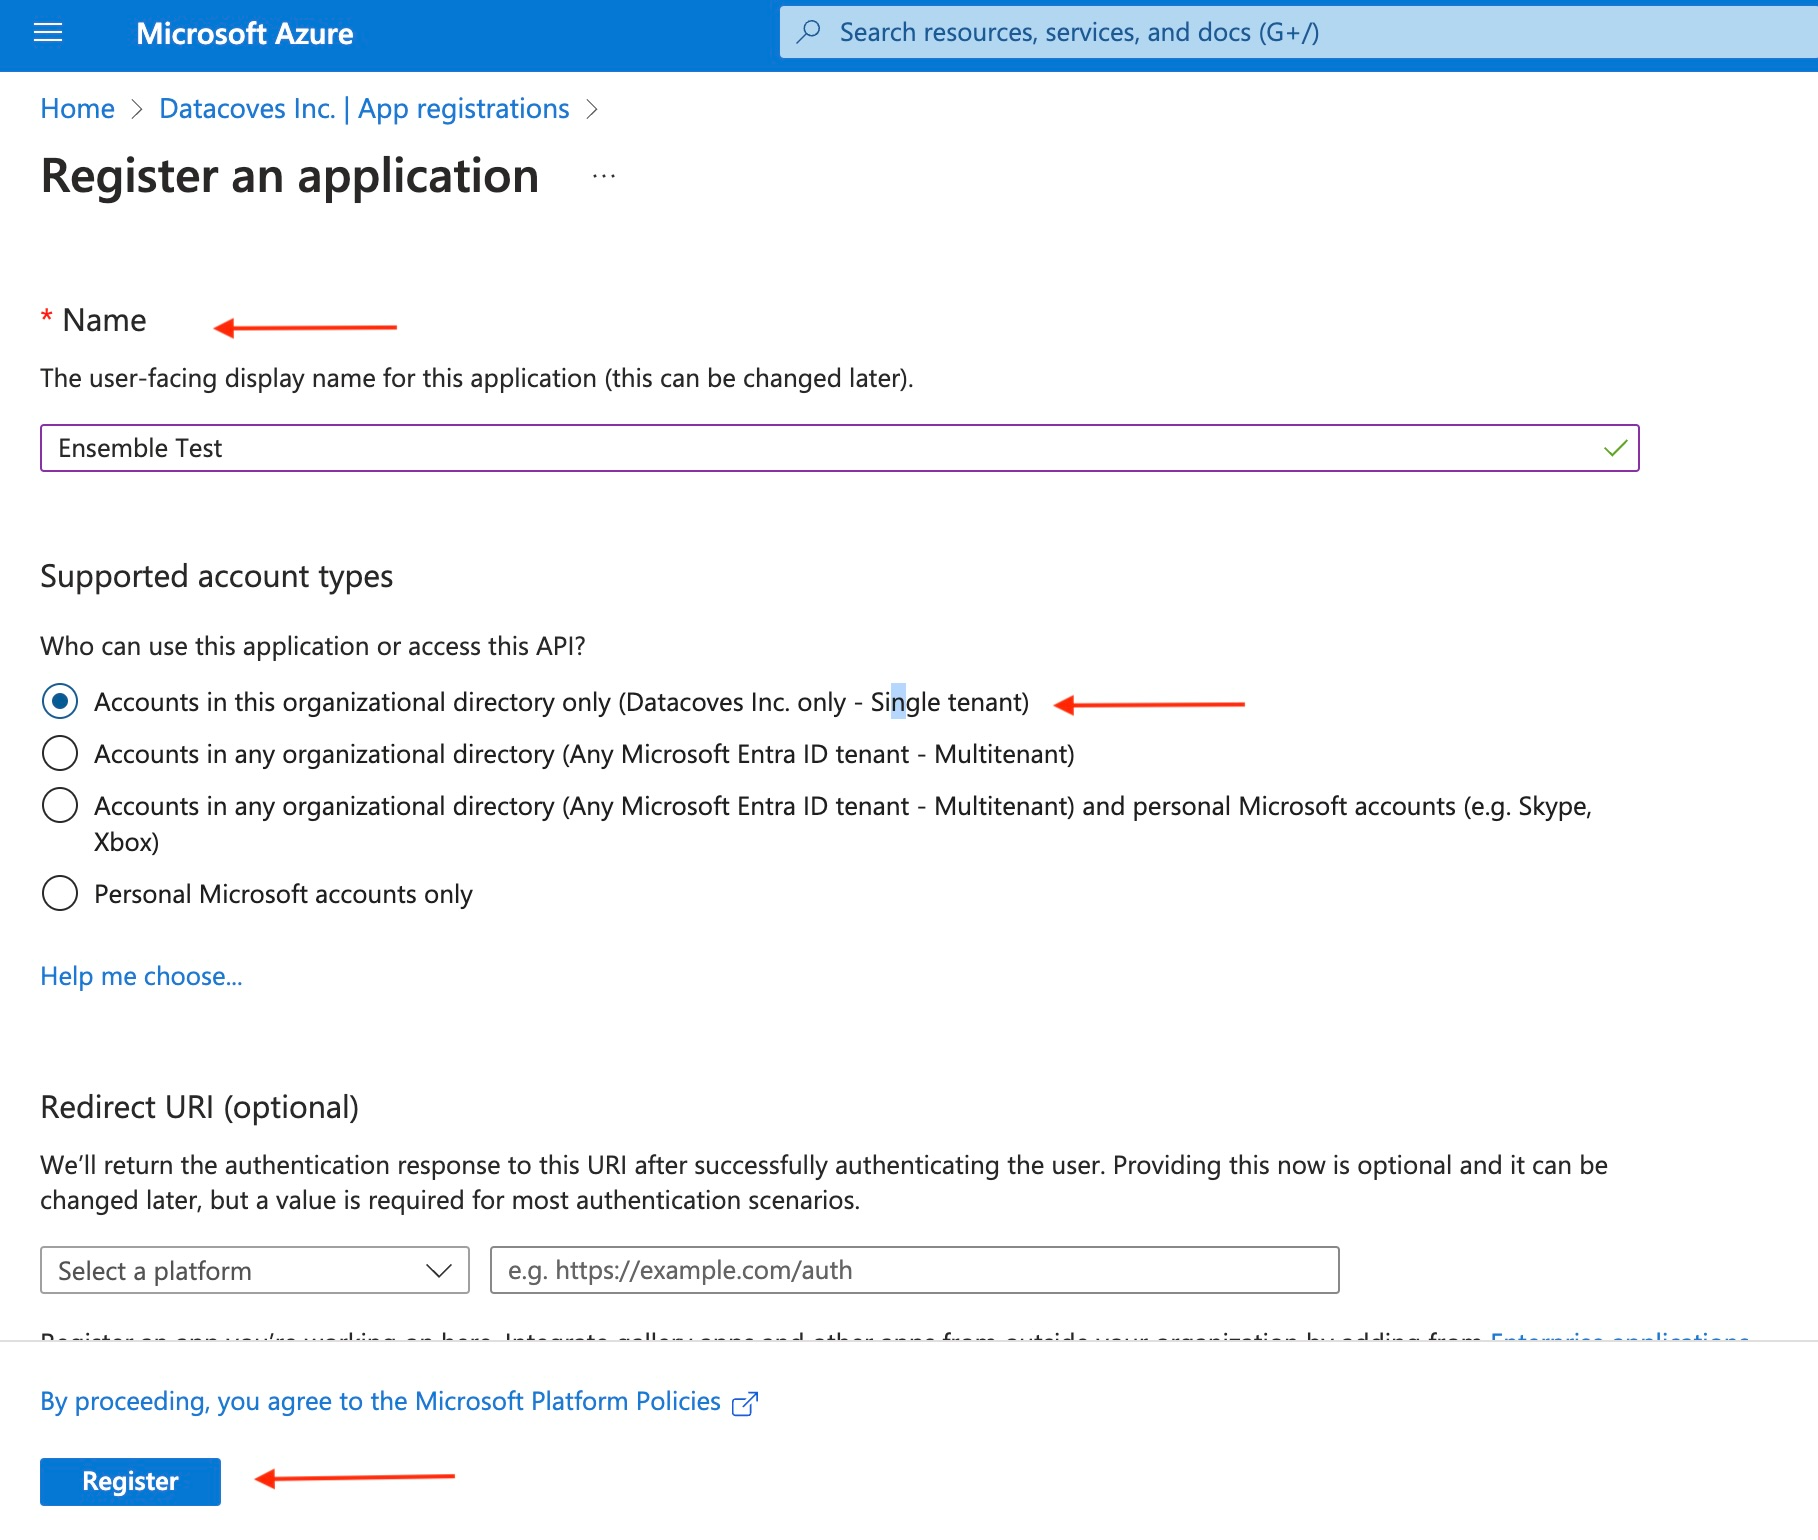
- Select
+ New registrationand fill out the fields:- Name: Give your application a meaningful name
- Supported account types: Select
Accounts in this organizational directory only
Step 4
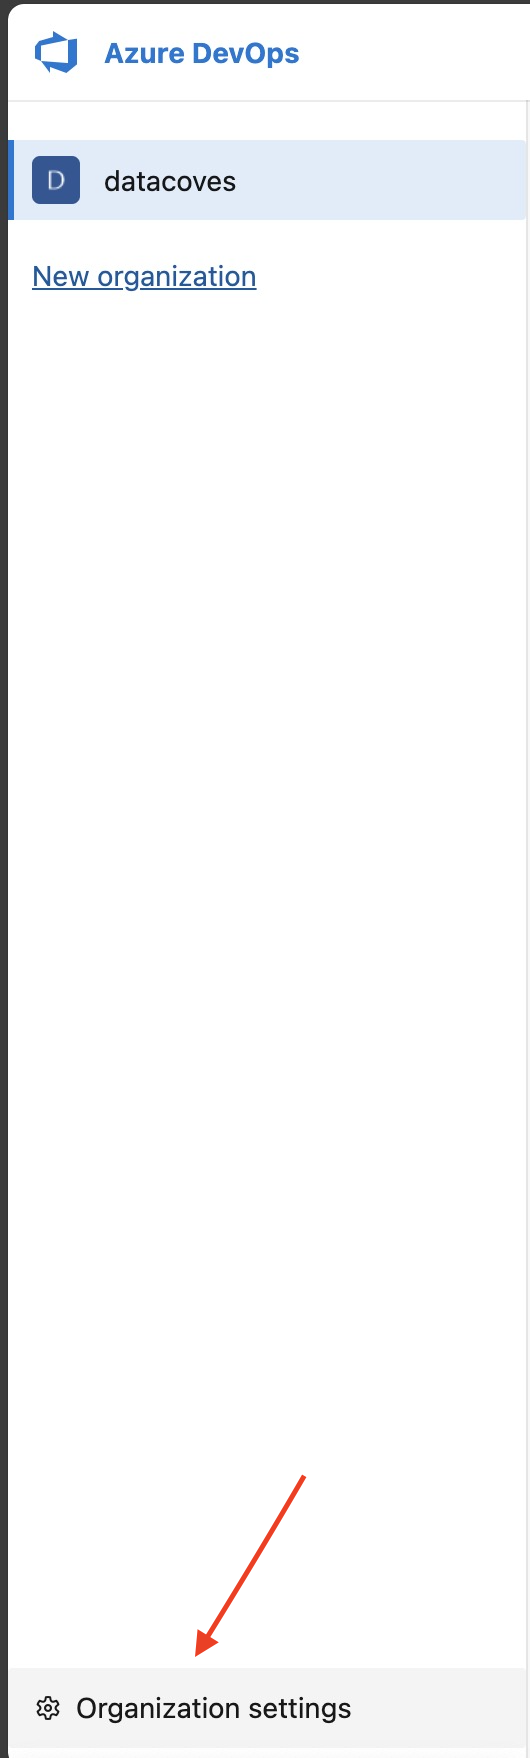
Step 2: Add your Application as a User in DevOps Portal
Step 1
Step 2
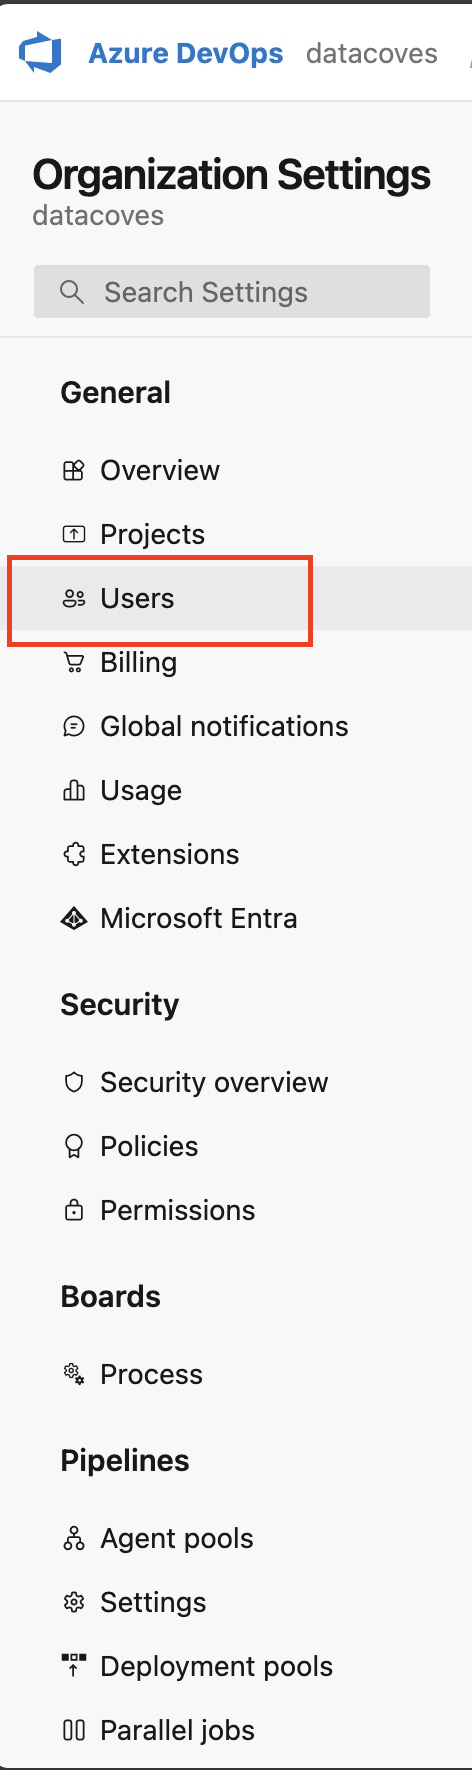
Step 3
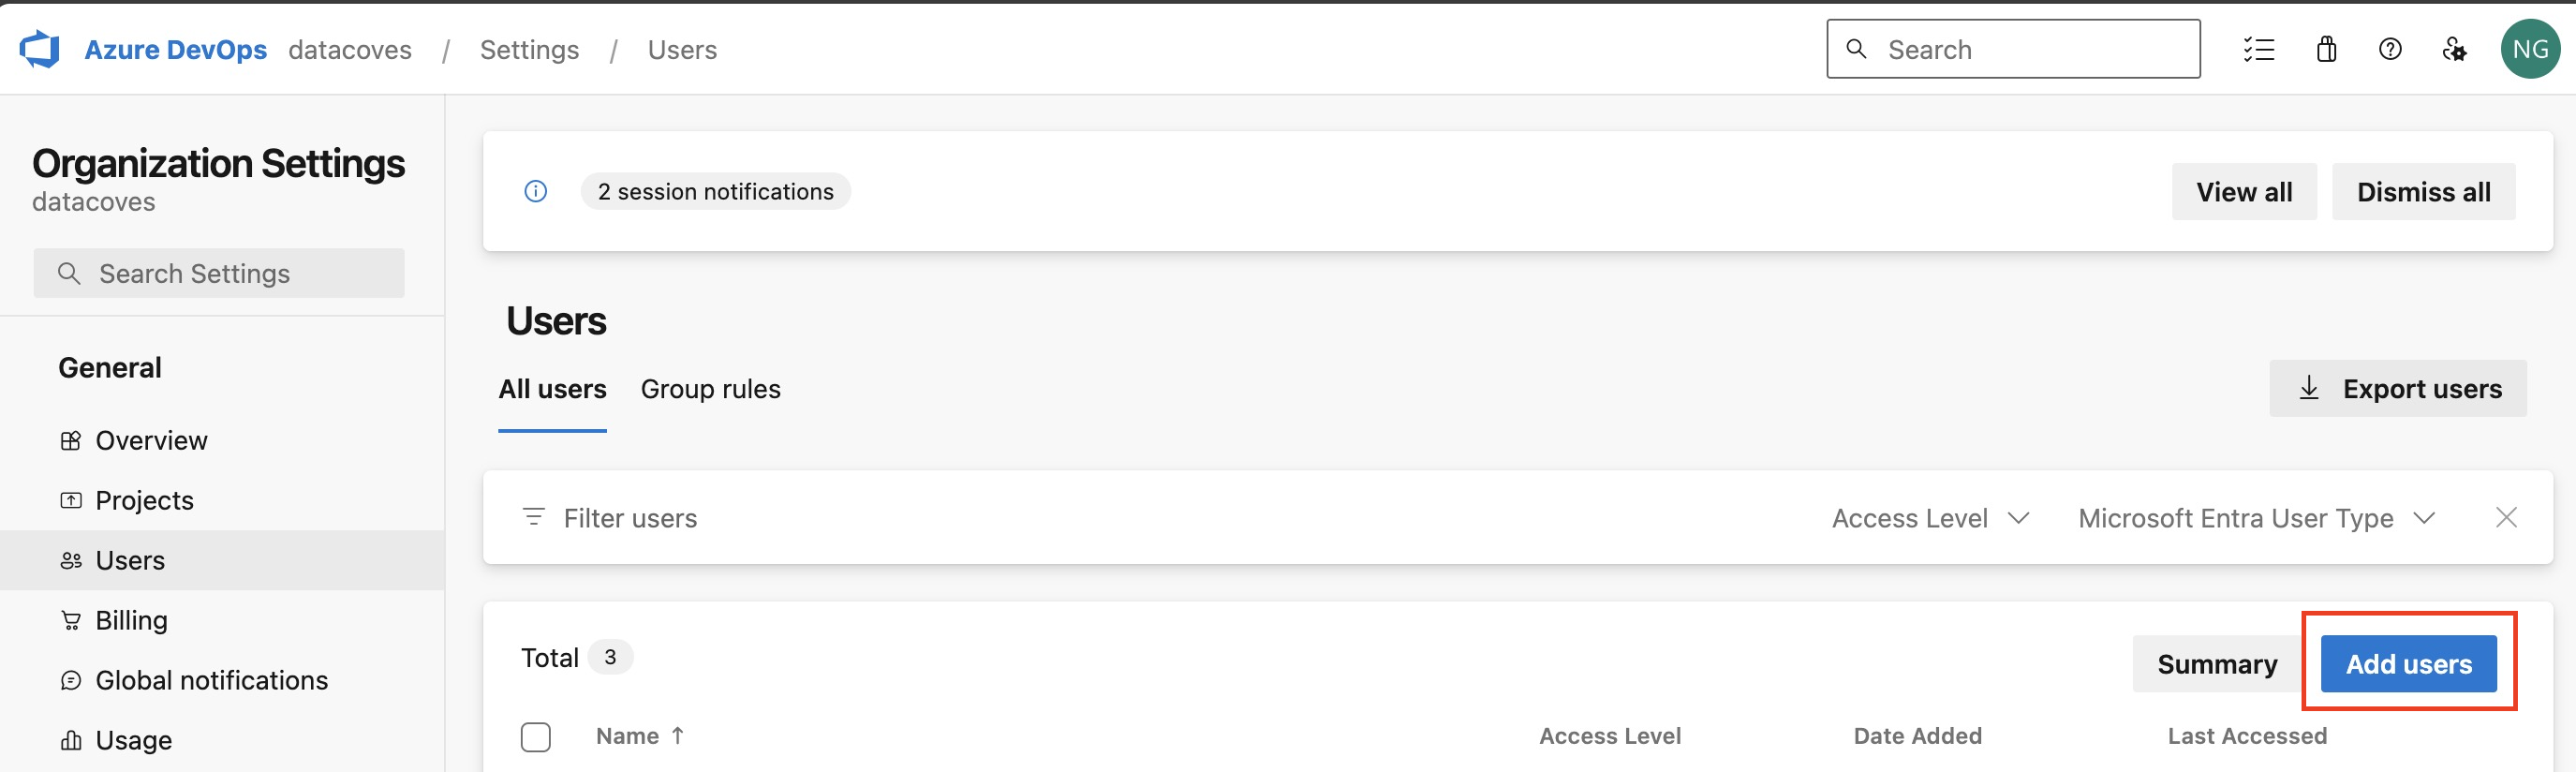
Step 4
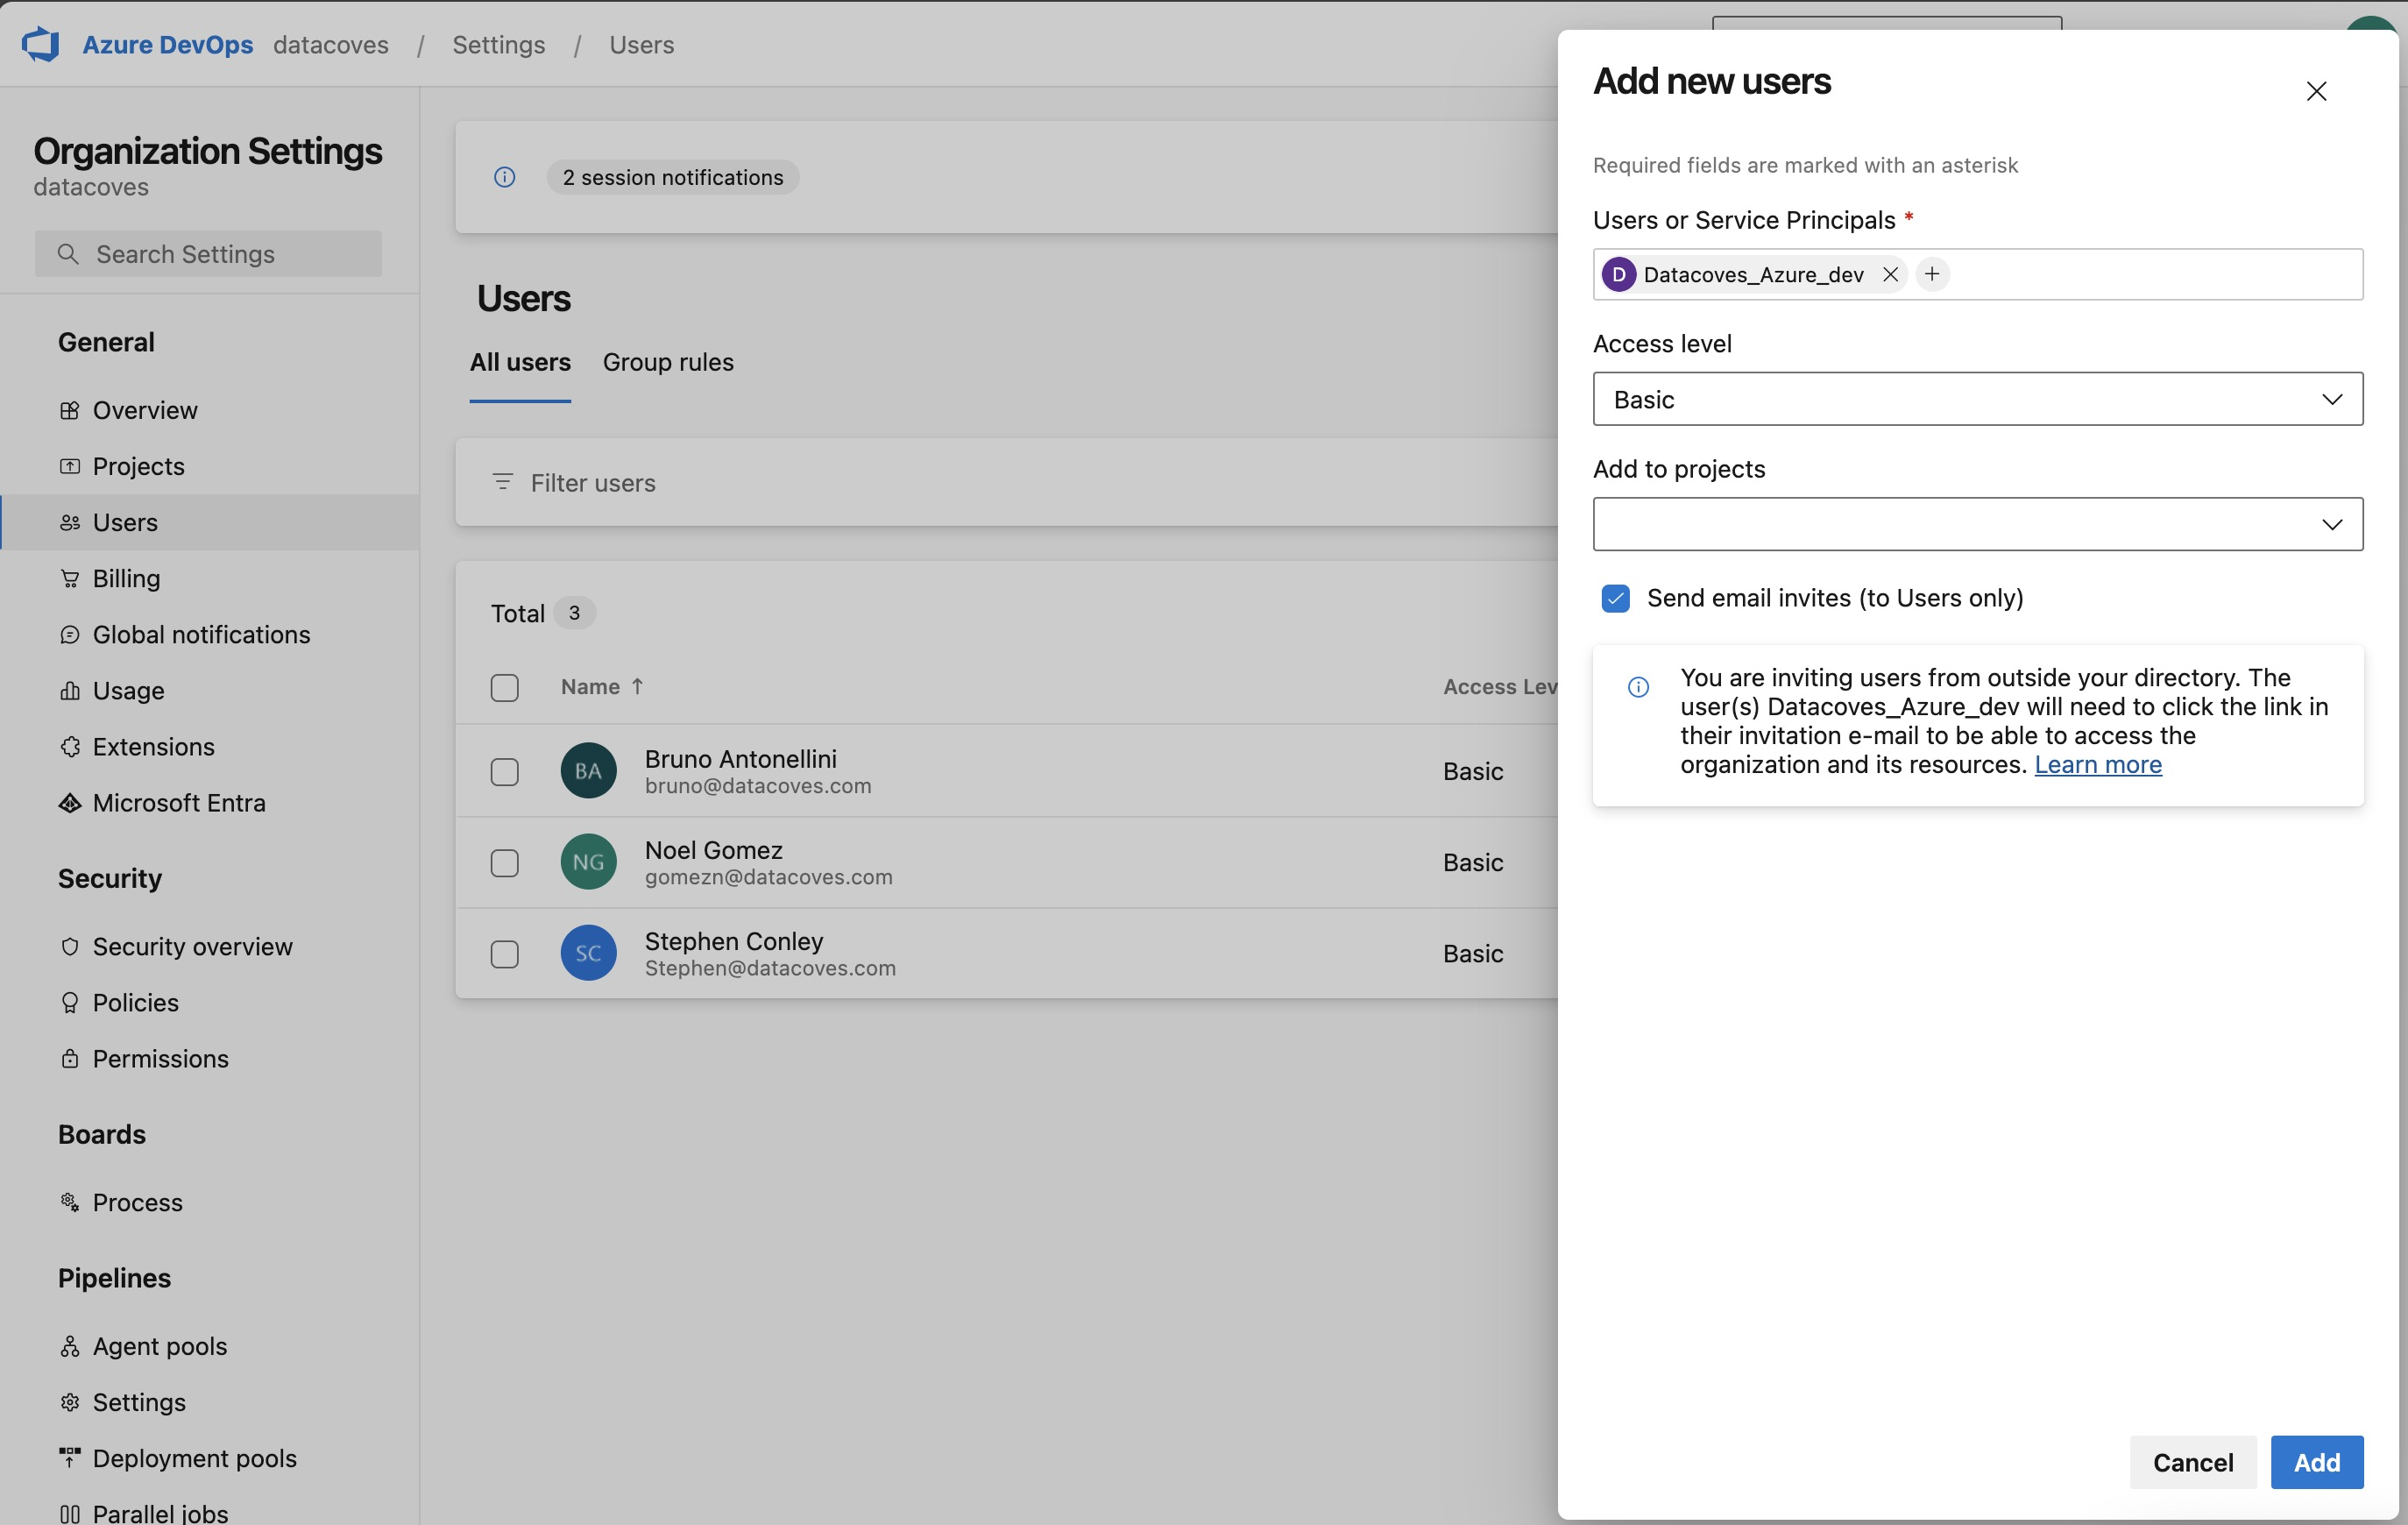
Step 5
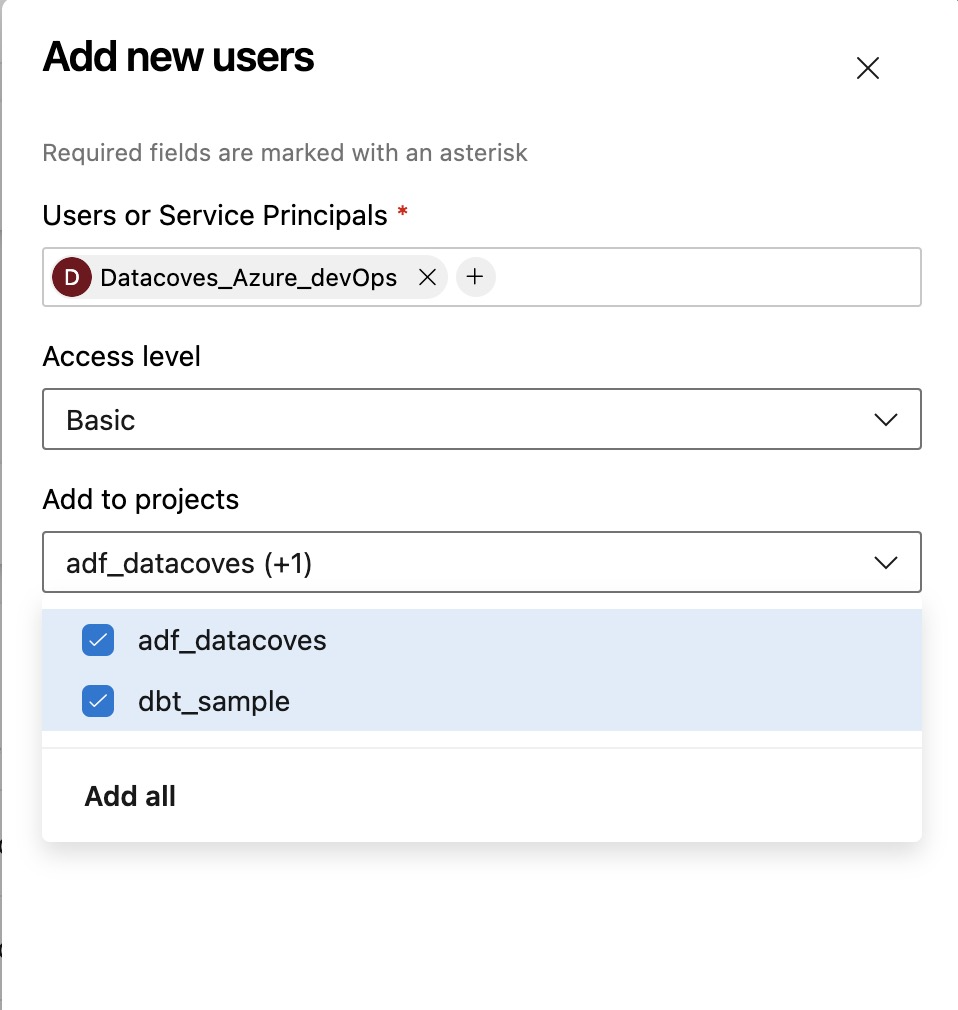
Now that you have created your EntraID application and added it as a user in the DevOps Portal, proceed to the next tab to configure Azure DevOps authentication.
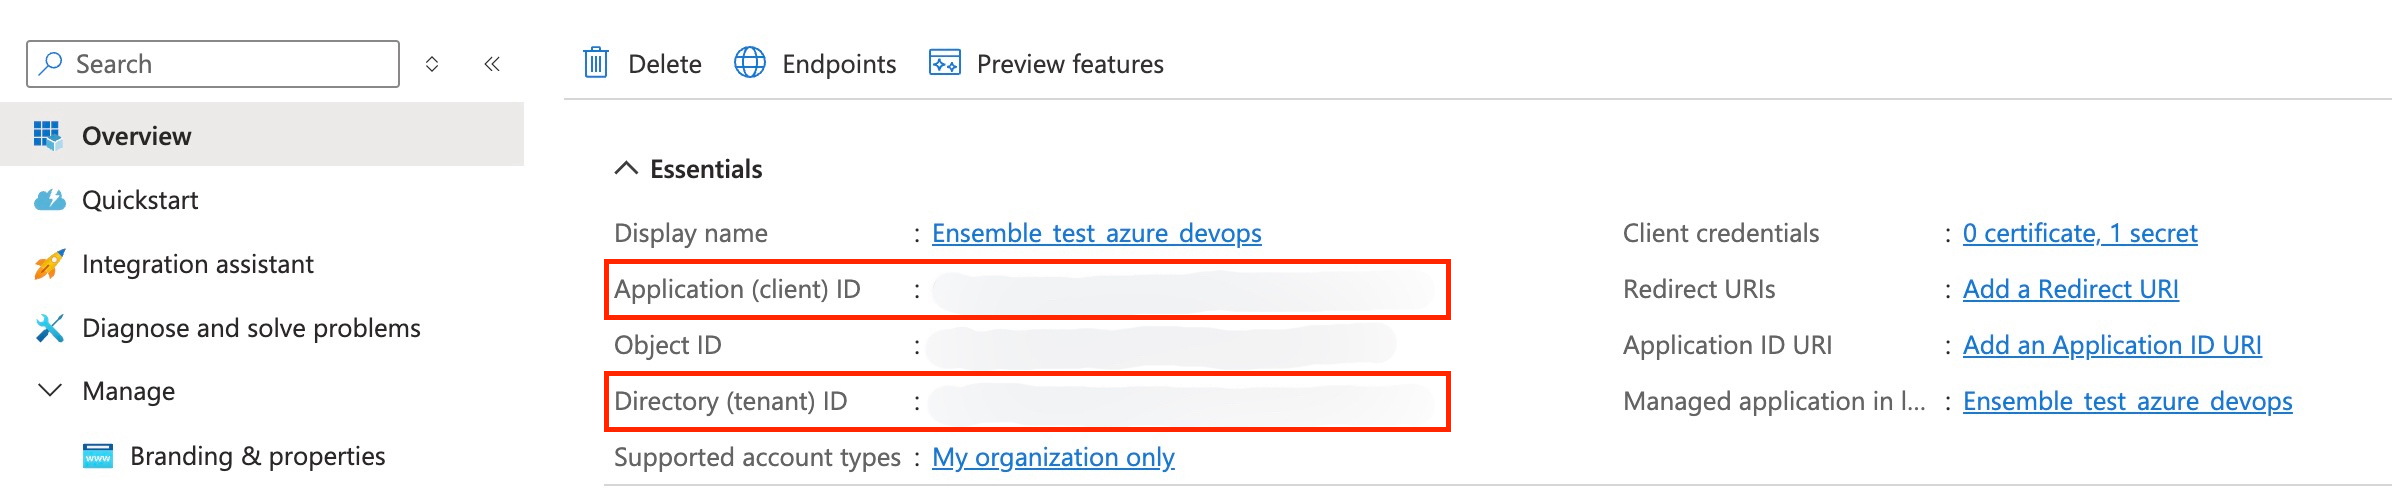
Step 3: Gather DevOps Authentication Details
Application (Client) ID and Directory (Tenant) ID
Step 1
- From your Azure Portal, search for EntraID.
Step 2
- Select
App Registrationsfrom the left navigation menu.
Step 3
- Select
All Applicationsand select your newly created app.
Step 4
Repo SSH and HTTP URLs
Step 1
- Log in to your Azure DevOps Portal.
Step 2
- Navigate to your project.
Step 3
- Navigate to your repo and select the
Clonebutton.
Step 4
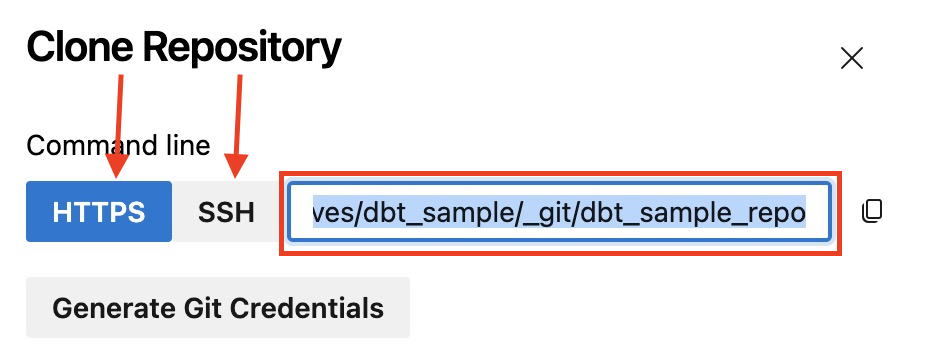
Be sure to save all of these details in a safe notepad. Proceed to the next tab to configure Azure DevOps authentication.
When copying the HTTPS URL, ensure it does not include an organization prefix before dev.azure.com. For example, use:
https://dev.azure.com/your-org/your-project/_git/your-repo
Not:
https://your-org@dev.azure.com/your-org/your-project/_git/your-repo
The your-org@ prefix interferes with Datacoves Azure authentication and will cause URL validation to fail.
Step 4: Authenticate Azure DevOps
Step 1
- Navigate back to the tab where you created your application in the Azure Portal. You should be inside your newly created application.
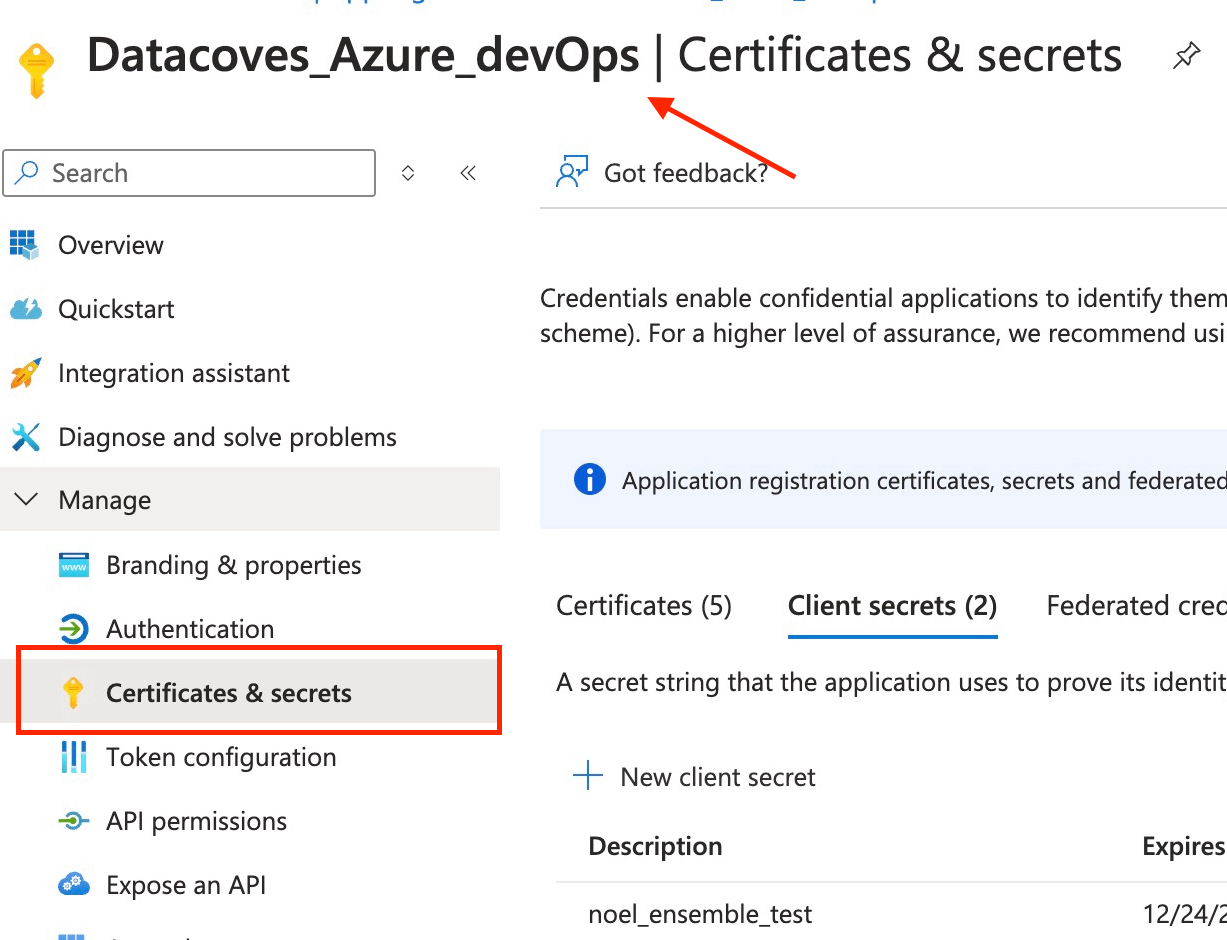
- Select the
Certificates & Secretsoption in the left navigation menu.
Secret or Certificate Authentication Method
Secret-Based Authentication
Step 2
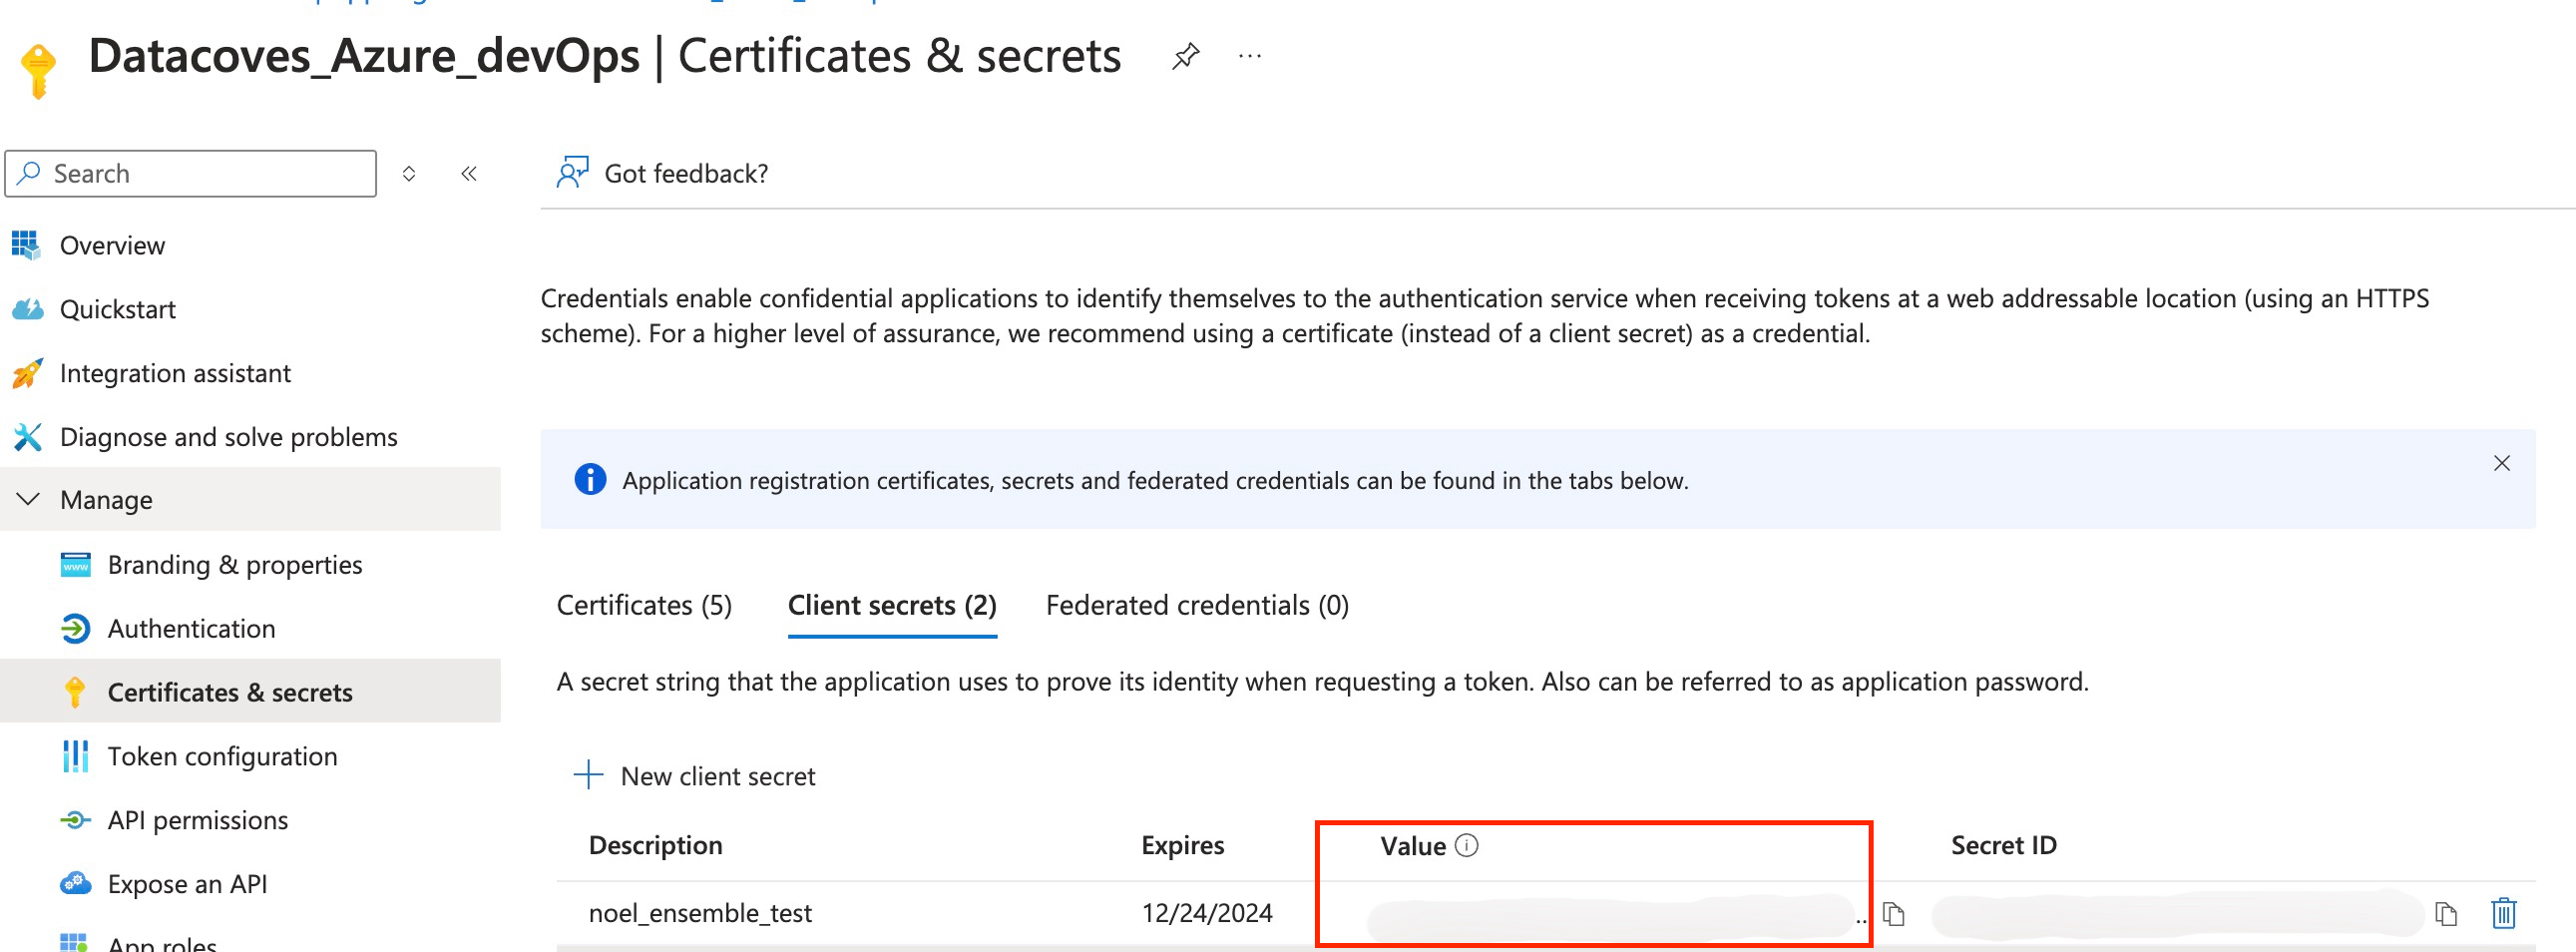
- Select
Client Secretsin the top navigation menu and+ New Secret.
Step 3
- Give it a meaningful description and set your desired expiration date.
Step 4
Certificate-Based Authentication
Step 2
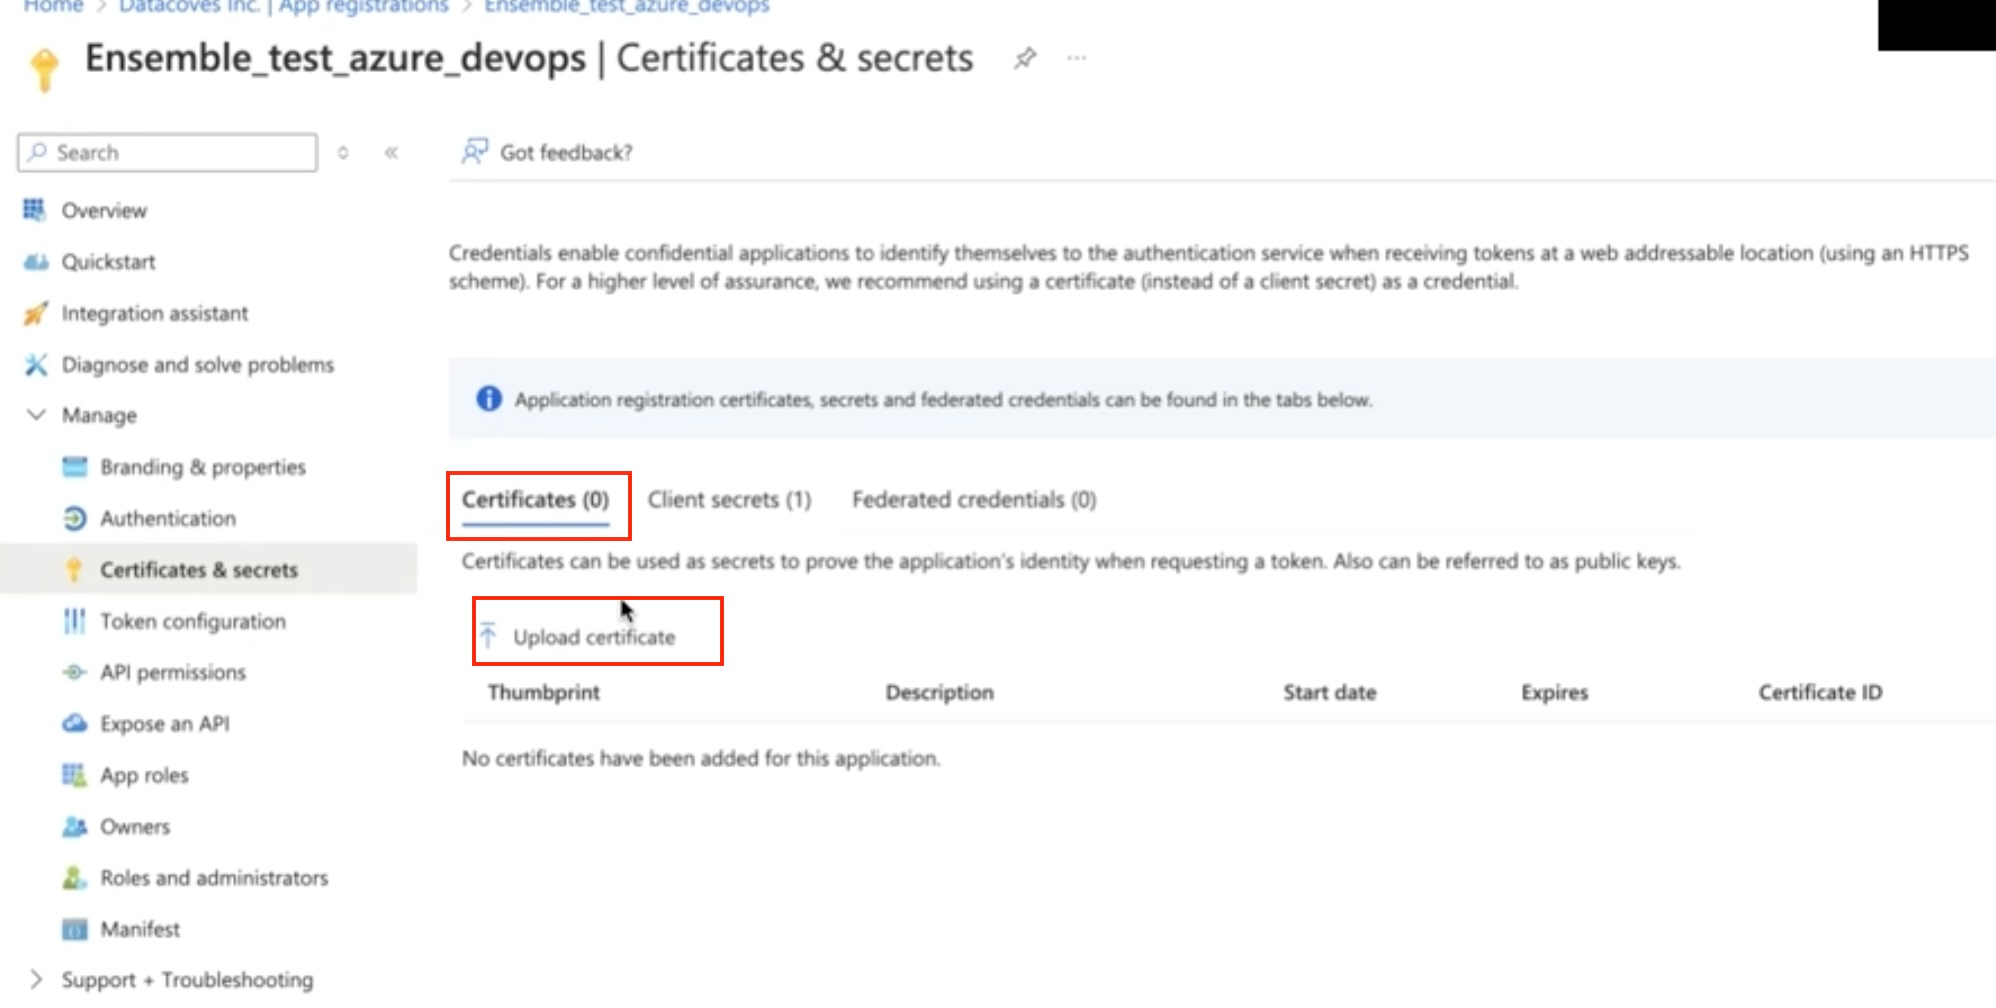
- Select
Certificatesfrom the top navigation menu.
Step 3
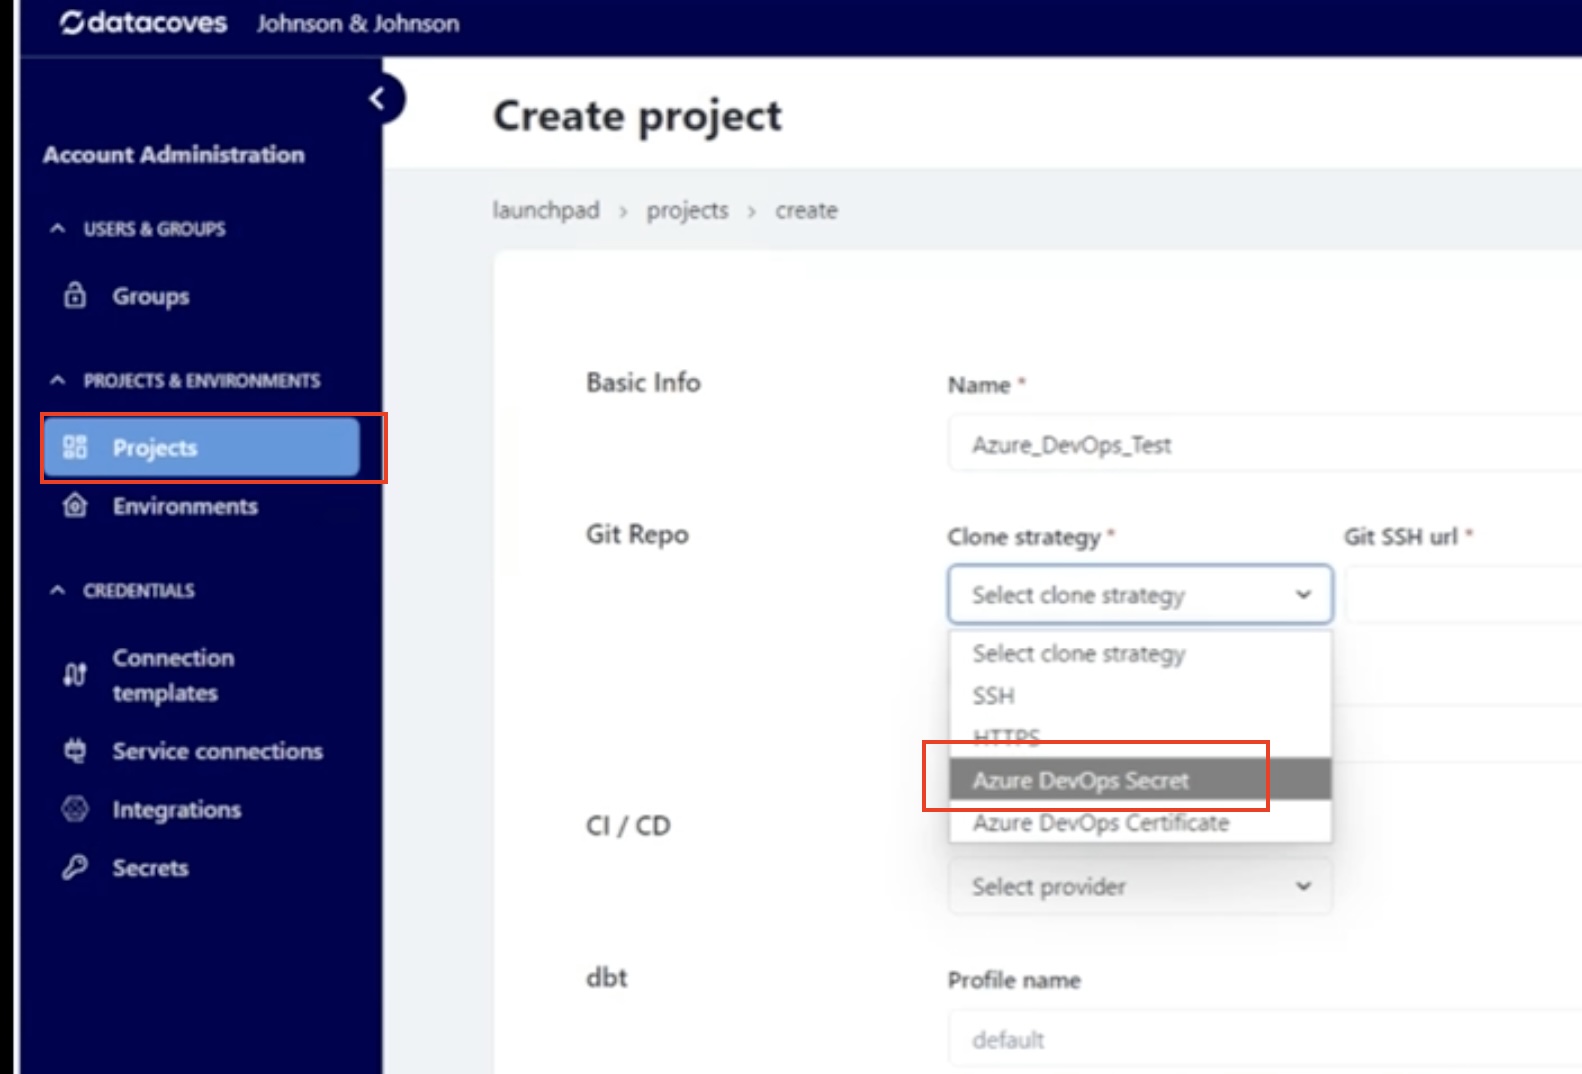
- To generate a certificate PEM file, begin project configuration.
Step 4
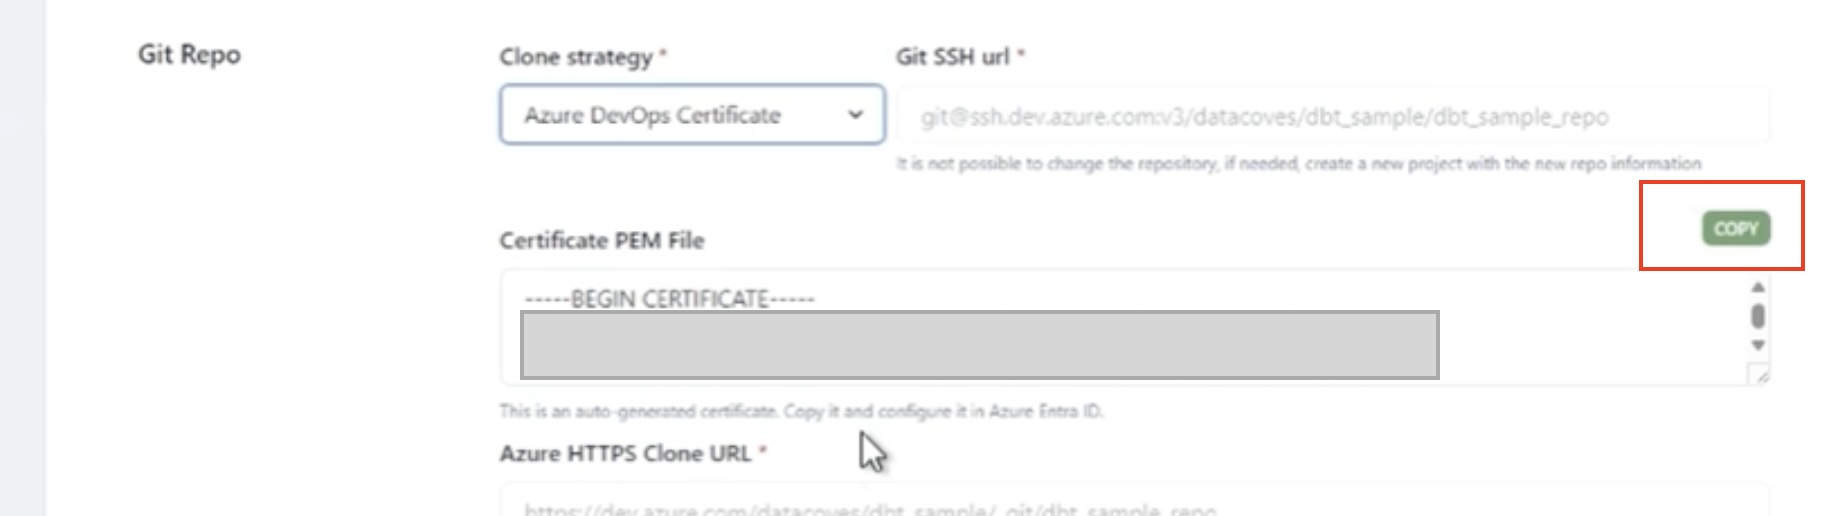
- Select
Azure DevOps Certificateas your Cloning Strategy.
Step 5
- Copy the certificate and save it as a plain text file on your desktop with a
.pemextensiondatacoves_cert.pem.
Step 6
- Navigate back to your Azure Portal tab and select
Upload certificate. Upload the PEM file you saved in the previous step.
Step 7
- Give it a description and select
Add.