How to add Environment variables to VS Code
Table of Contents
- Overview of Environment Variables in VS Code
- User Level Environment Variables
- Environment Level Environment Variables
- Project Level Environment Variables
- Creating Environment Variables
- Deleting Environment Variables
Overview of Environment Variables in VS Code
Datacoves injects several environment variables on your behalf. However, you may need to add additional variables to run scripts, test code etc. This doc will walk you through adding your own environment variables at the user, environment and project level. These variables are only available in your VS Code, not Airflow. For Airflow we recommend you use Airflow Variables or Datacoves Secrets
User Level
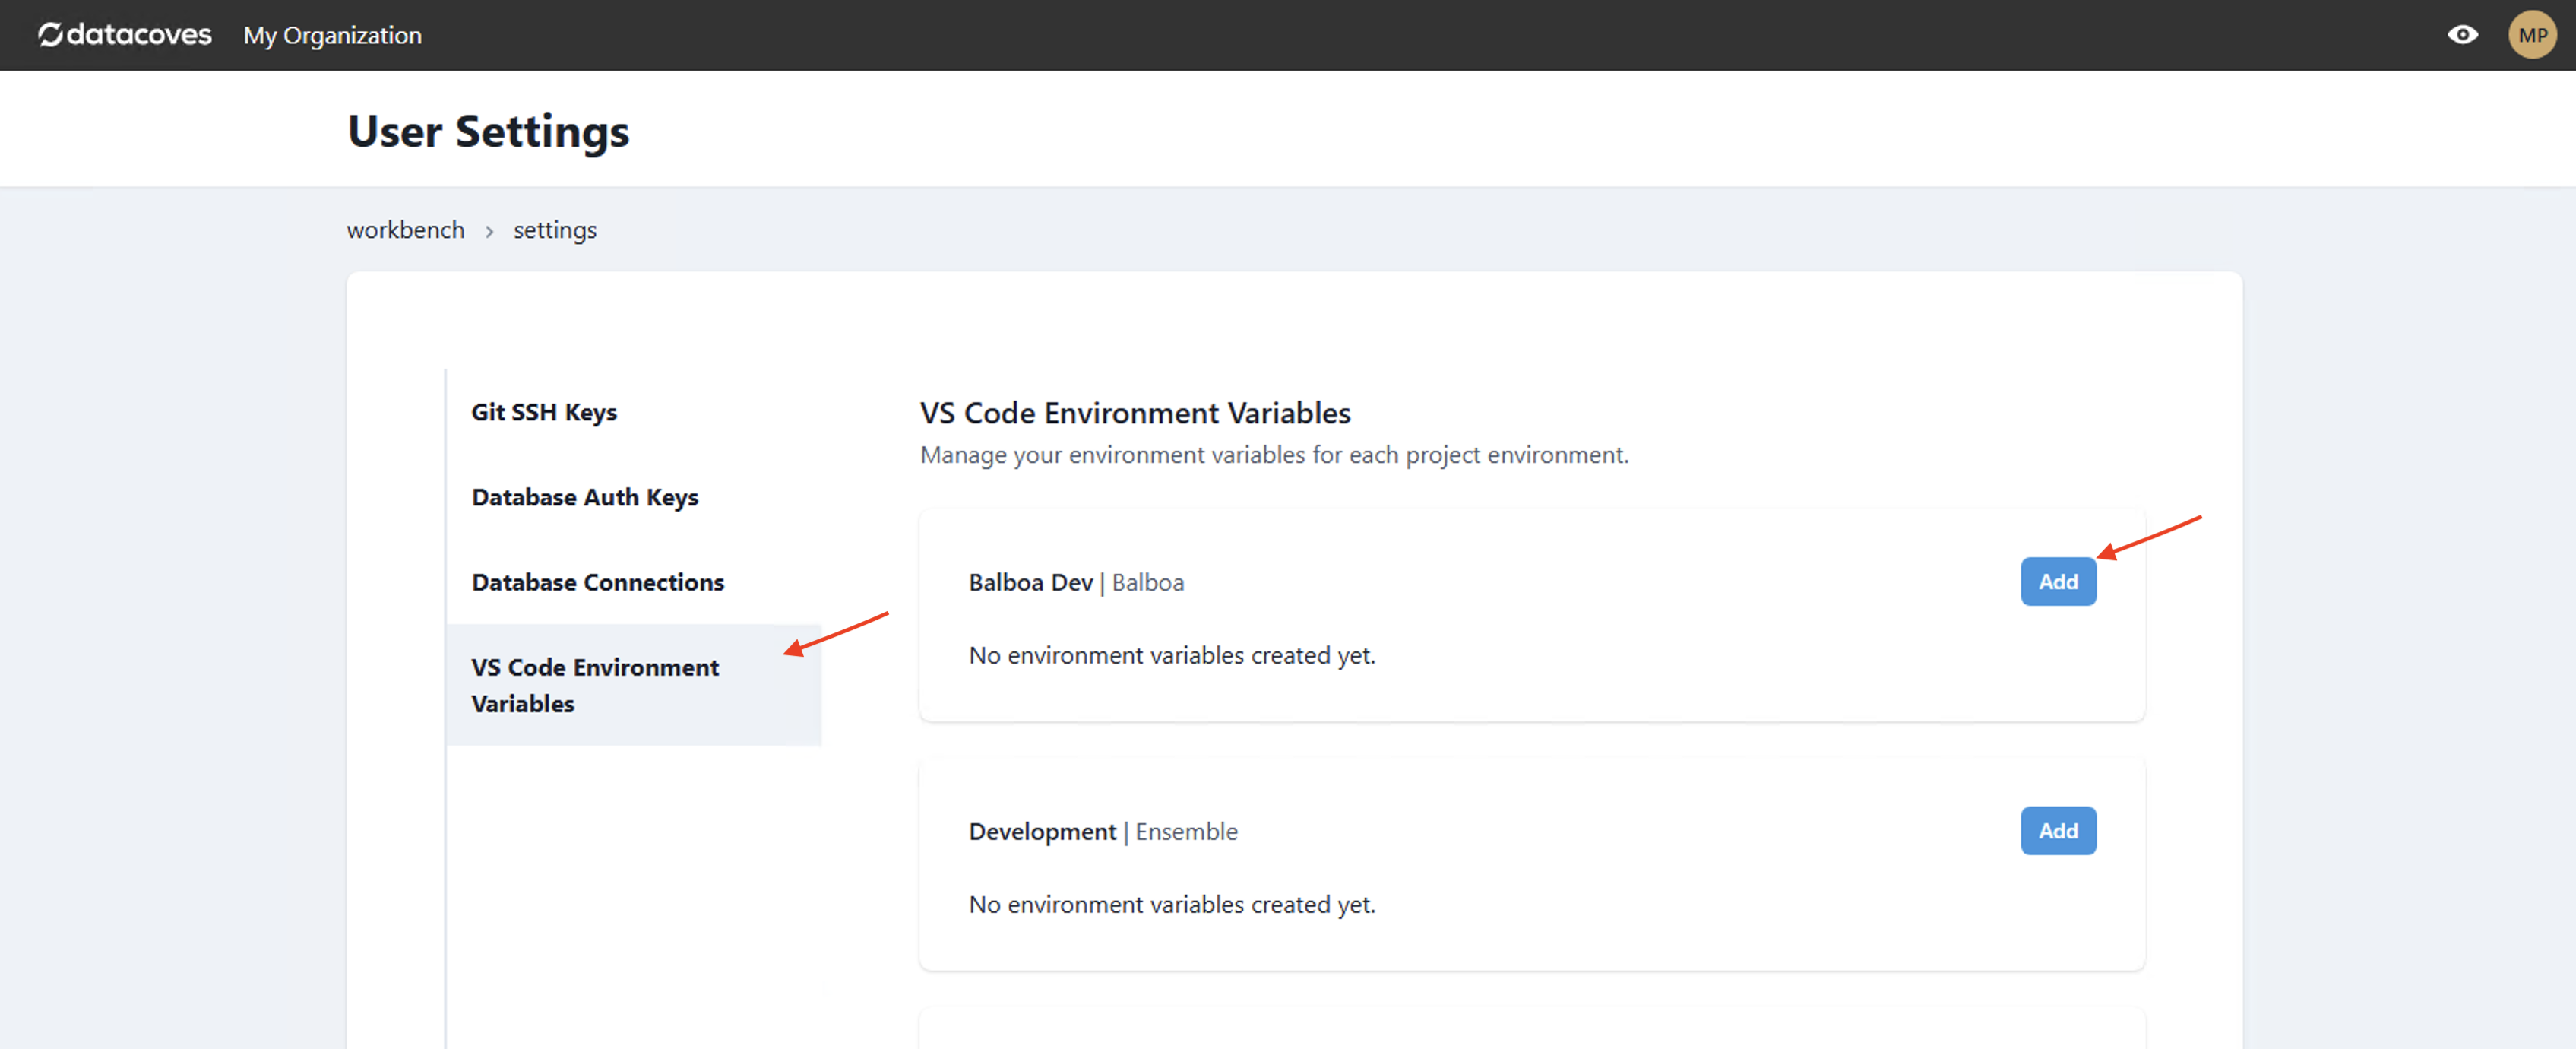
Environment variables set at the user level will only be available to the workspace environment of the individual who created them.
Step 1: Navigate to your user settings in the top right-hand corner

Step 2: Navigate to
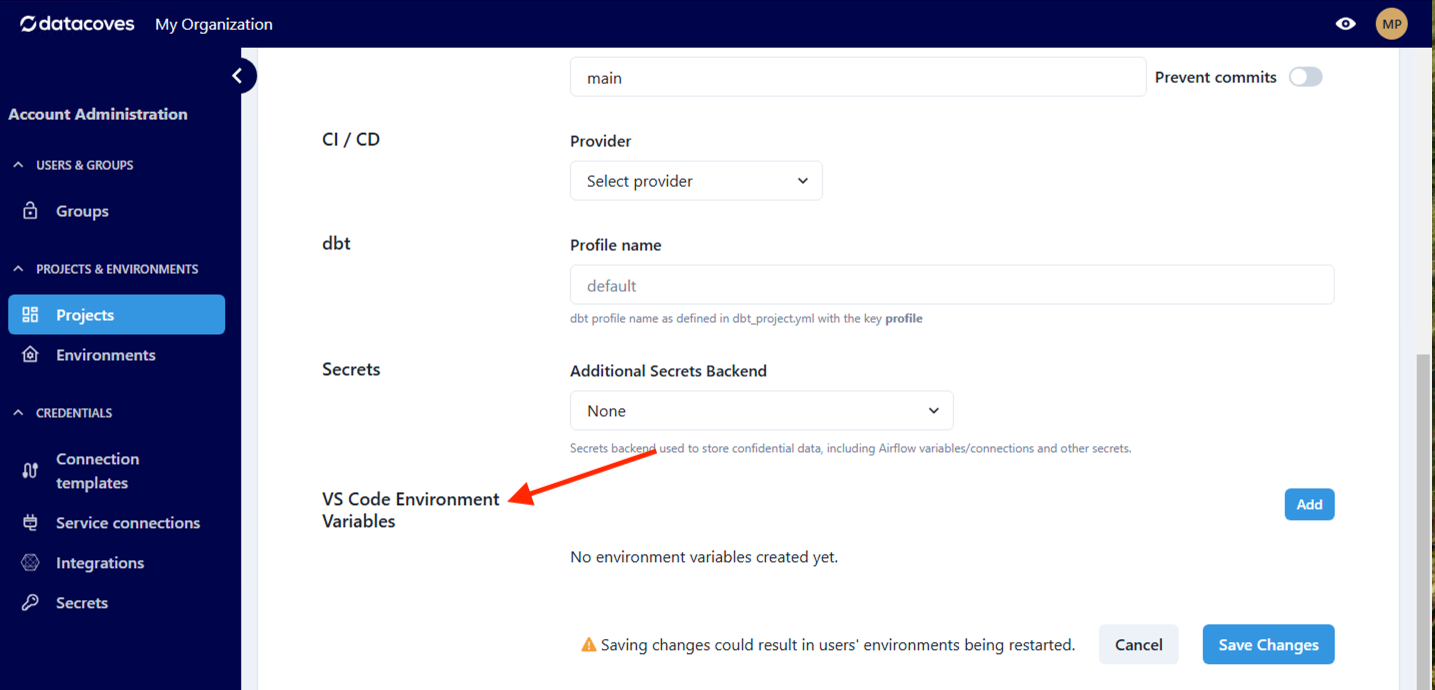
VS Code Environment Variables
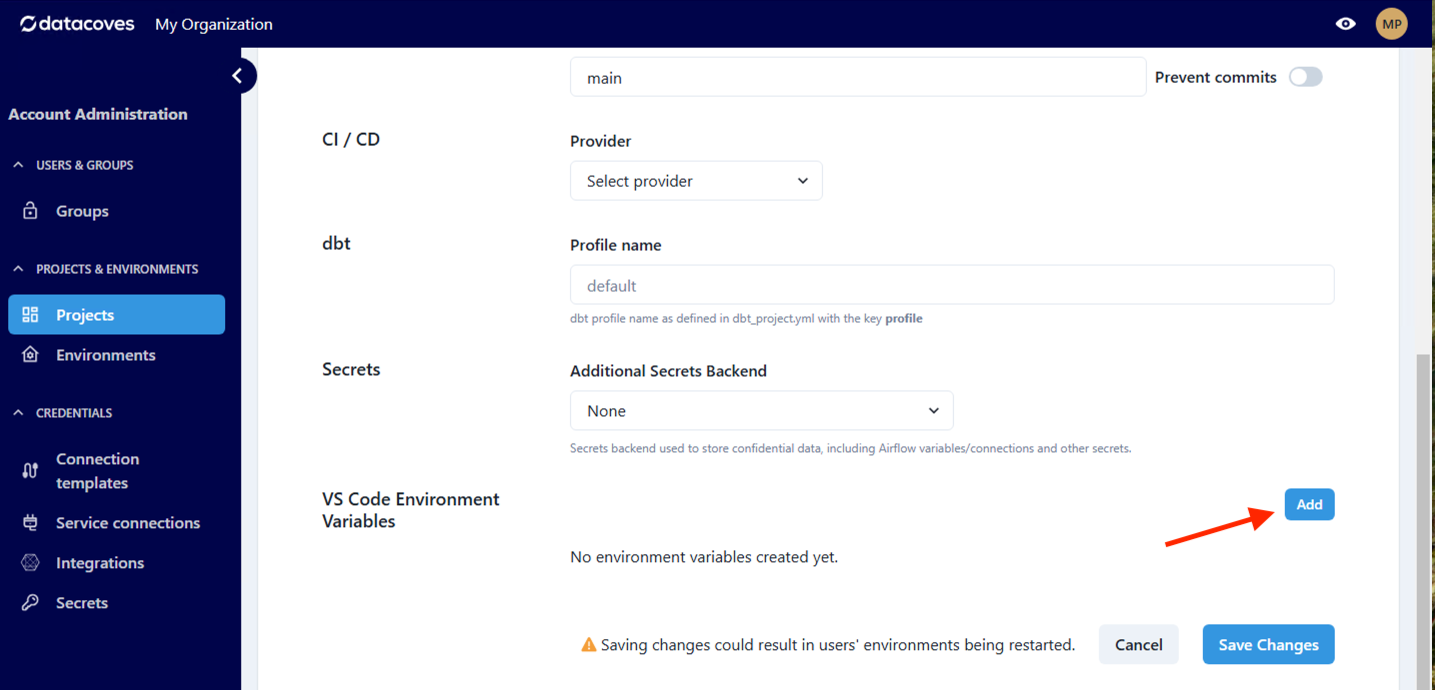
Step 3: Select
Add
Environment Level
Note
You must have admin permissions to add variables across the project or user environments.
Environment level variables will be available to everyone with access to the environment ie) The Development Environment.
Step 1: Navigate to the environment menu
Step 2: Navigate to
VS Code Environment Variables
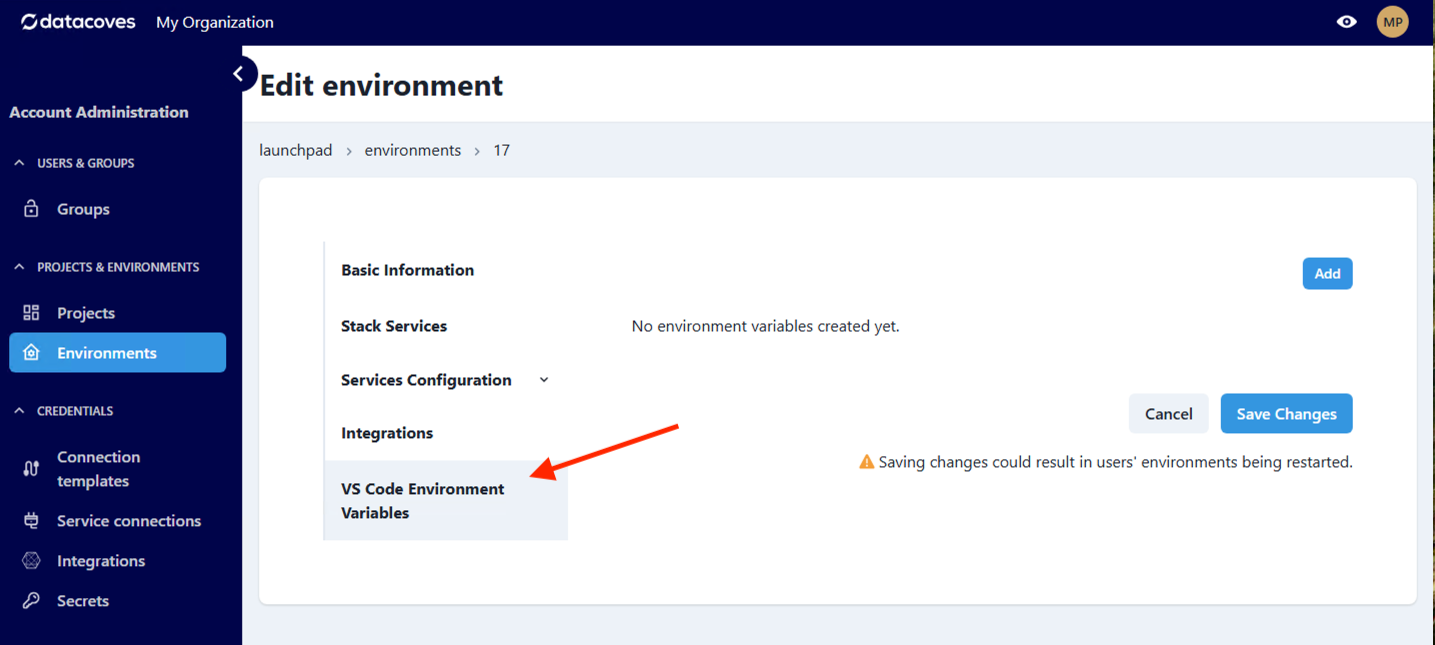
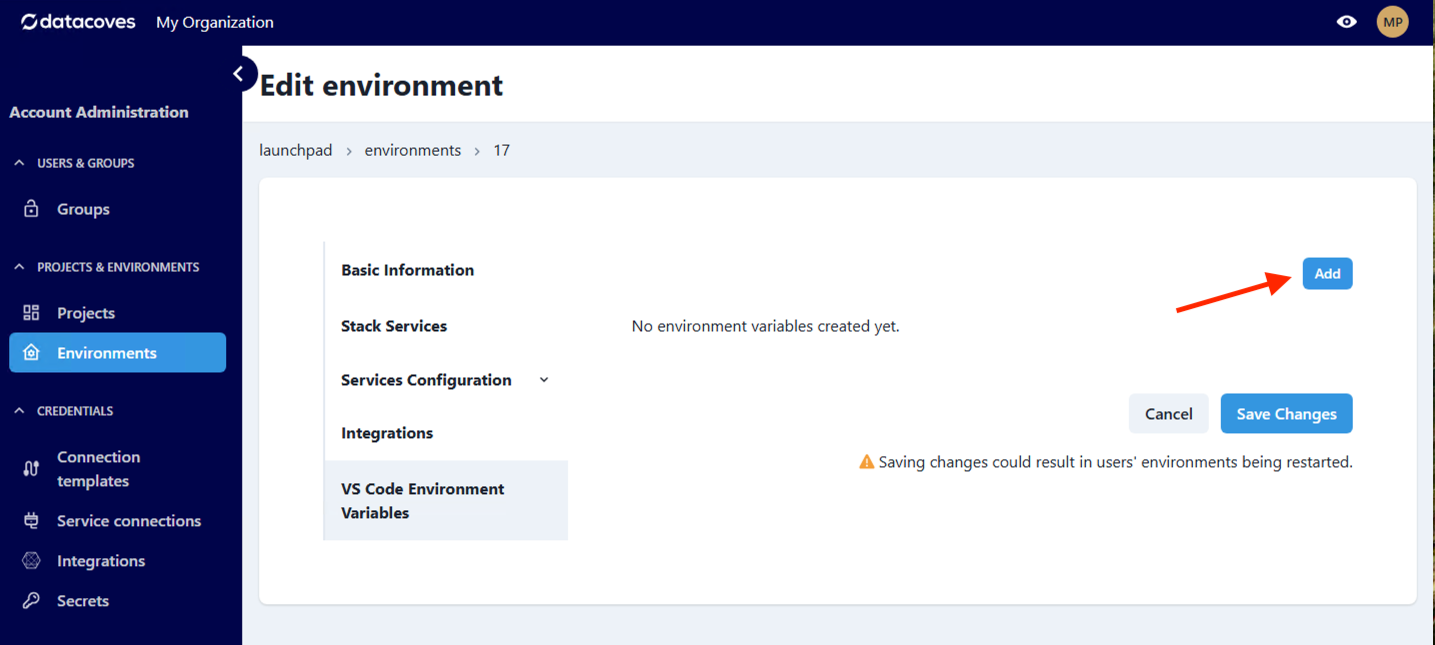
Step 3: Select
Add
Project Level
Project level variables will be available across all environments in a project.
Step 1: Navigate to the project menu

Step 2: Navigate to
VS Code Environment Variables
Step 3: Select
Add
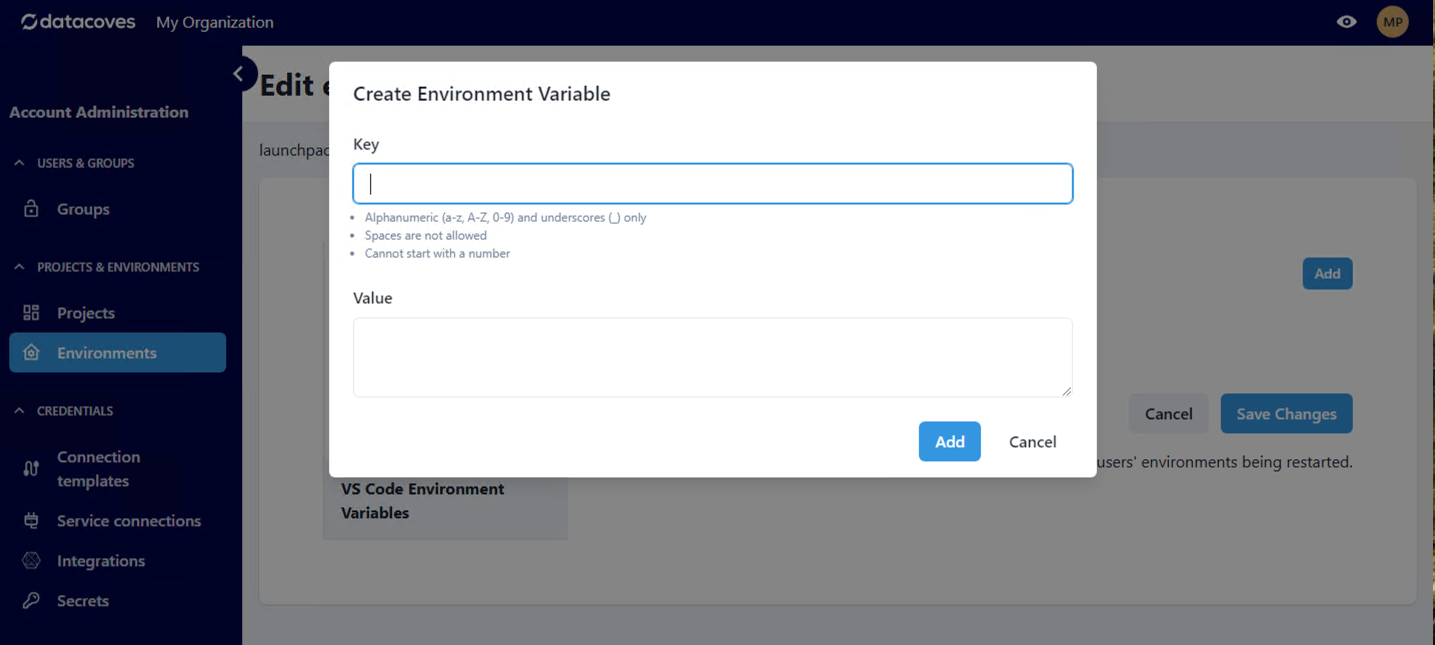
Creating variables
Creating variables is simple. Add the key following the correct format and add the desired value.
Deleting variables
Deleting variables is also simple. Simply navigate to the Project or Environment settings.
Step 1: Toggle the delete option or the red trashcan
Step 2: Save Changes
If you do not save changes, the variable will not be deleted.
